
We will first look into the basics of using Brainshark by exploring the fundamentals. By learning how to create your first presentation, you can easily move onto the more advanced sections, illustrating how to add, edit, and delete various types of content your presentation.
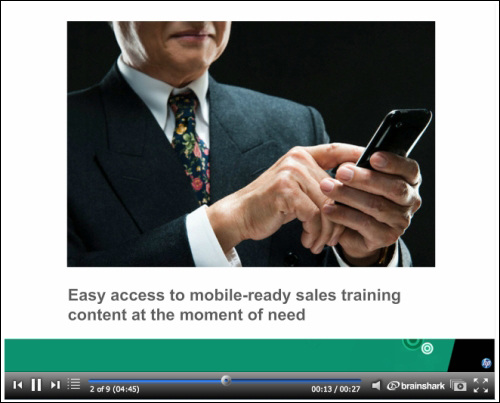
An example of a Brainshark presentation
Through this recipe, we will be able to start our first presentation, with content design tips to enhance your sales cycle using Brainshark's audio annotation system. To start, you should ideally prepare some file(s) in one of the valid formats, depending on the type of presentation you're seeking to create:
Narrated slideshow presentations represent the core functionality of Brainshark. By importing your existing slideshows, you may add audio annotations, enhancing your audience's experience. We will cover more on these presentations in future recipes.
Valid formats include:
.ppt/.pptx: Microsoft PowerPoint slideshows.odp: Open Office presentation format
Photo albums allow you to share image content in a presentable manner over the Internet. Whether you wish to showcase vacation photos to your friends or family, or even promote the sale of your product via images, photo albums are a great way to deliver your content.
Valid formats include:
.jpg/.jpeg: JPEG image file.gif: GIF image file.png: PNG image file.bmp: Bitmap image file
You may also choose to upload existing video files to play on Brainshark. This may be ideal for when you wish to internally link a video from an existing Brainshark presentation or show off a product in real time.
Valid formats include:
.avi: AVI video file.flv: Flash video file.mov: QuickTime movie file.wmv: Windows movie file.rm: RealMedia file
Podcasts are a great way to get a hold of your busy audience, in this fast-paced world. Brainshark is a great place to upload, edit, and send audio files to those on-the-go are unable to watch an actual presentation.
Valid formats include:
.
mp3: MP3 audio format
In addition to narrated slideshow presentations, narrated documents allow you to present in a more formal fashion. Given the flexibility to upload Microsoft Word documents and even Excel spreadsheets, you now have a larger range of materials to distribute at your next showcase.
Its valid formats include:
.ppt/.pptx: Microsoft PowerPoint slideshows.doc/.docx: Microsoft Word documents.xls/.xlsx: Microsoft Excel spreadsheets.odp: Open Office presentation format.odt: Open Office document format.ods: Open Office spreadsheet format.pdf: Portable document format.txt: Text file
We will now explore how to create our first presentation. The steps are as follows:
Go to http://my.brainshark.com.
Press the SIGN UP FOR FREE link in the top-right corner of the screen, going through the registration process and logging in.

Upload your media by pressing the Upload Content button. This can be found on the right-hand side of the screen or the navigation bar.

Select your presentation type (that is, PowerPoint, document, video, photo album, or podcast) and press the Upload button.

Fill out the presentation information while your file is being uploaded. Be sure to change the title to something readable; and ensure that all the relevant fields are filled out. Further details on how to properly categorize or tag your presentations may be found in the Helping people find your presentations recipe.
Now, we take advantage of Brainshark's unique and powerful audio annotation feature. You can either add audio via a computer microphone or over the phone using the given phone number and presentation code.
Brainshark's presentation system allows you to upload and share media online to clients, co-workers, and peers. Its audio annotation system links recorded input from your microphone or phone to sound files that are stored on Brainshark's servers. Then, it is played as the presentation progresses.
This section will show a step-by-step process on how to delete and print presentations after creation.
Note that this process applies to all Brainshark presentations made from this point on.
Note
Deleted presentations cannot be recovered. Please ensure that you know you wish to delete the presentation before performing the following steps.
Press the My Content button on the navigation bar.

Select the presentation you wish to delete or print.
Press the Edit Presentation link on the action panel, located on the right-hand side of the screen.

Under the left panel, you will find the Print slides and Delete options.
