
OpenShift Origin is the free and open source flavor of OpenShift PaaS. It is the upstream project to both OpenShift Online and Enterprise. You will learn how to run OpenShift Origin in a Virtual Machine (VM) running on your machine. This will help you work with OpenShift even when you are not connected to the Internet. You can use the OpenShift Origin VM as your development environment to test your changes, and then when you are ready for deployment, you can push the source code to OpenShift Online. To use the OpenShift Origin VM as your development environment, run the rhc setup --server command. The --server option should point to the OpenShift Origin VM broker. You can refer to the Specifying a different OpenShift server hostname recipe in Chapter 1, Getting Started with OpenShift, for more details.
To prepare yourself, you will need to have VirtualBox installed on your machine. If you do not have it installed, please download it from the official website at https://www.virtualbox.org/. Also, install the 7-Zip software for your operating system, which you can download from its official website at http://www.7-zip.org/download.html.
Perform the following steps to run OpenShift on a VM:
Download the OpenShift Origin Version 3 VM image. The VM is over 2 GB in size. You can run the following command:
$ wget https://mirror.openshift.com/pub/origin-server/release/3/images/openshift-origin.zip –secure-protocol=SSLv3Windows users can download either via the browser, or they can first download the
wgetsoftware for Windows at http://gnuwin32.sourceforge.net/packages/wget.htm, and then use it to download the OpenShift Origin VM.The advantage of using
wgetis that you can resume the partial download using the-coption. This will help if you are at a location where the Internet connection is not stable, so you can resume the download using the following command:$ wget -c https://mirror.openshift.com/pub/origin-server/release/3/images/openshift-origin.zip --secure-protocol=SSLv3Next, unpack the zip archive using the 7-Zip file archiver:
$ 7z x openshift-origin.zipTyping in this command will result in three additional files, as shown in the next command:
$ ls -1tThese are
OpenShift Origin Release 3.vmx,OpenShift Origin Release 3.vbox, andorigin-rel3.vmdk.Start the VirtualBox manager, and click on the New button. Have a look at the following screenshot:

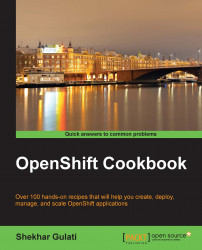
Change the details required for the OpenShift Origin VM. You can keep whatever name you like, but you have to use Type as Linux and Version as Fedora (64 bit). Have a look at the following screenshot:
Next, set the memory size to 1 GB, as this will give the VM a reasonable amount of memory to work well with. Have a look at the following screenshot:

Next, you will add a virtual hard drive to the new machine. Please select the Use an existing virtual hard drive file option, and click on the Choose a virtual hard drive file upload button. Have a look at the following screenshot:

VirtualBox will present a file selection dialog. Browse to find the
origin-rel3.vmdkfile, and select it. Click on the button labeled Open. Have a look at the following screenshot:
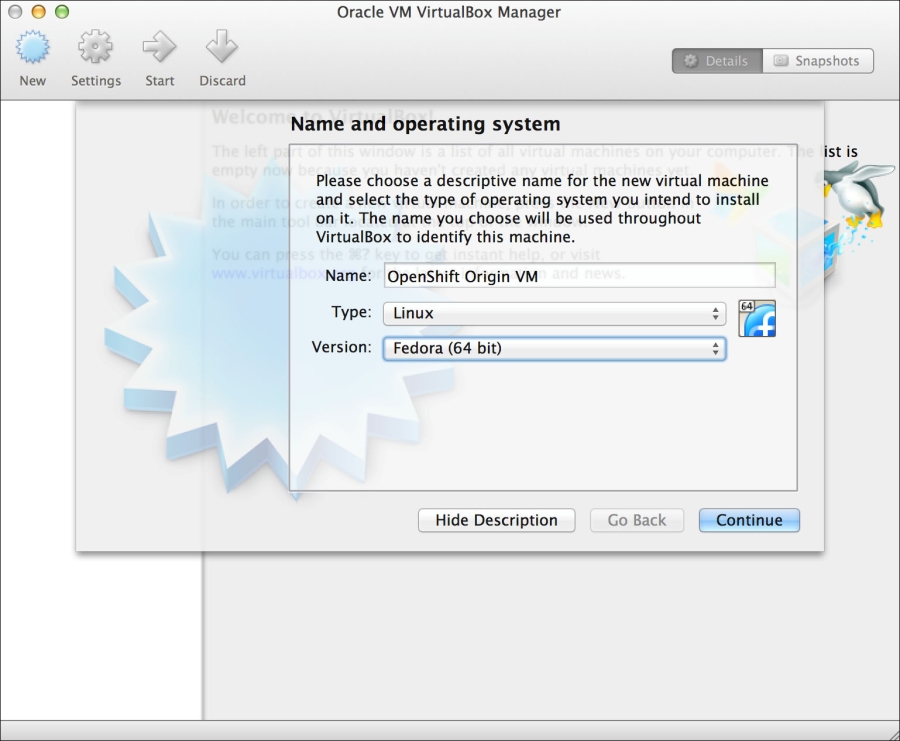
After selecting the file, click on Create to create a new VM. You will see a new VM in the virtual manager display. Have a look at the following screenshot:
Next, you will set up a bridged network adapter, which will allow you to work with the OpenShift Origin VM from your local machine. Select the VM, and right-click on it. Then, click on the Settings icon:

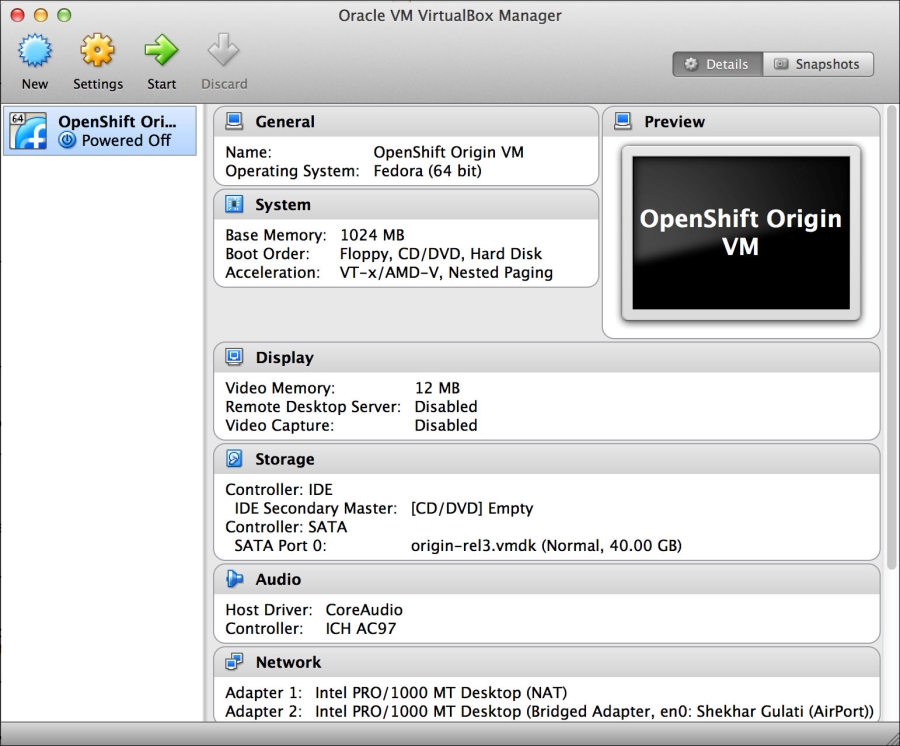
Navigate to the Network settings, and select Adapter 2. Check the Enable Network Adapter checkbox, and then set the Attached to drop-down menu to Bridged Adapter. Finally, set the name to the network adapter you want to bridge. Have a look at the following screenshot:
Each system may have different names for their physical network adaptors. Click on OK after making the preceding changes.
Start the VM by clicking on the Start button. Have a look at the following screenshot:

When the VM has finished booting, it will present you with a tutorial that will help you understand how to work with the OpenShift Origin VM, as shown in the following screenshot:

After you enter
yes, the tutorial will walk you through the features of the OpenShift Origin VM from an administrator's perspective.After finishing the admin tutorial, you will be shown a menu where you can select options to interact with the OpenShift Origin VM. Choose the second option to connect with the web console. You will be shown the web console details, as shown in the following screenshot:
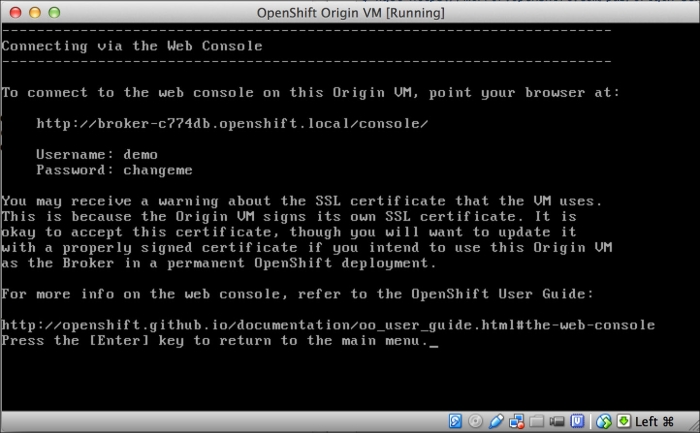
Copy the URL and paste it into your browser. The default username/password combination is
demo/changeme. Have a look at the following screenshot: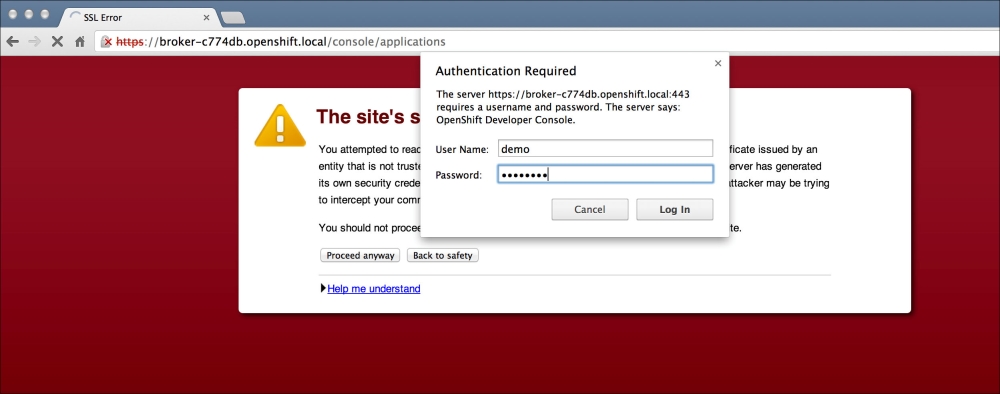
Log in to the web console using the default username and password. You will be directed to the application creation page. You can create the WordPress application by following the steps mentioned in the Creating a WordPress application using the web console recipe in Chapter 1, Getting Started with OpenShift.