
The process for creating bootable USB media with Mac OS X is very similar to that of Linux, but there's a little preparation to do first. After you download the ISO, as mentioned earlier, we will need to convert the ISO file to the IMG format and then write the media.
First, let's convert the downloaded ISO image.
Open a terminal and then execute the following command:
hdiutil convert -format UDRW -o <path_to_save_IMG_file> <path_to_ISO_image>
In my case, the command is as follows:
hdiutil convert -format UDRW -o /Users/jay/ubuntu_server.img
/Users/jay/Downloads/ubuntu-16.04-server-amd64.iso
All you should need to do is change the paths accordingly. First, we're choosing the path we want the created IMG file to be saved to, followed by the path to the Ubuntu ISO. The following screenshot shows an example run of this process:
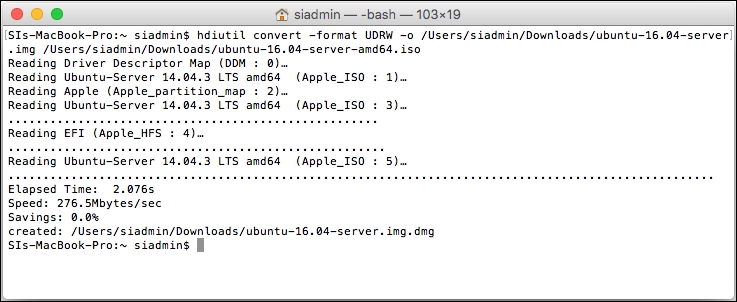
Converting the Ubuntu Server ISO to IMG format
With the conversion out of the way, we can run the following command to show information regarding the disks which are currently attached to the system. We need to do this so we know the device name OS X has given our USB drive, since we'll be referring to it later:
diskutil list
In the example screenshot, you can see what the process looks like on the system I was using. In my case, I know my USB media is /dev/disk2, as it's the only thing attached to the Mac, which is roughly 8 GB in size. In your case, double-check the output of the diskutil list command and make a note of which entry is referring to your USB media. If in doubt, run the command before and after inserting your flash drive and compare the results:
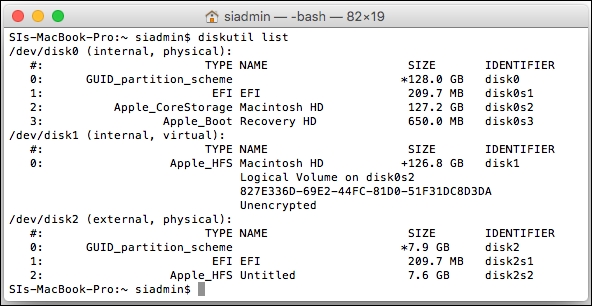
Listing attached disks on a Mac system
Now that we know the device name of your USB media, we can continue with the final command and perform the actual creation of our Ubuntu Server media. But first, we should make sure that the flash drive is not mounted:
diskutil unmountDisk /dev/disk2
Be sure to change the device name to match the one you saw in the results of the diskutil list command you performed earlier.
The following command will create our actual media:
# sudo dd if=<path_to_IMG_file> of=<device_node_of_usb_media> bs=1m
For example, using the paths and device name on my system, the command would become the following:
# sudo dd if=/Users/jay/ubuntu_server.img.dmg of=/dev/rdisk2 bs=1m
Note
Here, I'm using the sudo command, which means that I want to run the command using root privileges. From this point forward, I'll prefix commands with # if you need to run the commands with root privileges. It doesn't matter if you use sudo or switch to root whenever you see this mark. (Just keep in mind that commands prefixed with # needs to be executed either with root or sudo). Even though this section involves using a Mac, I thought it would be worth bringing up.
The next screenshot shows an example run of this dd command:
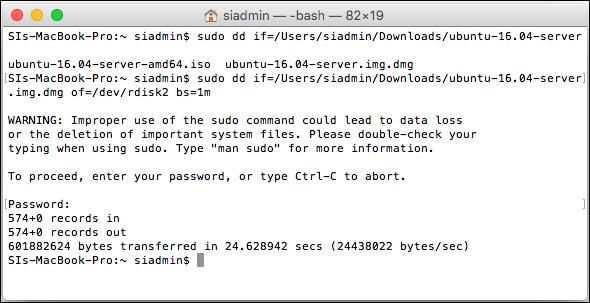
Writing the Ubuntu Server IMG file to a USB flash drive
Now that we have our media, you can remove it from your Mac and continue on and get some installations going. Before we get into that, though, we should have a quick discussion regarding partitioning.