Locally, kickstart files aren't really practical, and they're not quick to work with. We need something that can be set up quickly and easily, but which is also very powerful.
Enter Vagrant.
Developed by Hashicorp as an open source piece of software, Vagrant can be used for automatically provisioning VMs, and even whole development environments.
Typically, somewhere, you might find a Vagrantfile (the name of the core Vagrant... file...) is in a repository of some in-house application.
The developers working on the application pull down the repository to their local machine, and use the Vagrant configuration file to spin up a local development environment, which they can then use to test code changes or feature additions without utilizing expensive development environments.
Vagrant is available for macOS, Linux, and Windows.
On my Ubuntu host, I install Vagrant like so:
$ sudo apt install vagrant
There's quite a few dependencies, totalling around 200 MB of used disk space afterwards.
Ubuntu's packages are reasonably up to date, so we get a recent version:
$ vagrant --version
Vagrant 2.0.2
I'm quite particular about where I keep my files, so I'm going to create a dedicated folder called Vagrant in my home directory, which I'll use for working with my Vagrant VMs:
$ ls
 Desktop     Downloads   Pictures   snap        Videos
 Documents   Music       Public     Templates  'VirtualBox VMs'
$ mkdir Vagrant
$ cd Vagrant/
Next, we will initialize a new Vagrantfile. The following command will do this automatically:
$ vagrant init
$ ls
Vagrantfile
Have a look in the Vagrantfile, but don't make any changes yet. You'll see that a lot of the options are listed, but commented out by default. This is a good way of introducing you to what Vagrant is capable of.
Note that, by default, Vagrant will attempt to use a box called base, but will also prompt you to look at https://vagrantcloud.com/search for other boxes:
  # Every Vagrant development environment requires a box. You can search for
  # boxes at https://vagrantcloud.com/search.
  config.vm.box = "base"
Doing a search for CentOS on vagrantcloud reveals a nice default box we can use: https://app.vagrantup.com/centos/boxes/7.
It also lists the providers that the box can be provisioned under. VirtualBox is one of them, meaning it will work in our installation.
We need to change our Vagrantfile to point at this box. From the folder in which your Vagrantfile exists, run the following:
$ sed -i 's#config.vm.box = "base"#config.vm.box = "centos/7"#g' Vagrantfile
We've just used sed (a common tool for editing text on the command line, either in files or on standard out) with the -i option, to modify our Vagrantfile in-place. Opening the file now will show us that the base line has changed to point to centos/7 instead.
Now, we can provision our VM with another simple command:
$ vagrant up
Bringing machine 'default' up with 'virtualbox' provider...
==> default: Box 'centos/7' could not be found. Attempting to find and install...
    default: Box Provider: virtualbox
    default: Box Version: >= 0
==> default: Loading metadata for box 'centos/7'
    default: URL: https://vagrantcloud.com/centos/7
==> default: Adding box 'centos/7' (v1804.02) for provider: virtualbox
    default: Downloading: https://vagrantcloud.com/centos/boxes/7/versions/1804.02/providers/virtualbox.box
==> default: Successfully added box 'centos/7' (v1804.02) for 'virtualbox'!
<SNIP>
    default: No guest additions were detected on the base box for this VM! Guest
    default: additions are required for forwarded ports, shared folders, host only
    default: networking, and more. If SSH fails on this machine, please install
    default: the guest additions and repackage the box to continue.
    default:
    default: This is not an error message; everything may continue to work properly,
    default: in which case you may ignore this message.
==> default: Rsyncing folder: /home/adam/Vagrant/ => /vagrant
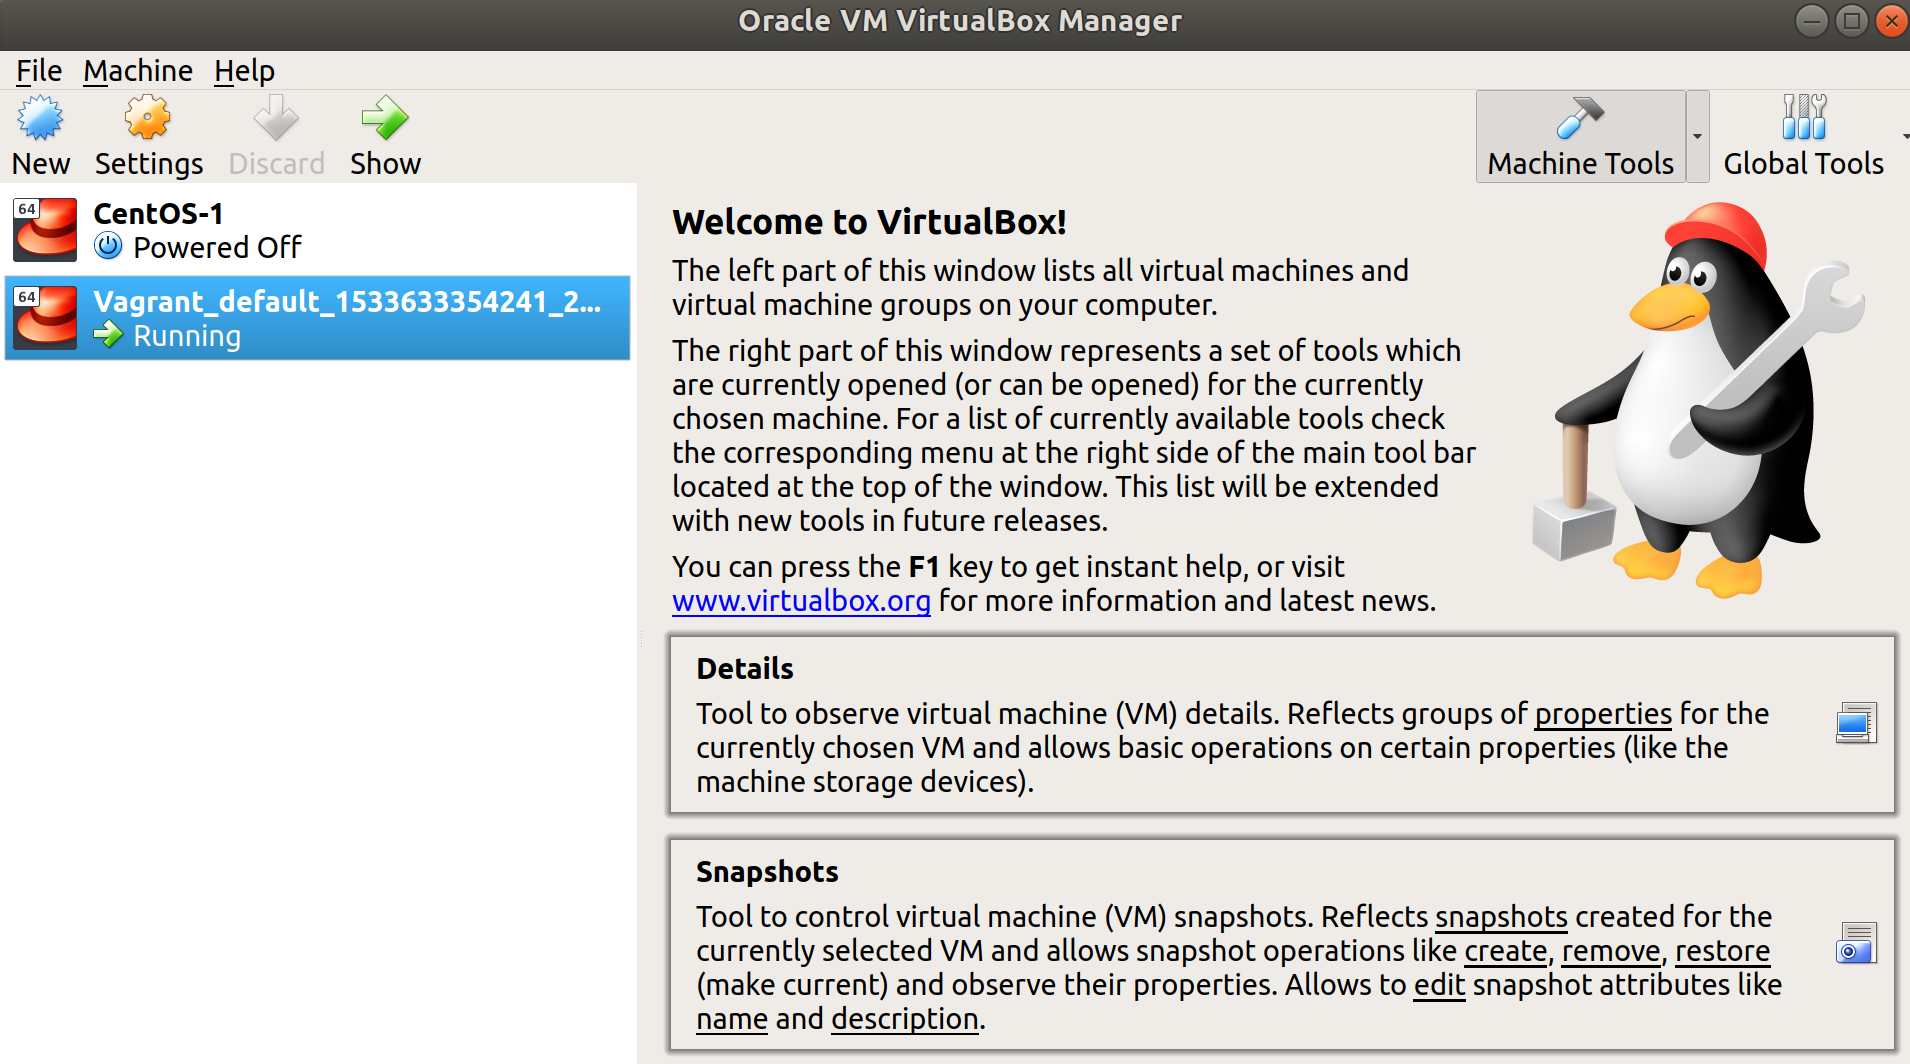
All being well, your VM image will start to download from vagrantcloud, and your box will spin itself up in VirtualBox.
We can even see our VM in the VirtualBox main window:
Taking a look under Settings | Network and Port Forwarding shows how Vagrant also automatically sets up access for the NAT's network, in a very similar way to the manual way we did.
We can also connect to our new VM using a built-in Vagrant shortcut:
$ vagrant ssh
Last login: Tue Aug  7 09:16:42 2018 from 10.0.2.2
[vagrant@localhost ~]$
This means that we've provisioned and connected to a VM in four commands, in summary:
$ vagrant init
$ sed -i 's#config.vm.box = "base"#config.vm.box = "centos/7"#g' Vagrantfile
$ vagrant up
$ vagrant ssh
[vagrant@localhost ~]$
We can also destroy any VMs we create from within the same folder that we ran against our Vagrantfile using one command:
$ vagrant destroy
I wrote about manually setting up the VM with VirtualBox (and took all those screenshots) first, because it's good to get into the habit of learning about how things are done manually prior to automating the tedious bits. This same rule can be applied to most software, because even when it takes longer, knowing how something works under the hood makes troubleshooting much easier later on.