


In this section, we will show you how to install the free virtualization software called VirtualBox, before creating a new CentOS 7 VM. We will also finish very important post-installation tasks, which we will need to perform in the upcoming sections. Installation of VirtualBox is really straightforward. Executable installers are available for every major operating system. The following are the steps to install VirtualBox:
- Open your favorite web browser and navigate to https://www.virtualbox.org/. Now, click on the download button that is clearly visible on the home page.
- Select a target host OS of your choice. In our example, we will select Windows.
- Click on Windows hosts to start the download. Also, don't forget to download the VirtualBox extension pack that you can find on the same Downloads page.
This is a package that will provide better USB support, among other useful features. After the download has finished, open the downloaded installer to run it and install it using the default settings.
Now, let's create a new CentOS 7 VM in VirtualBox. In order to do so, we first need to download the CentOS 7 Minimal ISO file version 1611 from the official CentOS website (https://www.centos.org/). This contains only the most important software packages needed to run a non-graphical Linux server, which is exactly what we want.
The following are the steps for creating a new CentOS 7 VM:
- Open a web browser and navigate to https://www.centos.org/. Navigate to Get CentOS Now | Minimal ISO.
- On the next screen, select the download URL near to your current location for fast download speed. I'm currently located in Germany, so my actual download URL will most likely be different than yours if you're somewhere else.
- Wait until the download has finished.
- Run VirtualBox on your system. Now, let's reproduce the following steps to install our first CentOS 7 VM:
- Click on the New button to create a new VM. If you type the VM Name as CentOS 7, VirtualBox will recognize the two other fields, Type and Version, to be Linux and Red Hat (64-bit) correctly for you.
- Click on the Next button to proceed to the next step.
- Now, select how much memory or RAM your VM must have. If you don't want any performance issues for your host system, stay in the green area displayed to you in the Memory size window.
- For a basic headless server, which means a non-graphical server, at least 2 GB of RAM is recommended. Don't worry, you can change this setting later too.
- Click on the Next button and on the next screen leave the default settings as is. Now, click on Create.
- Select the VDI option and click on Next. Now, on this screen, stay with the Dynamically allocated option. Click on Next.
- On the next screen, double the virtual hard disk size to 16 GB, as 8 GB is way too little for our work.
- Finally, click on the Create button to create a fresh and empty VM ready for installation of CentOS 7.
Now, let's install CentOS 7 in our empty VM:
- Select our CentOS 7 server VM and click on the green Start button to start it. Here, our downloaded CentOS 7 ISO file will be used as a virtual CD-ROM by VirtualBox and this is where it can be booted or started from.
- To do this, click on the small folder symbol and navigate the file browser to your downloaded CentOS 7 Minimal ISO file, and then click on the Start button.
- Now, your VM will present you with a text-based start menu, where we will use the up arrow key on the keyboard to select Install CentOS Linux 7 and then press Enter to start the installer.
- After waiting for some time, you will be presented with the first graphical installation screen.
- Select the installer language. In our example, we used the default English language.
- Click on Continue. Now, we are on the main installation screen, where we can customize our installation. You will need to wait until all the items have been loaded.
- Next, we need to set the installation destination. Click on INSTALLATION DESTINATION. As we are using an empty VM, we will use the full hard disk for installation, which is the default, so just click on Done which is present at the top-left side of the screen.
- Before we start the actual installation, let's quickly enable our Ethernet network card here, so we don't have to do this post installation using the command line. If you are behind a proxy, you can also add this kind of information here in this menu. Click on Done if you're ready.
- Now, let's click on Begin Installation. While the installation is ongoing, set a strong and secure password for the administrator or root account, which is the account that has all the rights and control over a system. Click on Done after setting up the strong password.
- Now, from the same screen, you can create a normal user account for your everyday work.
- Click on Done after creating the new user account.
- Now wait until the installation has finished. Once the installation is finished, click on the Reboot button to restart your system.
- Pressing the Enter key on the start screen will always select and use the latest kernel.
- Now, wait until you get a login screen in this window, which is also called our Service Terminal.
- Log in using the root user and password you set during the installation.
- Then, type the following command in the Terminal and press the Enter key:
# yum update -y
This command will install all the latest software updates available for your CentOS 7 installation, as the installer media does not have them included.
If the core of the CentOS 7 system, which is called the kernel, has been updated, we need to reboot the system. So, type reboot in the Terminal, and then press Enter. After rebooting again, press the Enter key then wait for the login screen to load and log in again.
Next, we type in another two commands, which will clear out all our free space so that we can create a smaller backup image of the system. Now, type the following command with administrative/root access in the Terminal:
dd if=/dev/zero of=/dd.img; rm -f /dd.img
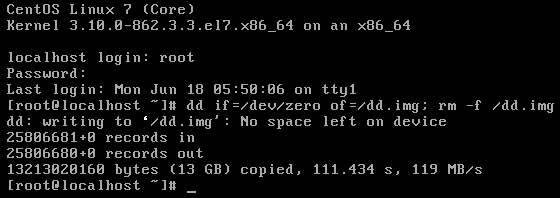
Now, press the Enter key. This command will override all the free space of your Linux filesystem by creating one big file containing only zeros until the disk is full. This will take some time, so you will need to be patient. If this command outputs some text, it has been finished. You can ignore the error output as this is the expected behavior.
Finally, for setting up SSH port forwarding, we need to write down the actual IP address of our VM's connected network adapter. Run the following command:
ip addr list
Press Enter and, in the output line type in the IP address, which is the value after the word inet. In our example, it's 10.0.2.15.
To shut down the VM, use the following command and then press the Enter key:
shutdown -h


