

Installing Ansible
There are multiple ways to install Ansible on your system, such as using the default package manager (yum, apt, dnf), using Python’s pip, or installing the source code itself. Depending on your environment and restrictions, follow any of the methods provided in the official documentation (https://docs.ansible.com/ansible/latest/installation_guide/intro_installation.html). If you are using the OS package manager, such as dnf, yum, or apt, then you need sudo privileges (or root access) to install Ansible.
Please note, you do not require root or sudo access on the Ansible control node for using Ansible. In the following snippet, sudo access is used for installing and updating packages.
Verify dependencies
As you learned that Ansible needs Python to work, you need to check the Python installation first:
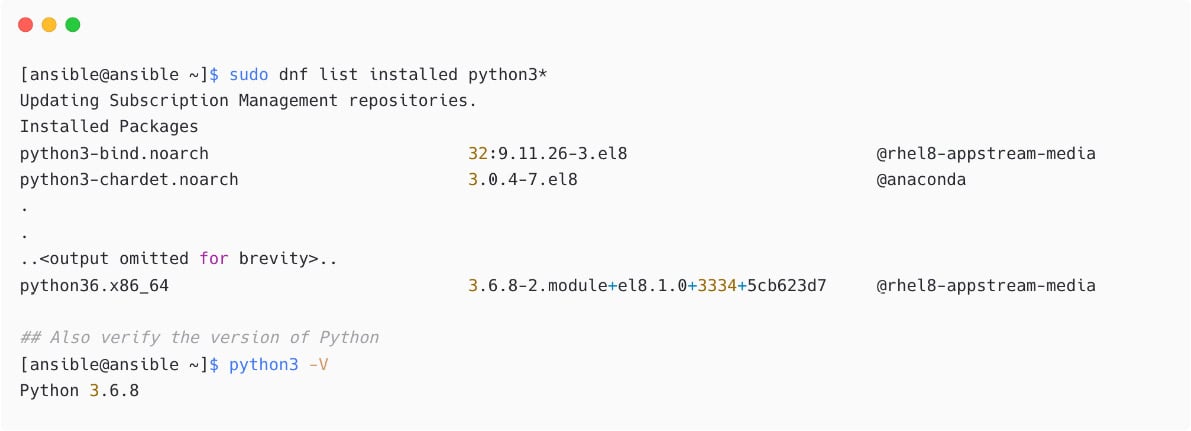
Figure 1.7 – Checking installed Python packages and version
If you have a supported Python version installed, then proceed with the Ansible installation as explained in the next section.
Installing Ansible using the package manager
Depending on the OS, you need to add and enable the appropriate repositories before installing Ansible. For example, if you are using Red Hat Enterprise Linux (RHEL), then you need to ensure the Red Hat subscriptions are in place and repositories are enabled to install Ansible:

Figure 1.8 – Installing Ansible package
Verify an installed Ansible version with the following command:
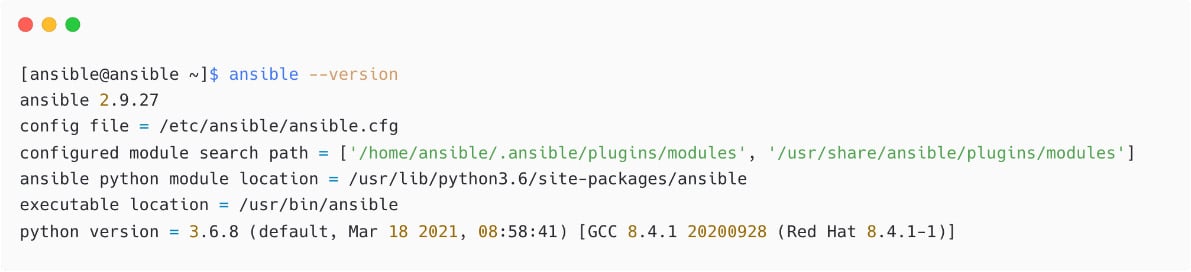
Figure 1.9 – Verifying Ansible installation
From this output, see the version of Ansible (2.9.27), the default configuration file used(config file = /etc/ansible/ansible.cfg), the module search path, the Python version in use, and other details.
The preceding Ansible version is coming from the default repository that you have configured on the OS. If you want to install the latest or different version of Ansible, then you need to follow different methods.
Installing Ansible using Python pip
You need to install pip if it is not already available on the system and then install Ansible using Python pip as follows:

Figure 1.10 – Installing Ansible using Python pip
Please note, when you execute pip install ansible, you are installing the Ansible package, which contains ansible-core and Ansible collections. I have already explained Ansible collections earlier in this chapter.
Pip-Based Ansible Installation and Support
It is best practice to follow the installation based on the OS package manager to get the appropriate support and updates automatically. Also, pip-based installations are hard to maintain and upgrade when there are newer versions of software available.
If you want to install a specific version of ansible, ansible-base, or ansible-core, then use the version information as follows:
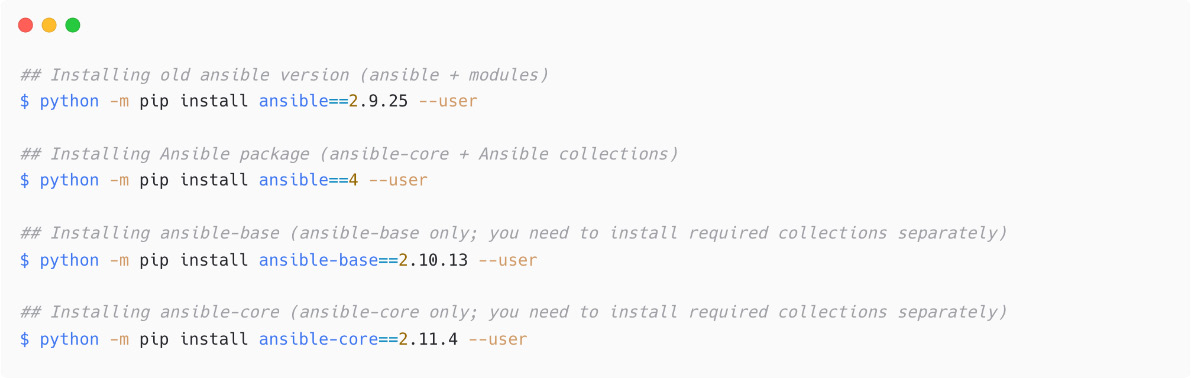
Figure 1.11 – Installing specific version of Ansible using pip
Let's check the Ansible version now:

Figure 1.12 – Check Ansible version
See the DEPRECATION WARNING message and ignore that in a development environment. But in the production environment, you need to make sure you are using the supported Python version for Ansible.
Ansible Installation
Check the Ansible documentation for instructions for different OSs and methods at https://docs.ansible.com/ansible/latest/installation_guide/intro_installation.html.
Deploying Ansible
Before you start with automation jobs, you need to configure Ansible for your environment using the ansible.cfg file. Ansible will look for a configuration file in four places in order, as listed in the following:
$ANSIBLE_CONFIG: Configuration file path in an environment variable./ansible.cfg: Configuration file in the current directory~/.ansible.cfg: Configuration file in the home directory/etc/ansible/ansible.cfg: Default configuration file
It is a best practice to keep the project-specific ansible.cfg file in the project directory:

Figure 1.13 – Creating the ansible.cfg file
Add some basic configurations inside the ansible.cfg file:

Figure 1.14 – Content of the ansible.cfg file
It is not a best practice to keep remote_user = devops in ansible.cfg; instead, configure it inside the inventory for different hosts and host groups. You will learn about this later in this chapter, in the Creating an Ansible inventory section.
Now, check the Ansible version again to see the difference and see that Ansible is taking /home/ansible/ansible-demo/ansible.cfg as the configuration:

Figure 1.15 – Checking which ansible.cfg is taken by Ansible
You have many other parameters to configure in ansible.cfg but not all of them are mandatory as if you have not specified parameters in your custom ansible.cfg file, then Ansible will load the default configurations as needed.
See another sample ansible.cfg file, which contains some of the important parameters, deciding the privilege escalation in Ansible. These parameters decide the sudo or su operation on the target nodes:
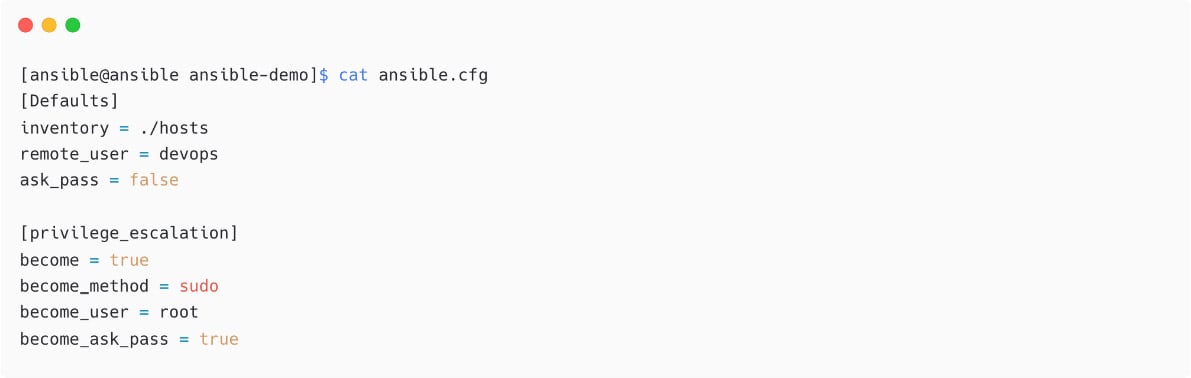
Figure 1.16 – Another ansible.cfg sample with privilege escalation parameters
In the preceding example, the following happens:
- Ansible will log in to the remote node as a
devopsuser and without asking for a password (ask_pass = false). - Ansible will automatically escalate privilege (
become = true) toroot(become_user = root) by using thesudomethod (become_method = sudo) and it will also ask for asudopassword for the user. Turn this off with thebecome_ask_pass = falsesetting.
Configure different credentials for different nodes in the Ansible inventory. You will learn about that in a later section of this chapter.
Also note, in the preceding example I have not created any inventory files yet. I just mentioned the inventory filename there as ./hosts.
Creating an Ansible inventory
Use any name for your inventory file, such as hosts, inventory, myhosts, or production-servers. Do not confuse this hosts file with the /etc/hosts file. When you have more and more managed nodes in inventory files, split the inventory into groups or into separate inventory files. For example, put production servers and devices in a file called production-hosts, and staging nodes into the staging-hosts file; there are no restrictions on this. Also note, if you are installing Ansible using the yum or apt utilities, then there will be a default inventory file called /etc/ansible/hosts with sample inventory content. Refer to that file to start with, but it is best practice to create your project-specific inventory file inside your project directory itself. It is possible to create inventory files in the ini or yaml formats as follows:

Figure 1.17 – Creating inventory file inside project directory
Add content inside the file as follows and save the file:

Figure 1.18 – Sample inventory file
You do not need to add localhost as the localhost entry is implicit in Ansible. That means we can still call the localhost node and Ansible will create an implicit entry. In the preceding demonstration, I have added this to show an entry as a sample. Since localhost is the local machine, you will not be using an SSH connection and it is possible tell Ansible the connection type for localhost as local:
localhost ansible_connection=local
It is not easy to remember the nodes with IP addresses or nodes with long hostnames. In Ansible, use any name for your hosts, and mention the actual name or IP address using the ansible_host parameter.
Update your inventory with the correct entry name now. Please note, this is optional, but it is a best practice to use human-readable names rather than IP addresses and long Fully Qualified Domain Names (FQDNs):
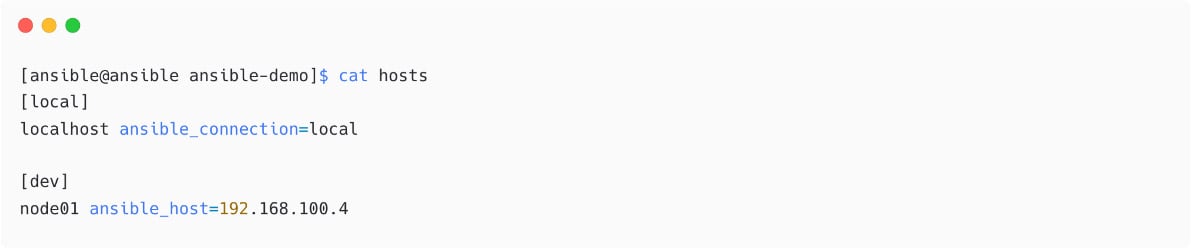
Figure 1.19 – Ansible inventory with human-readable names and ansible_host
The default ansible_connection is ssh and you do not need to mention that in the inventory. If you are using any other connection types, then you need to mention them, such as local, winrm, or paramiko.
Add any number of nodes here with multiple host groups (as the dev host group in the preceding example).
Now, test your inventory to make sure Ansible is able to read and understand your inventory and hosts. Please note that you are not connecting to the hosts from Ansible using this command:

Figure 1.20 – List inventory hosts
Create another inventory file with some dummy managed nodes:
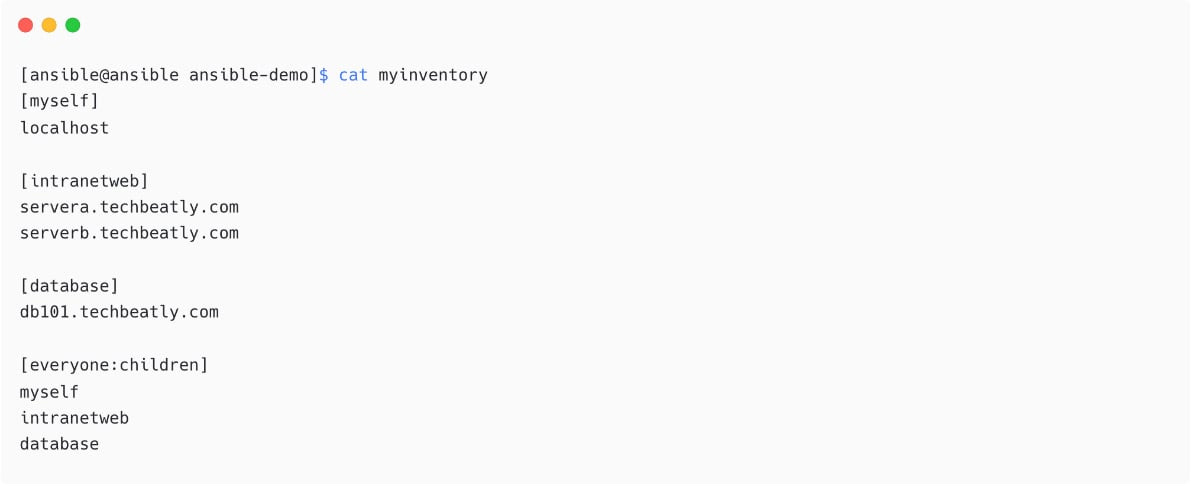
Figure 1.21 – Another Ansible inventory with more hosts and groups
In the preceding inventory, see the following:
- You have four host groups:
myself,intranet,database, andeveryone. everyoneis the parent of themyself,intranet, anddatabasehost groups.
You have two inventory files here now:

Figure 1.22 – Multiple inventory files in project directory
To use a different inventory file, you do not need to change the content of ansible.cfg; instead, use the -i switch to specify the inventory file dynamically. Ansible will take the mentioned inventory files instead of the one configured in the ansible.cfg file as follows:
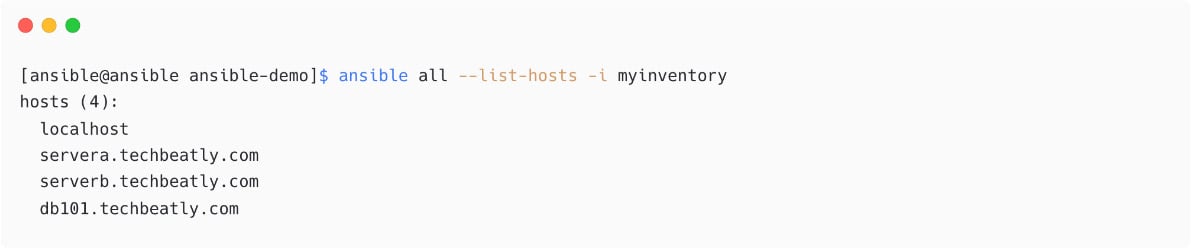
Figure 1.23 – List inventory hosts with different a inventory file
Use the --help options to see all the available switches with the Ansible command:

Figure 1.24 – List inventory hosts with different a inventory file
It is also possible to use patterns to filter the managed hosts with supported patterns. For example, let us display only managed nodes with *techbeatly.com:
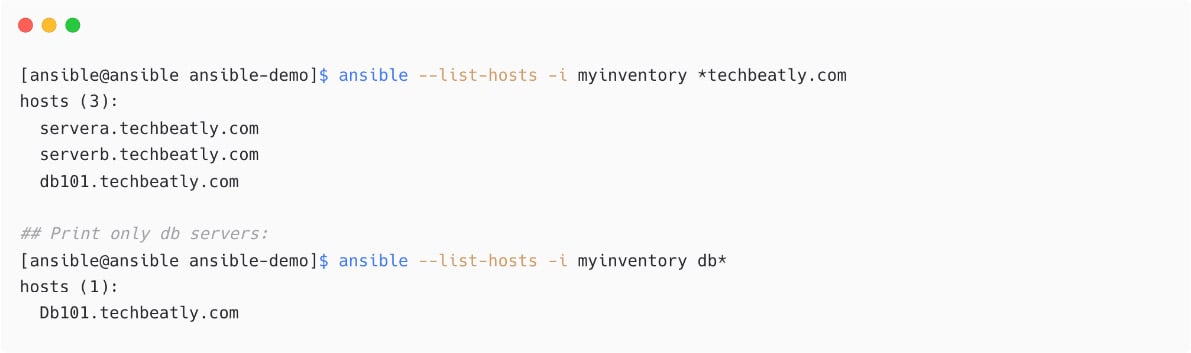
Figure 1.25 – Host selection using patterns
Ansible host patterns
Look up more information about patterns, targeting hosts, and groups at https://docs.ansible.com/ansible/latest/user_guide/intro_patterns.html.
Look up more information about the Ansible dynamic inventory at https://docs.ansible.com/ansible/latest/user_guide/intro_dynamic_inventory.html and https://github.com/ansible/ansible/tree/stable-2.9/contrib/inventory.
In the next section, we will learn how to configure managed nodes and connections.