-
Book Overview & Buying
-
Table Of Contents

Visual SourceSafe 2005 Software Configuration Management in Practice
Visual SourceSafe 2005 Software Configuration Management in Practice
Overview of this book
Why is Software Configuration Management important?Software Configuration Management (SCM) is the discipline of managing the building and modification of software through techniques including source-code control, revision control, object-build tracking, and release construction. SCM involves identifying the configuration of the software at given points in time, systematically controlling changes to the configuration, and maintaining the integrity and traceability of the configuration throughout the software development lifecycle.Software Configuration Management is one of the first skills a serious developer should master, after becoming proficient with his or her development tools of choice. Unfortunately, this does not always happen because the subject of SCM is not commonly taught in either academic or company training.When developing software, you need to have a manageable team development effort, track and maintain the history of your projects, sustain parallel development on multiple product versions, fix bugs, and release service packs while further developing the application. This is where the concepts of Software Configuration Management come into play; SCM is about getting the job done safer, faster, and better.Visual SourceSafe has a long history behind it. The previous versions were either loved for their ease of use and integration with other Microsoft products, or hated because the headaches caused by using them improperly. This book will help you to avoid such problems.
Table of Contents (15 chapters)
Visual SourceSafe 2005 Software Configuration Management in Practice

Credits
About the Author
About the Reviewers
Preface
 Free Chapter
Controlling the Evolution of Software Products
The SourceSafe 2005 Architecture
Creating a Service-Oriented Application
Adding Solutions to the SourceSafe Database
Developing Solutions under Source Control
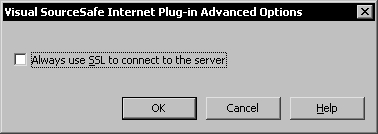
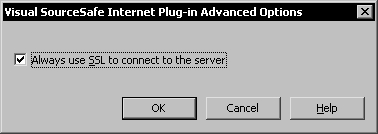
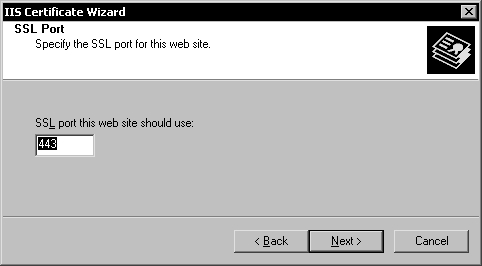
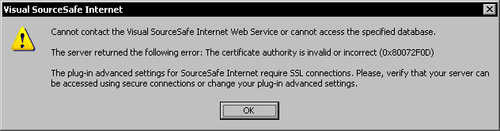
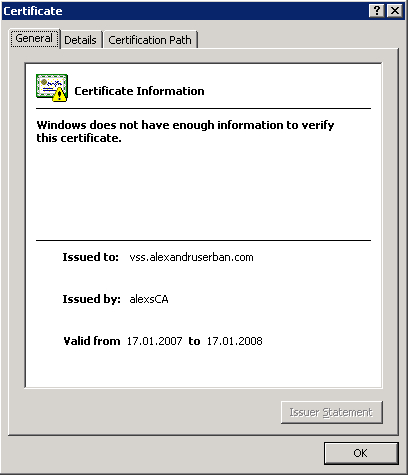
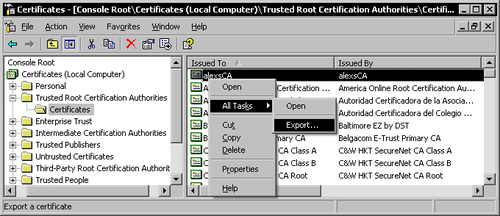
Working from Remote Locations
Managing the Software Development Lifecycle
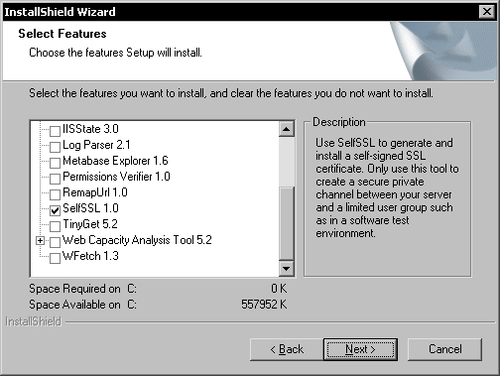
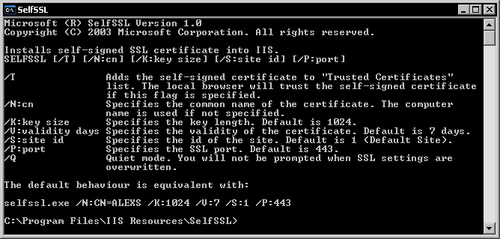
Installing Visual SourceSafe 2005
Creating and Configuring SourceSafe Databases