
First, we will go through how we can use Eclipse for Salesforce application development. We will start from the very basic steps, such as installing Eclipse and Force.com IDE, followed by configuring Git with Eclipse.
We will start by installing Eclipse on the developer machine. To install Eclipse, you should have a minimum of Java 6 installed. If it is not installed, you can install it from the official website at https://java.com/en/download/.
We are going to install Eclipse Neon. Java version 7 is required for Eclipse Neon.
The following are the prerequisites for a development environment for Salesforce:
- Operating systems:
- Windows 7, 8, or 10
- macOS 10.7, 10.8, 10.9, 10.10, or 10.11
- Ubuntu 12.04 LTS or 14.04 LTS
- Java SE Development Kit (JDK), Runtime Environment 8 or later (Java download page).
The installation steps are as follows:
- Eclipse 4.5 or later is recommended. Go to the download site at https://www.eclipse.org/downloads/.
- Select the appropriate executable package for the operating system you are using.
- Once the download is complete, you can proceed with Eclipse installation. Double-click on the
.exefile if you are using Windows. - The
Eclipse IDE for Java Developersdistribution is the recommended installer. - Choose an installation folder for Eclipse and click on
INSTALL. It will take some time to install Eclipse. - After completing the installation, launch Eclipse. Select the workspace for Eclipse.
- You will see the welcome page for Eclipse.
Now we have installed Eclipse on our system, we can move forward with the installation of Force.com IDE.
The following are the steps to install Force.com IDE:
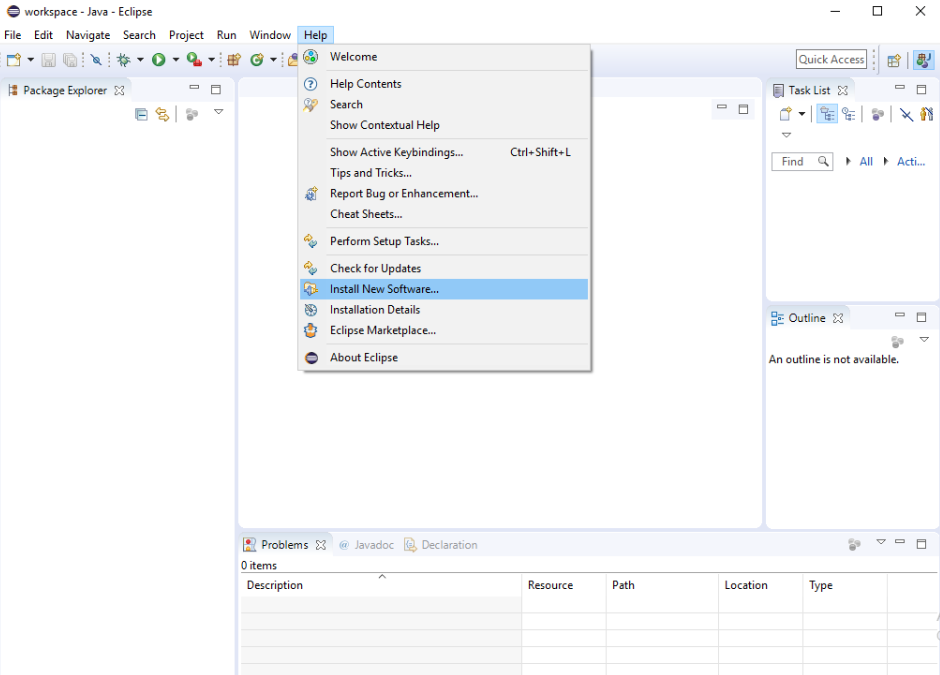
- Launch Eclipse, go to the
Helpoption and choose theInstall New Softwareoption from the drop-down list:
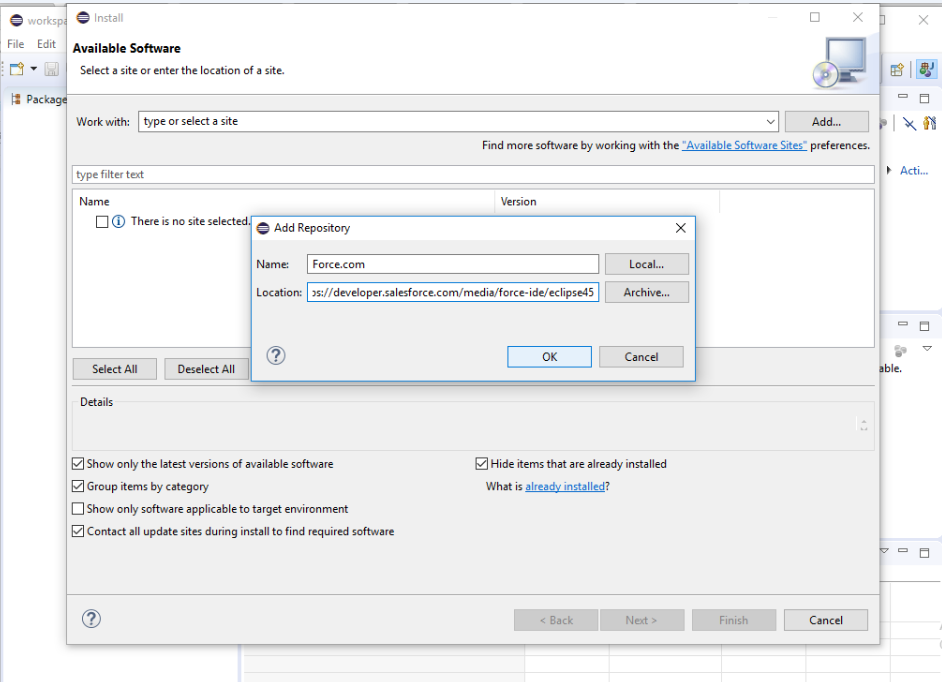
- Click
Add. - In the
Add Repositorydialog, set the name toForce.com IDEand the location tohttps://developer.salesforce.com/media/force-ide/eclipse45:
- Click
OK. - If you are not using Java 8, then deselect
Show only the latest versions of available software, and it will show an older version of the plugin. - Eclipse will show a list of all available plugins. Select the
Force.com IDEplugin, and then clickNext. - In the
Install Detailsdialog, clickNext. - Review the licenses, accept the terms, and click
Finish. - Eclipse starts downloading Force.com IDE and installs it and other required dependencies. Once the installation is completed, you need to restart Eclipse to reflect the changes. Click
Yes.
- When Eclipse restarts, select
Window | Open Perspective | Other. SelectForce.comand then clickOK:

We are done with setting up the Salesforce development environment in Eclipse.
We have a Salesforce application, and we want Salesforce code in the local workspace we just created using Force.com IDE:
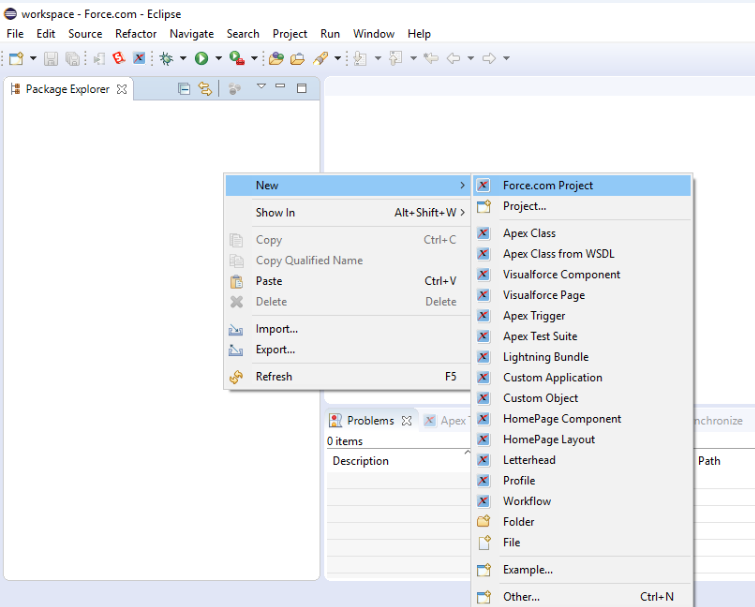
- Right-click on the
Package Explorerarea, then chooseNewand selectForce.com Project:
- Create a new Force.com project. You need to provide details about your project. Enter the
Project nameandOrganization Settingsdetails for connection:Username: Provide a username and append the sandbox name to it.Password: Provide a password for the given username.Security Token: You need to provide a security token for the sandbox.Environment: Choose the environment you are using, such as sandbox or Production Edition:
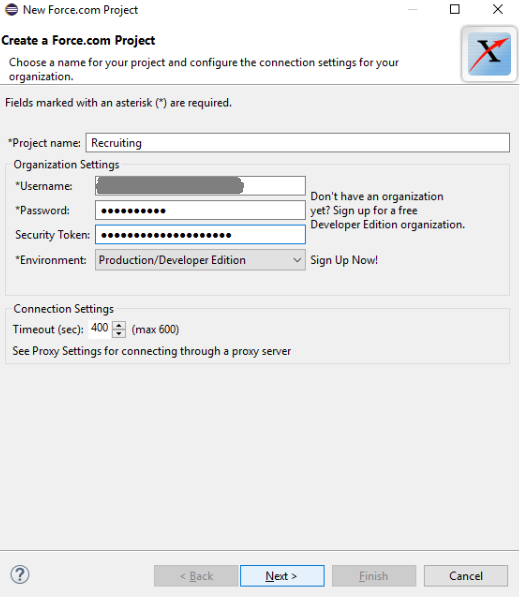
Once you have filled in all the details, click
Next.
We will get all the code in Eclipse from Salesforce. Now, whatever changes a developer makes in Eclipse will be in sync with the sandbox being used.