Book Image

DevOps for Salesforce

By : Priyanka Dive, Nagraj Gornalli
Book Image

DevOps for Salesforce

By: Priyanka Dive, Nagraj Gornalli

Overview of this book

Salesforce is one of the top CRM tools used these days, and with its immense functionalities and features, it eases the functioning of an enterprise in various areas of sales, marketing, and finance, among others. Deploying Salesforce applications is a tricky event, and it can get quite taxing for admins and consultants. This book addresses all the problems that you might encounter while trying to deploy your applications and shows you how to resort to DevOps to take these challenges head on. Beginning with an overview of the development and delivery process of a Salesforce app, DevOps for Salesforce covers various types of sandboxing and helps you understand when to choose which type. You will then see how different it is to deploy with Salesforce as compared to deploying with another app. You will learn how to leverage a migration tool and automate deployment using the latest and most popular tools in the ecosystem. This book explores topics such as version control and DevOps techniques such as Continuous Integration, Continuous Delivery, and testing. Finally, the book will conclude by showing you how to track bugs in your application changes using monitoring tools and how to quantify your productivity and ROI. By the end of the book, you will have acquired skills to create, test, and effectively deploy your applications by leveraging the features of DevOps.
Table of Contents (14 chapters)
Title Page
Packt Upsell
Contributors
Preface
Index

Using Git in the Eclipse IDE


Steps 1 to 3 are already explained in Chapter 1, Salesforce Development and Delivery Process:

  1. Eclipse installation
  2. Install the Force.com IDE plugin
  3. Configure Force.com project in Eclipse

We will continue with the next steps in the following sections.
Configuring Git and pushing code to Git

Now we need to configure Git.

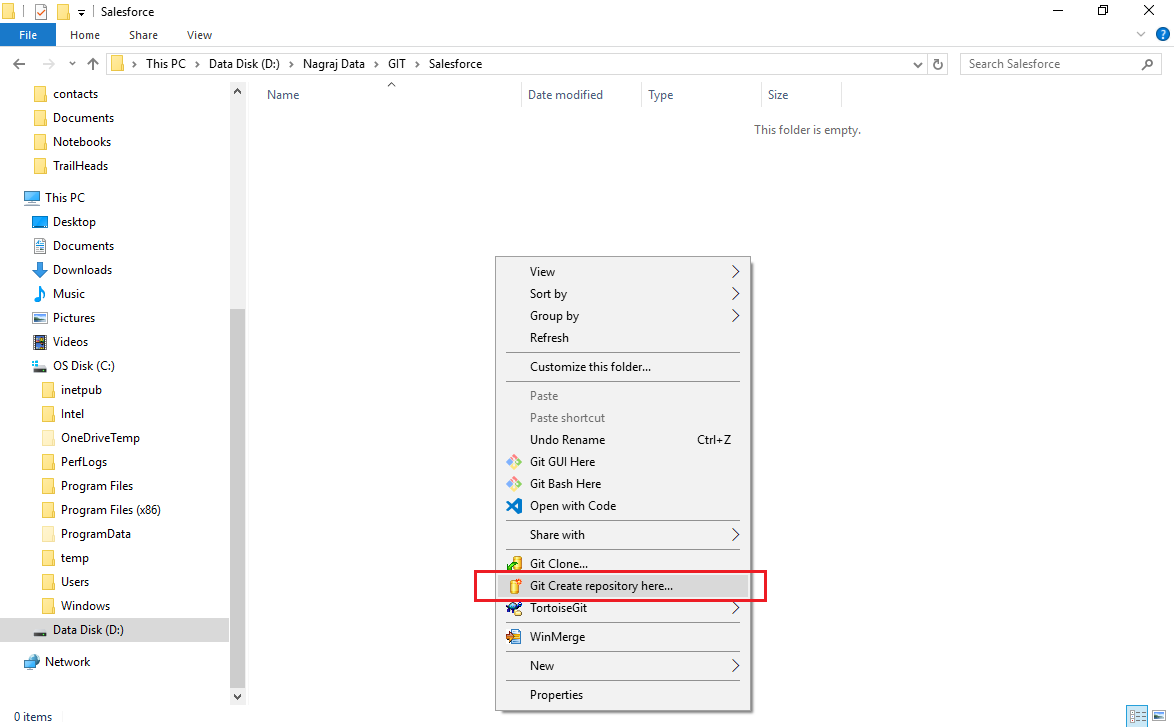
  1. Create the repository in a new folder by right-clicking on the folder and selecting  Git repository here...:
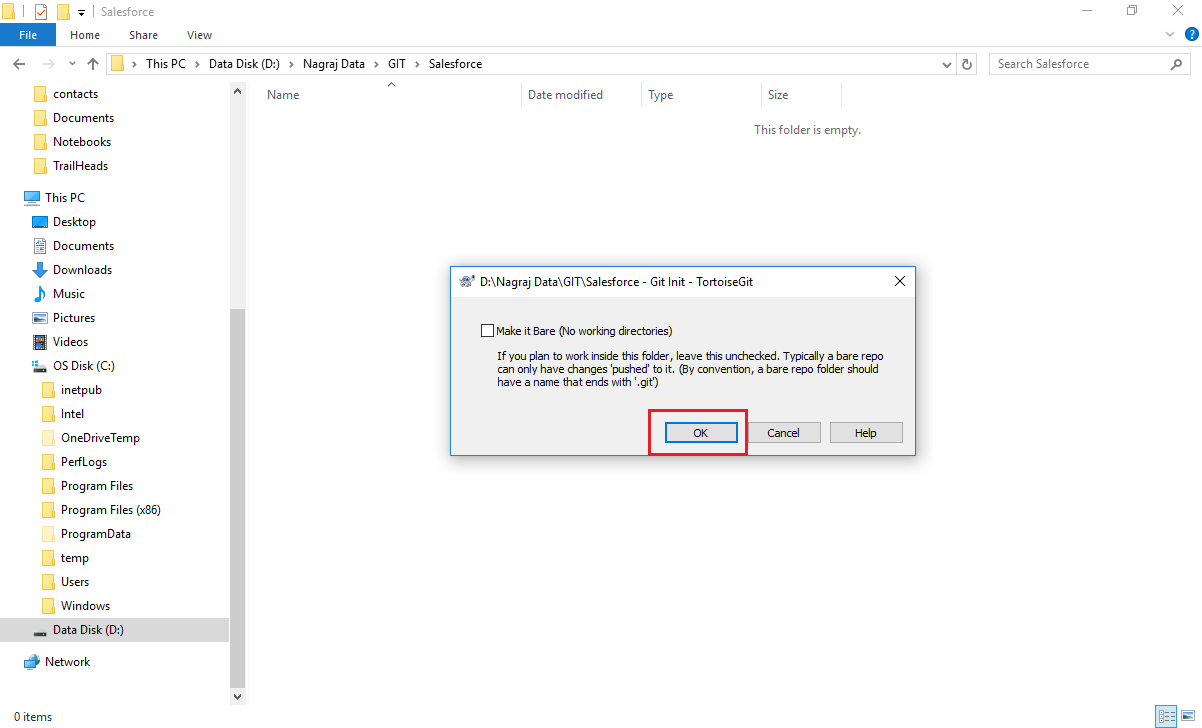
  1. Here, we are not selecting the Make it Bare and click on OK:
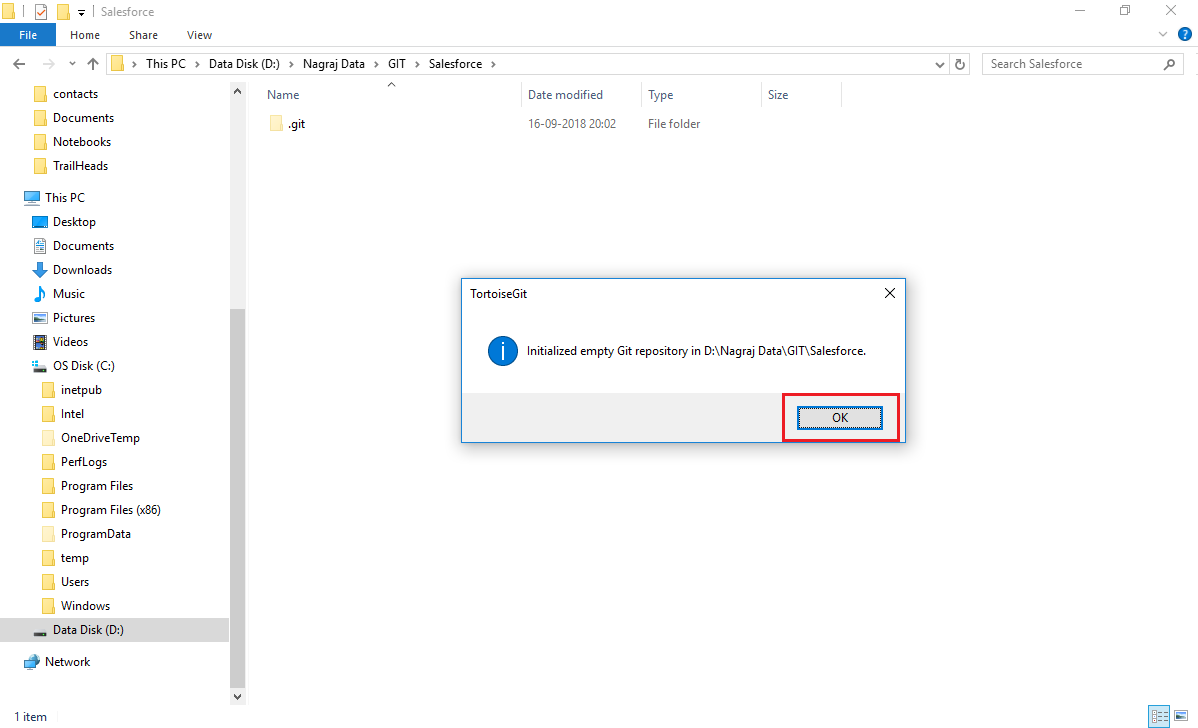
  1. You will see the next screen. Click on OK:
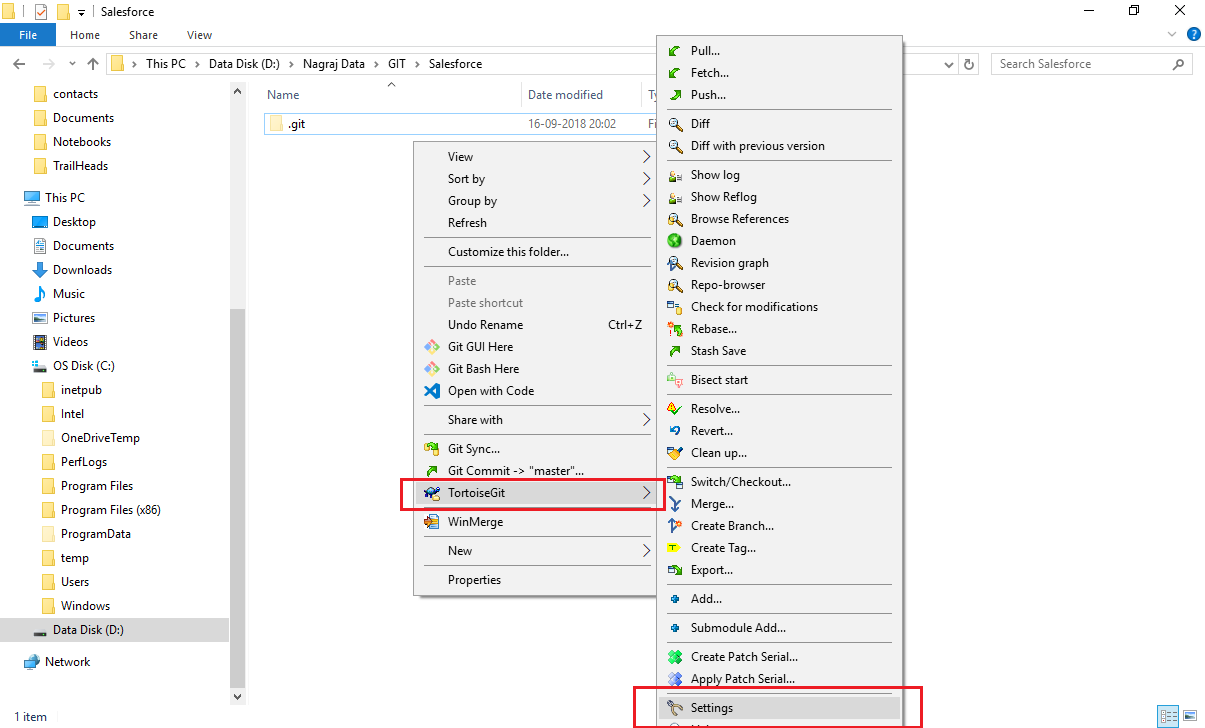
  1. Right-click on the folder and select TortoiseGit and click on Settings:
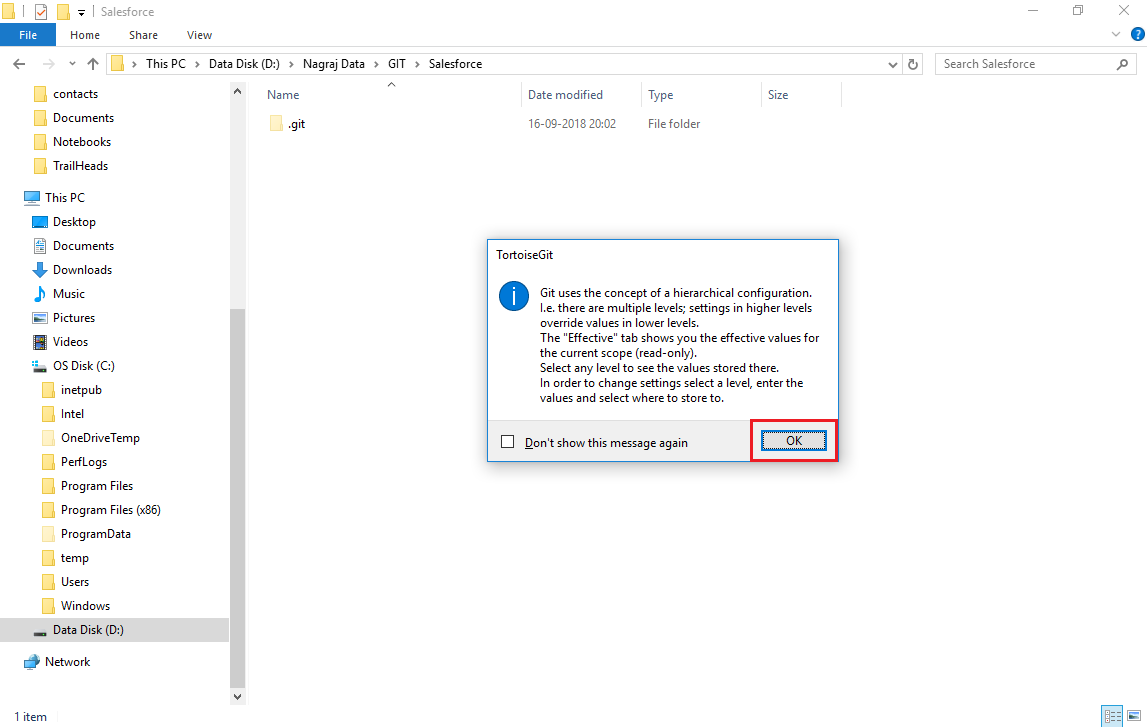
  1. You will see the next screen. Click on OK:
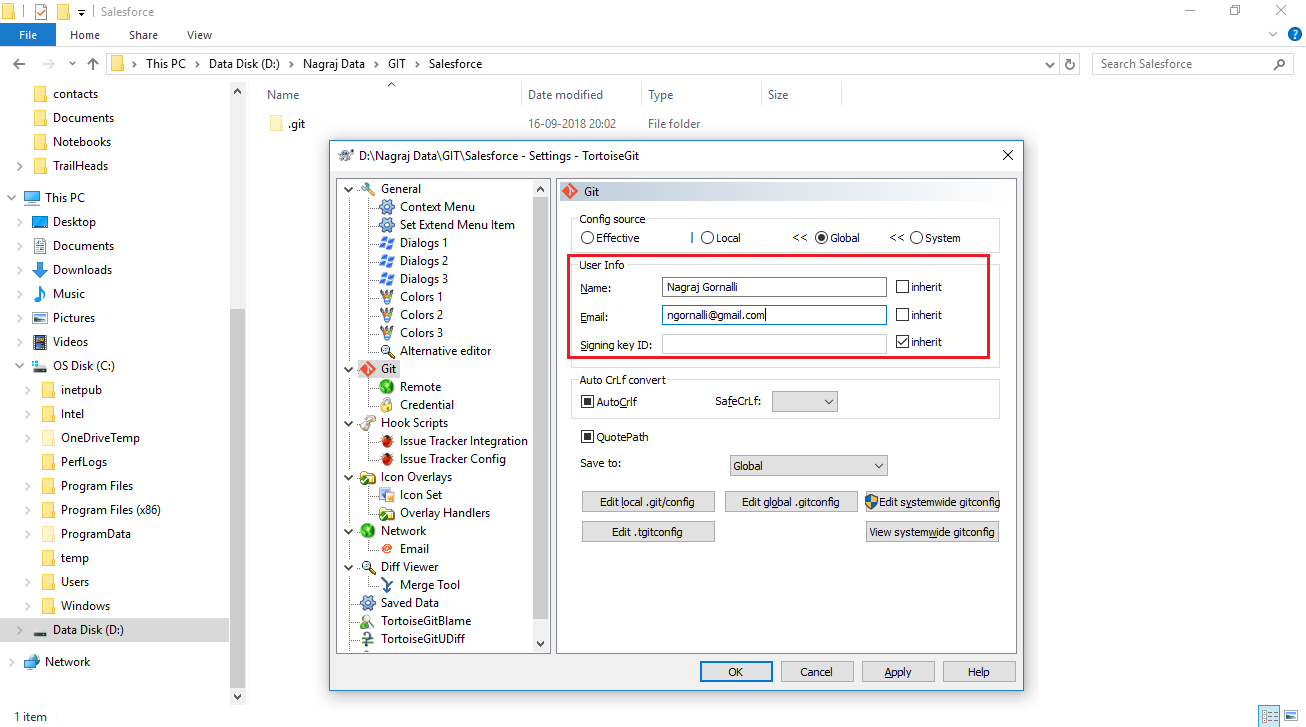
  1. Select the Git and enter the Name and Email:
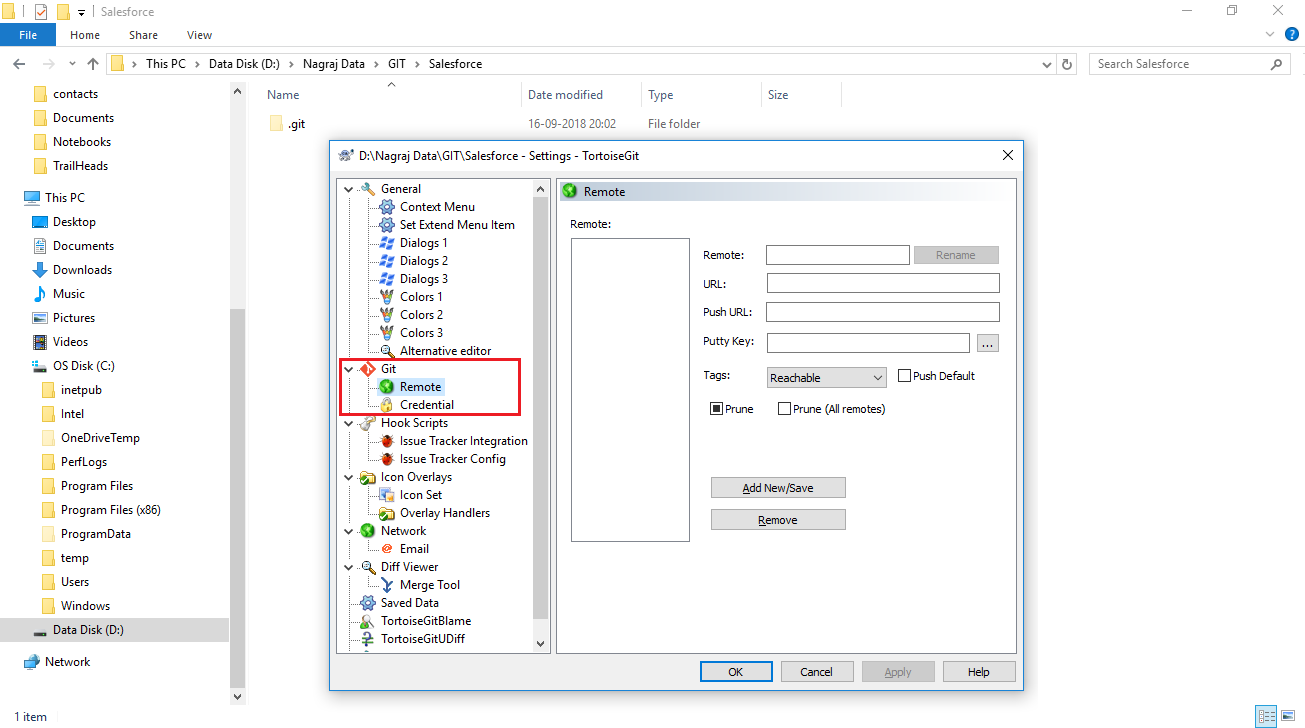
  1. You will see the next screen. Select the Git and click on Remote:
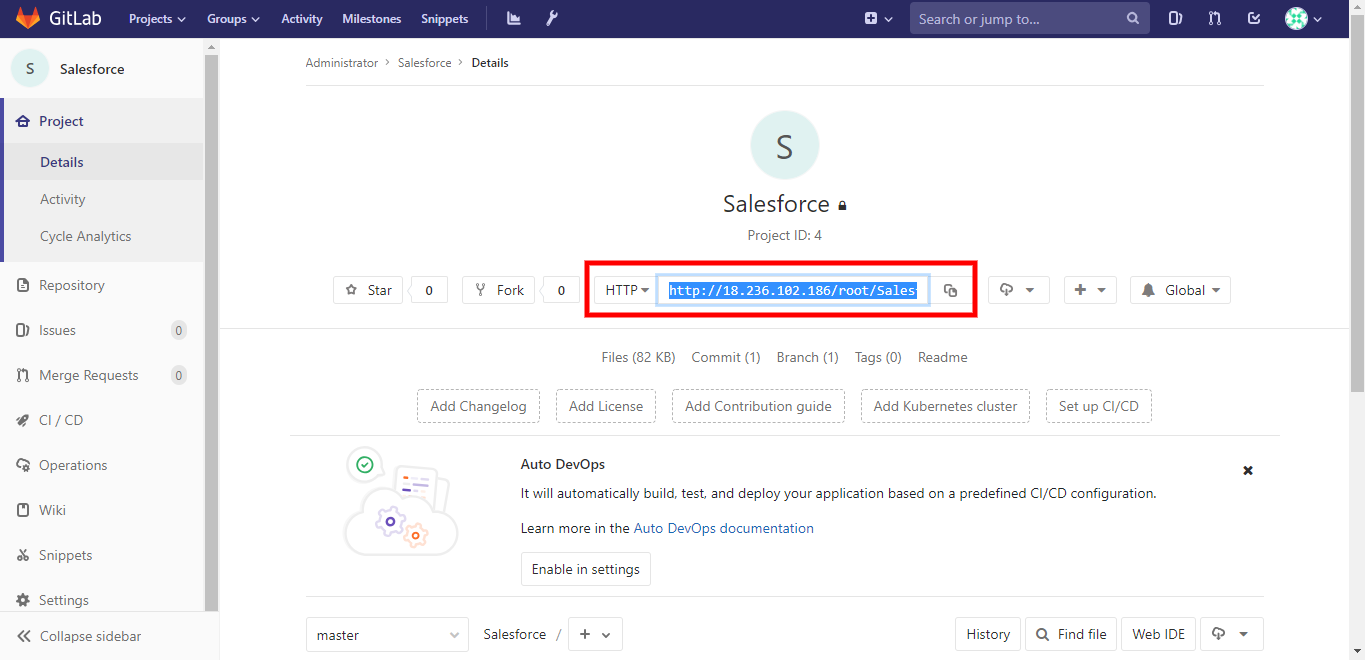
  1. Open the Git project in the browser and select the project.
  2. Copy the HTTP URL from the project:
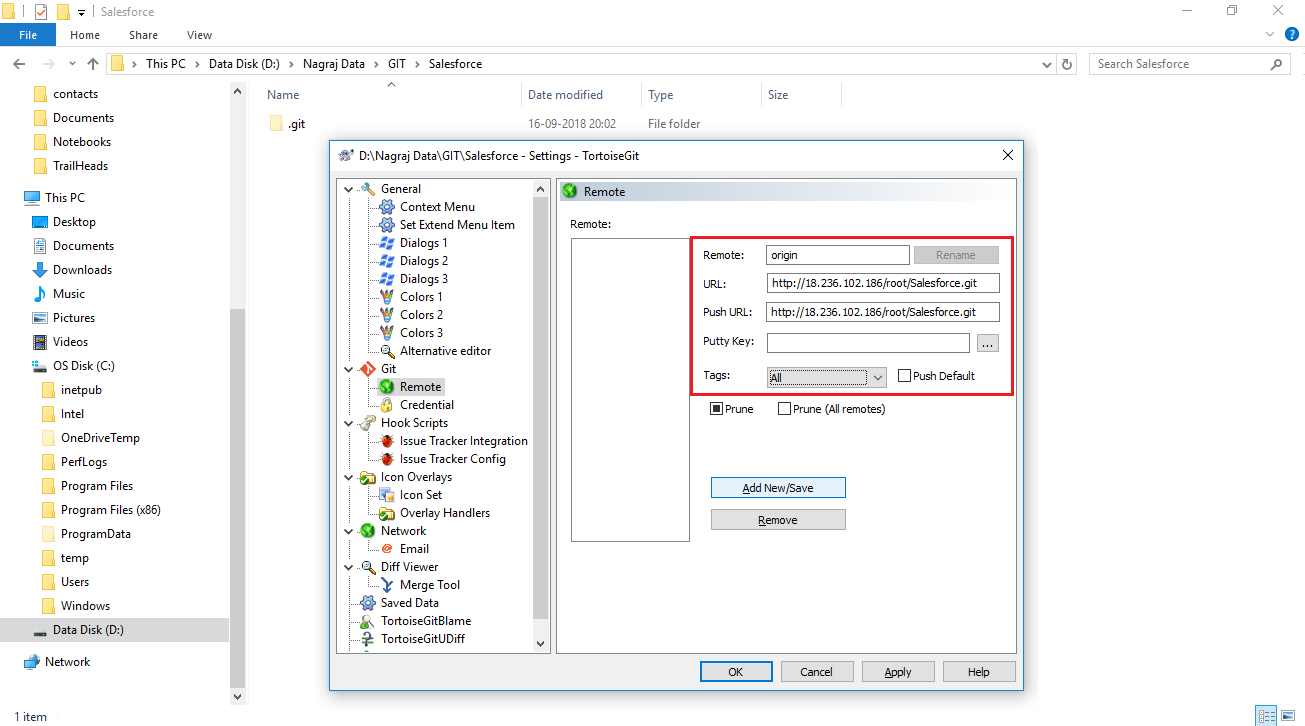
  1. Enter the copied URL in URL and Push URL. Select All intheTags field and click on the Add New/Save button:
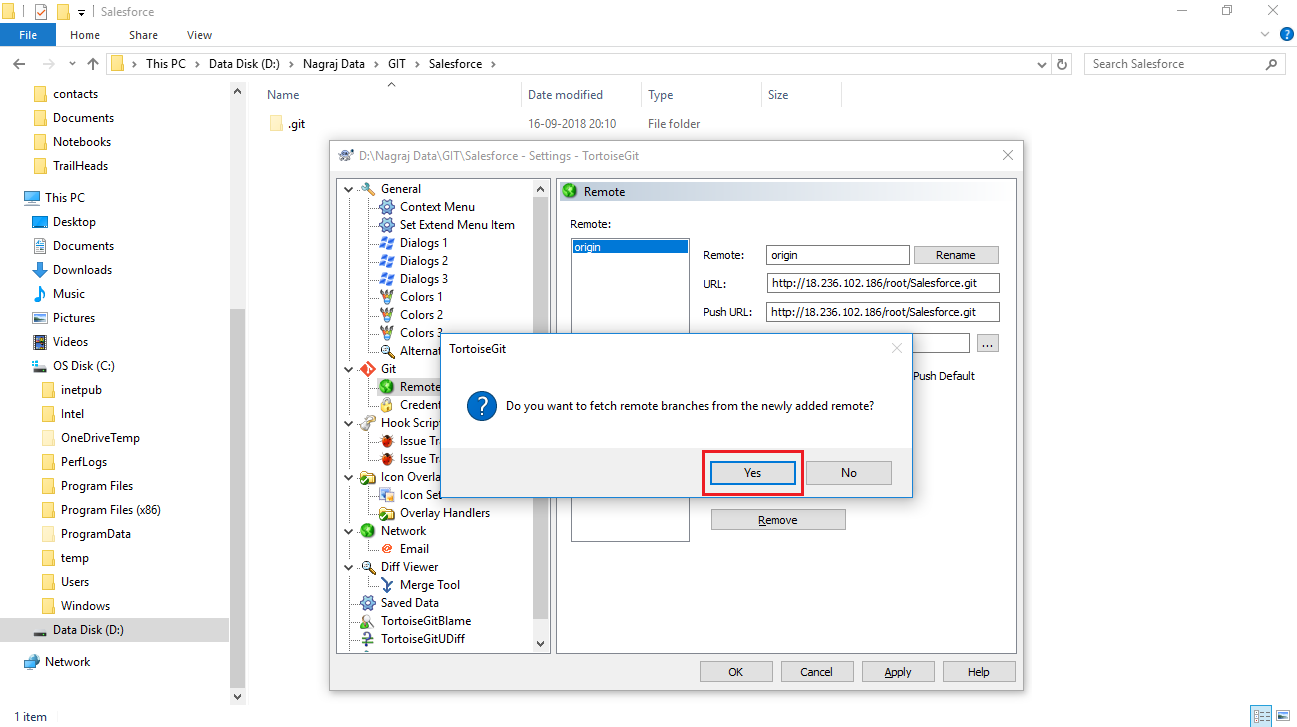
  1. Click on the Yes button:


  1. You...