To complete this section, you will need the following:
- Installation media for Windows 7 and Windows server 2008. Due to licensing restrictions, we are unable to provide installation media for Microsoft software products.
These versions are preferable as they are old enough to have well-documented vulnerabilities and low resource requirements. Since Windows 7 for desktops and Windows server 2008 are most commonly seen as of the time of the writing of this book, we recommend these be used for your test lab, and will be used as examples in this book.
- A virtual machine platform such as VirtualBox which we configured in previous steps.
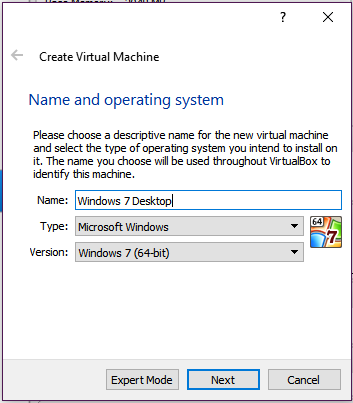
- Starting from your VirtualBox interface, select the New button from the upper-left corner to create a new virtual host for Windows to be installed into. You will need to use a system template that matches the version of Windows you are going to be installing:
Create new virtual machine
- Since this machine will be for testing only, assign it 1 or 2 gigabytes of memory, and use the default values for all of the remaining options by clicking on Next until you reach the end of the configuration section.
- Once the initial virtual host has been configured, you will need to go back into the settings to tell the virtual host to boot from the installation media. Right-click on the virtual system that you just created and go to settings. Once in the settings dialog window, select Storage from the menu on the left, highlight the topmost controller device, click on the Add Storage Attachment button, and select Add Optical Drive.
- From the next dialog box, select Use Existing when asked whether you would like to leave the storage option empty. When prompted, navigate to your Windows installation media, and click on Open; then complete the configuration session by clicking on OK.
- Start your new virtual machine by clicking on the parentheses start button.
- From this point, you will follow the default operating system installation process specific to the version of Windows you have selected. When given the option of installing additional services, use only the default options selected.
- During installation, we will name our systems something easy to remember. We will name the desktop clients Windows Desktop 1 and Windows Desktop 2, and the server AD Server.
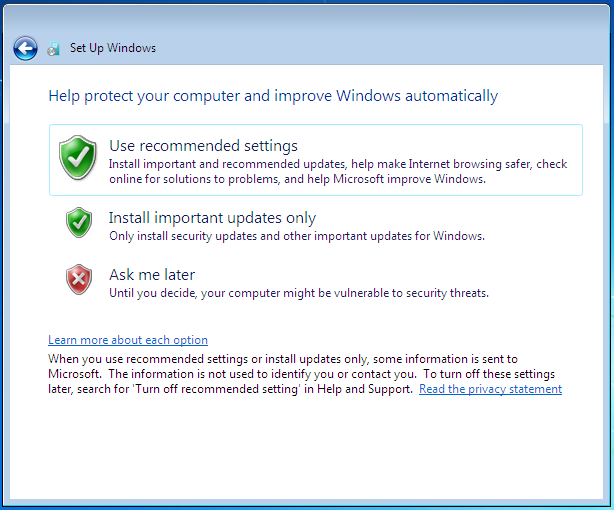
- When prompted to configure the Windows update services, ensure that you do not enable the automatic installation of Windows updates:
De-selection of automatic Windows updates
On certain platforms, you may select the option to download but not install updates if you so choose. This will allow you to evaluate the security of the system, both prior to and after the installation of Windows updates. You maybe asked to create a password for the administrative user. If this is the case, then create a user and password that will be easy to remember and refer to in future chapters.
- Once you have completed the installation of Windows 7, reboot the machine, and login when presented with the login screen.
- Once logged in, change the machine name to Win7_Desktop_1, and reboot.
- Go into the virtual host settings, and ensure that the network adapter is assigned to the host-only network that we created earlier in this section.
- Now that the machine has been properly configured, we will clone it to create a second instance of Windows 7 desktop.
Cloning of machines makes it very easy to create a gold image and working copies from this image. It is different than snapshots, which create point-in-time references that can be rolled back to if need be.
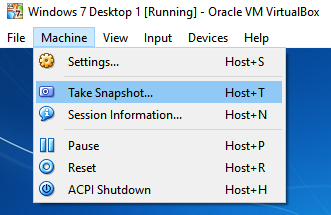
- To create a clone of the Windows desktop machine, you will need to power it up using the Start option. Once started, do not log into the machine; but rather from the desktop view, from the top menu bar, select Machine | Take Snapshot... to start the snapshot creation process:
Create snapshot
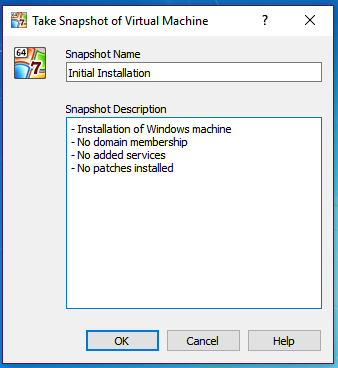
- In the next screen, you will be given the opportunity to name and provide details about the purpose of this snapshot. Since it is likely that we will be returning to this state frequently, name it Initial Installation, and in the description, indicate that this is a clean Windows build, and that the snapshot was taken before AD domain membership:
Creating a VirtualBox snapshot
- VirtualBox will now generate a snapshot. Depending on the system, this may take several minutes. Once complete, power down the system using the power buttons on the lower-right part of the login screen – do not login at this time.
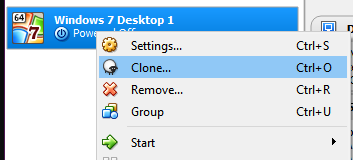
- Now that the initial host has been set up, we will need to create the clone of this device. To do so, right-click on Windows 7 Desktop 1, and select Clone... from the dropdown menu:
Start cloning process
- When prompted, name this Windows Desktop 2, and select the option to reinitialize the MAC address of all available cards. Click on Next.
- When given the option to do so, select Full Clone as the clone type, and click on Next.
- Since we will be creating a new snapshot of this system in a subsequent step, choose the option for Current Machine State as the options for snapshots, and click on Next. This will start the cloning process, which may take several minutes.
- Once completed, we will start this host as well as we did with the first Windows 7 Desktop 1, but this time, we will log in when prompted to do so.
- Once logged in, you will need to change the name of the machine to Win7_Desktop_2. Allow the machine to reboot.
- Once back at the login screen, create a snapshot as we described earlier.
- We will now install the Windows 2008 server in the same manner we did the Windows 7 desktops, ensuring that the device is assigned to the host-only network that we created in a previous section.
- With all the default options chosen, install Windows 2008, and log in for the first time. The first time you log in, you will be presented with the Initial Configuration Tasks tool. From this tool, configure only the following:
|
Set time zone
|
Set to your timezone
|
|
Configure networking
|
Set the IP information as follows:
IP Address: 192.168.56.10
Subnet Mask: 255.255.255.0
Gateway: 192.168.56.1
DNS Server: 192.268.56.1
|
|
Computer name and domain
|
Computer name: AD-Server
Leave set to workgroup for now
|
Initial Windows server configuration:
- Reboot the server after these options are set, and log in. The Initial Configuration Tasks wizard will open again. Scroll down to the section named Add Roles; here we will add the DNS and DHCP roles to this server.
- Select all the default options, except the following:
|
Page
|
Option
|
Setting
|
|
Specify IPv4 DNS Server Settings
|
Parent Domain
|
kalicookbook.local |
|
Add of Edit DHCP Scopes (click on ADD)
|
Scope Name
|
Lab
|
|
Starting IP Address
|
192.168.56.100 |
|
Ending IP Address
|
192.168.56.150 |
|
Default Gateway
|
192.168.56.1 |
|
Configure IPv8 Stateless Mode
|
Select the DHCPv6 Stateless Mode...
|
Disable DHCPv6 stateless mode for this server
|
Initial role configuration
- Once all the preceding has been completed, reboot the server, and log into each of the desktops to make sure that they get an IP address from the AD server and that you can ping each host by their IP addresses. We will configure DNS in a later step.
- After you have confirmed that network connectivity between your hosts is working properly, close all open windows, and create a snapshot as we have done in the past.
- With the desktop machines created and functioning, you will need to enable basic services on the AD server. After logging into the server, you will be presented with the Initial Configuration Tasks wizard again. Once presented, scroll down to Customize this Server section, and click on Add Role.
- In the section called Select Server Roles, select and install the following:
- File services
- Remote desktop services
- Web server (IIS)
If you are prompted to include dependencies, accept, and continue.
- As you progress, you will need to select certain options for each of the roles added previously:
- Remote desktop services:
- Select only Remote Desktop Session Host and click on Next
- Select Do Note Require Network Level Authentication
- Select Configure Later to defer the licensing of the remote desktop until a later date (120 days max)
- Permitted user groups: Leave administrators in place and continue
- Leave all the remaining options as the default and continue. Reboot when prompted to do so, and log in once more; you will automatically return to the Add Roles wizard. Confirm that the installation was successful.
- Return to the Add Role wizard, and select this time to install Active Directory Domain Services. Click on Install AD DS Anyway (not recommended) when presented with the dialog box confirming installation on a domain controller, and accept any dependencies that maybe required. Continue through the installation process with the remaining default options. When complete, select Close.
- In the left menu, select Active Directory Domain Services; and in the right pane, select Run the Active Directory Domain Services Installation Wizard (dcpromo.exe). As you go through the wizard, select the default options, except for the following:
- Choose a deployment configuration: Create new domain in a new forest
- FQDN of the forest root domain: kalicookbook.local
- Forest functional model: Windows server 2008 R2
- Once prompted, reboot. Confirm there are no errors
- You will now need to log into each of the Windows 7 desktops and join them to the kalicookbook.local domain.
- Log into each machine and ensure that Windows updates are disabled. Make sure the Windows firewall is also disabled.
- Create snapshots of each to give us a foundation to work from as we progress through this book. Snapshots will allow us to go back to pre-determined points in time.