
Docker installation
Installers are one of the first pieces of software you need to get up and running with Docker on both your local machine and your server environments. Let's first take a look at which environments you can install Docker in:
- Linux (various Linux flavors)
- macOS
- Windows 10 Professional
Besides, you can run them on public clouds, such as Amazon Web Services, Microsoft Azure, and DigitalOcean, to name a few. With each of these installers listed previously, Docker actually operates in different ways on the operating system. For example, Docker runs natively on Linux. However, if you are using macOS or Windows 10, then it operates a little differently since it relies on using Linux.
Let's look at quickly installing Docker on a Linux desktop running Ubuntu 18.04, and then on macOS and Windows 10.
Installing Docker on Linux
As already mentioned, this is the most straightforward installation out of the three systems we will be looking at. We'll be installing Docker on Ubuntu 18.04; however, there are various flavors of Linux with their own package managers, which will handle this slightly differently. See the Further reading section for details on install on other Linux distributions. To install Docker, simply run the following command from a Terminal session:
$ curl -sSL https://get.docker.com/ | sh
$ sudo systemctl start docker
You will also be asked to add your current user to the Docker group. To do this, run the following command, making sure you replace the username with your own:
$ sudo usermod -aG docker username
These commands will download, install, and configure the latest version of Docker from Docker themselves. At the time of writing, the Linux operating system version installed by the official install script is 19.03.
Running the following command should confirm that Docker is installed and running:
$ docker version
You should see something similar to the following output:
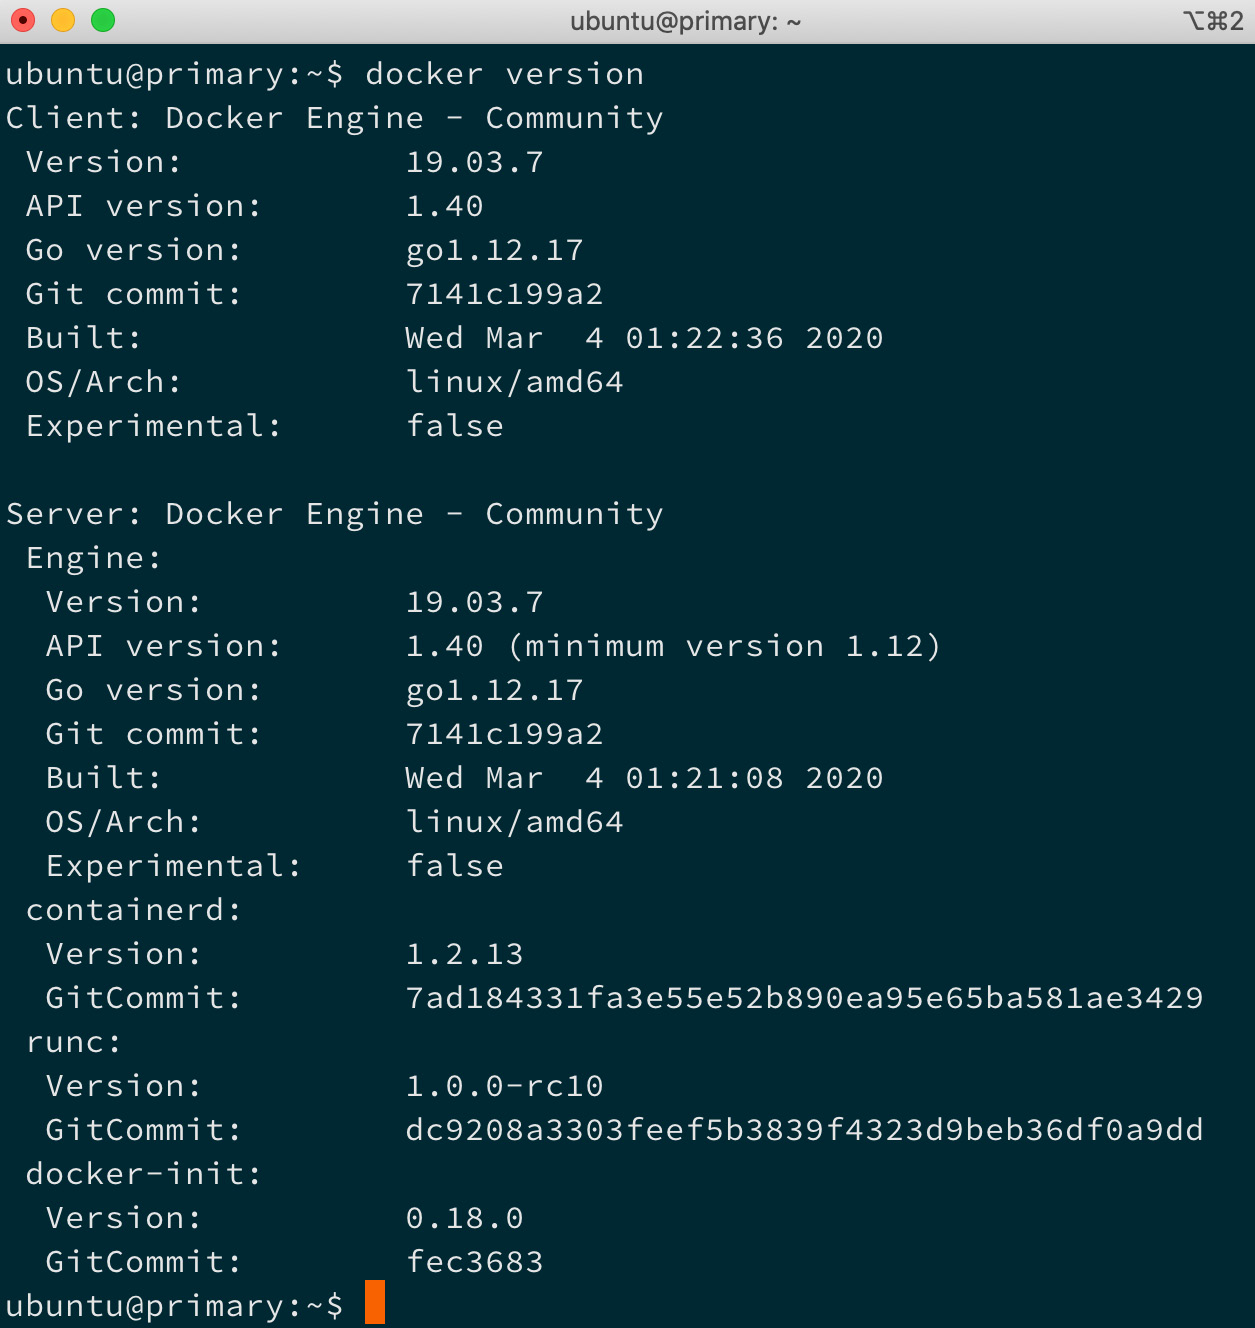
Figure 1.3 – Output of the docker version command showing the version of Docker installed on the system
There is a supporting tool that we are going to use in future chapters, which are installed as part of the Docker for macOS or Windows 10 installers.
To ensure that we are ready to use the tool in later chapters, we should install it now. The tool is called Docker Compose, and to install it we first need to get the latest version number. You can find this by visiting the releases section of the project's GitHub page at https://github.com/docker/compose/releases/. At the time of writing, the version was 1.25.4 – update the version number in the commands in the following code block with whatever the latest version is when you install it:
$ COMPOSEVERSION=1.25.4
$ curl -L https://github.com/docker/compose/releases/
download/$COMPOSEVERSION/docker-compose-`uname -s`-`uname -m`
>/tmp/docker-compose
$ chmod +x /tmp/docker-compose
$ sudo mv /tmp/docker-compose /usr/local/bin/docker-compose
Once it's installed, you should be able to run the following two commands to confirm the version of the software is correct:
$ docker-compose version
Now that we know how to install it on Linux, let's look at how we can install it on macOS.
Installing Docker on macOS
Unlike the command-line Linux installation, Docker for Mac has a graphical installer.
Tip
Before downloading, you should make sure that you are running at least Apple macOS X Yosemite 10.10.3 as this is minimum OS requirement to run the version of Docker we will be discussing in this title. If you are running an older version, all is not lost; you can still run Docker. Refer to the Older operating systems section of this chapter.
Let's install Docker on macOS:
- Go to the Docker store at https://hub.docker.com/editions/community/docker-ce-desktop-mac.
- Click on the Get Docker link.
- Once it's downloaded, you should have a
DMGfile. Double-clicking on it will mount the image, and opening the image mounted on your desktop should present you with something like this:
Figure 1.4 – The drag and drop screen for the Docker installer for macOS
- Once you have dragged the Docker icon to your Applications folder, double-click on it and you will be asked whether you want to open the application you have downloaded.
- Clicking Yes will open the Docker installer, showing the following prompt:

Figure 1.5 – Prompt for the Docker installer
- Clicking on OK will bring up a dialogue that asks for your password. Once the password is entered, you should see a Docker icon in the top-left icon bar on your screen.
- Clicking on the icon and selecting About Docker should show you something similar to the following:

Figure 1.6 – The About Docker screen
- You can also run the following commands to check the version of Docker Compose that were installed alongside Docker Engine on the command line:
$ docker-compose version
Now that we know how to install Docker on macOS, let's move on to our final operating system, Windows 10 Professional.
Installing Docker on Windows 10 Professional
Like Docker for Mac, Docker for Windows uses a graphical installer.
Important Note
Before downloading, you should make sure that you are running Microsoft Windows 10 Professional or Enterprise 64-bit. If you are running an older version or an unsupported edition of Windows 10, you can still run Docker; refer to the Older operating systems section of this chapter for more information. Docker for Windows has this requirement due to its reliance on Hyper-V. Hyper-V is Windows' native hypervisor and allows you to run x86-64 guests on your Windows machine, be it Windows 10 Professional or Windows Server. It even forms part of the Xbox One operating system.
Let's install Docker for Windows:
- Download the Docker for Windows installer from the Docker store at https://hub.docker.com/editions/community/docker-ce-desktop-windows.
- Click on the Get Docker button to download the installer.
- Once it's downloaded, run the installer package, and you will be greeted with the following:

Figure 1.7 – Configuration screen of the Docker for Windows installer
- Leave the configuration at the default values and then click on OK. This will trigger an installation of all of the components needed to run Docker on Windows:

Figure 1.8 – Docker installation in progress
- Once it's installed, you will be prompted to restart. To do this, simply click on the Close and restart button:

Figure 1.9 – Docker installation complete confirmation screen
- Once your machine has restarted, you should see a Docker icon in the icon tray in the bottom right of your screen. Clicking on it and selecting About Docker from the menu will show the following:

Figure 1.10 – Docker About Me page
- Open a PowerShell window and type the following command:
$ docker version
This should also show you similar output to the Mac and Linux versions:
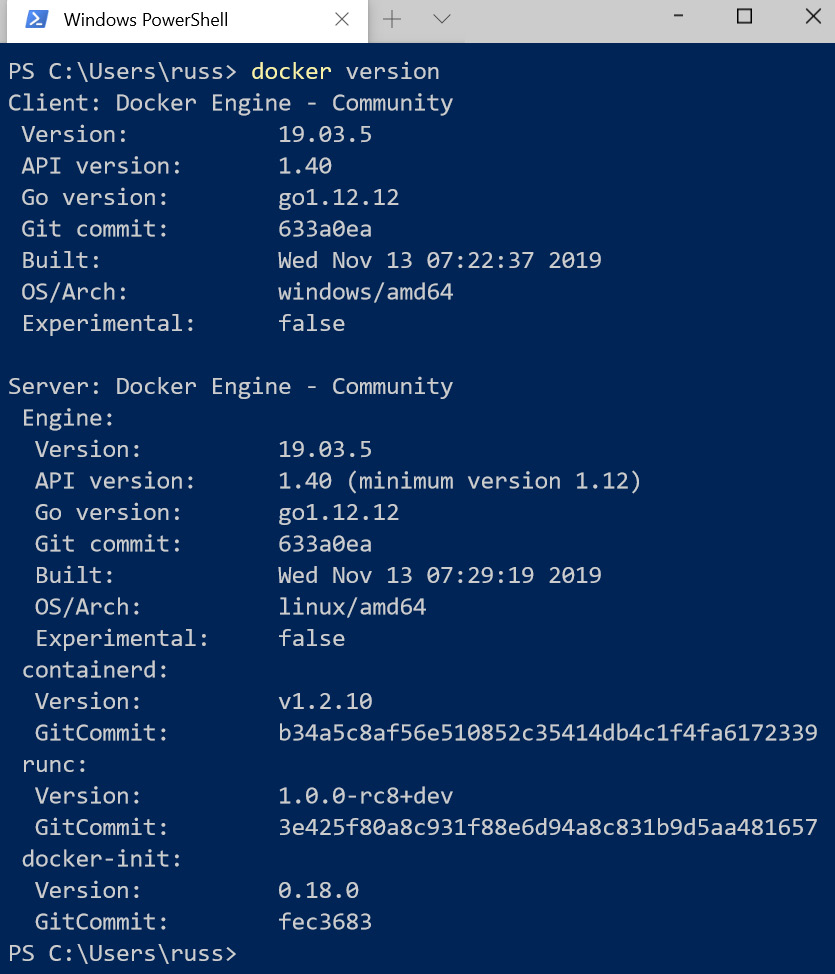
Figure 1.11 – Output of the docker version command
Again, you can also run the following commands to check the versions of Docker Compose and Docker Machine that were installed alongside Docker Engine:
$ docker-compose version
You should see a similar output to the macOS and Linux versions. As you may have started to gather, once the packages are installed, their usage is going to be pretty similar. You will be able to see this when we get to the Using Docker commands section of this chapter.
Older operating systems
If you are not running a sufficiently new operating system on Mac or Windows, then you will need to use Docker Toolbox. Consider the output printed from running the following command:
$ docker version
On all three of the installations we have performed so far, it shows two different versions, a client and a server. Predictably, the Linux version shows that the architecture for the client and server are both Linux; however, you may notice that the Mac version shows the client is running on Darwin, which is Apple's Unix-like kernel, and the Windows version shows Windows. Yet both of the servers show the architecture as being Linux, so what gives?
That is because both the Mac and Windows versions of Docker download and run a virtual machine in the background, and this virtual machine runs a small, lightweight operating system based on Alpine Linux. The virtual machine runs using Docker's libraries, which connect to the built-in hypervisor for your chosen environment.
For macOS, this is the built-in Hypervisor.framework, and for Windows, as we have already mentioned, it is Hyper-V.
To ensure that no one misses out on the Docker experience, a version of Docker that does not use these built-in hypervisors is available for older versions of macOS and unsupported Windows versions. These versions utilize VirtualBox as the hypervisor to run the Linux server for your local client to connect to.
Important note
VirtualBox is an open source x86 and AMD64/Intel64 virtualization product developed by Oracle. It runs on Windows, Linux, Macintosh, and Solaris hosts, with support for many Linux, Unix, and Windows guest operating systems.
For more information on Docker Toolbox, see the project's website at https://github.com/docker/toolbox/, where you can also download the macOS and Windows installers from the releases page.
Important note
This book assumes that you have installed the latest Docker version on Linux or have used Docker for Mac or Docker for Windows. While Docker installations using Docker Toolbox should be able to support the commands in this book, you may run into issues around file permissions and ownership when mounting data from your local machine to your containers.
Now that you have Docker up and running on the system of your choice, let's start exploring the commands that we need in order to use it effectively.