
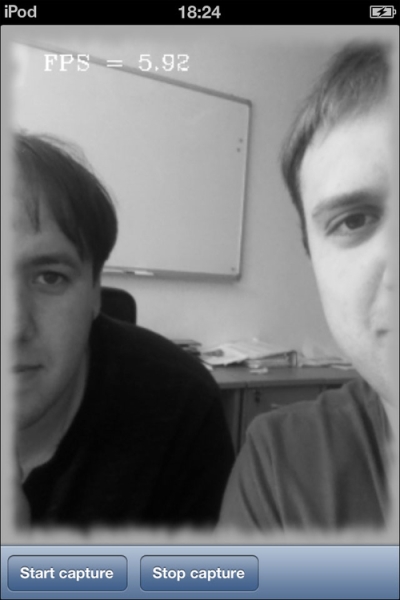
In this recipe, we'll consider an example showing how to take a live video feed and apply an image filter in real-time. As we discussed previously, you should only implement the processImage method. Also, we'll add displaying the FPS number directly in camera images, it can help you in the optimization process. The following is an example snapshot of the application:
We will use the Recipe10_CapturingVideo project as a starting point, trying to apply previously implemented RetroFilter to the video stream. We also suppose that the RetroFilter class, and its resources were added to the CvEffects static library project. Source code can be found in the Recipe12_ProcessingVideo folder in the code bundle that accompanies this book. For this recipe, you can't use Simulator, as it doesn't support working with camera.
The following are the required steps:
Add instance variables for storing retro filter properties.
Add an initialization of the filter to the button's action.
Finally, we'll implement applying the filter in the
processImagefunction.
Let's implement the described steps:
First, we should add the
RetroFilter::Parametersvariable and a pointer to the filter to the Controller interface. Also, we'll add a variable for storing the previous time for FPS calculation:@interface ViewController : UIViewController<CvVideoCameraDelegate> { CvVideoCamera* videoCamera; BOOL isCapturing; RetroFilter::Parameters params; cv::Ptr<RetroFilter> filter; uint64_t prevTime; }In order to initialize filter properties, we should add some code to the
viewDidLoadfunction:// Load textures UIImage* resImage = [UIImage imageNamed:@"scratches.png"]; UIImageToMat(resImage, params.scratches); resImage = [UIImage imageNamed:@"fuzzy_border.png"]; UIImageToMat(resImage, params.fuzzyBorder); filter = NULL; prevTime = mach_absolute_time();
As we know the resolution of the camera only after session starts, we should create a filter object when the StartCapture button is pressed:
-(IBAction)startCaptureButtonPressed:(id)sender
{
    [videoCamera start];
    isCapturing = YES;

    params.frameSize = cv::Size(videoCamera.imageWidth,
                                videoCamera.imageHeight);

    if (!filter)
        filter = new RetroFilter(params);
}
Finally, we should apply the filter to a camera image:
- (void)processImage:(cv::Mat&)image
{
    cv::Mat inputFrame = image;

    BOOL isNeedRotation = image.size() != params.frameSize;
    if (isNeedRotation)
        inputFrame = image.t();

    // Apply filter
    cv::Mat finalFrame;
    filter->applyToVideo(inputFrame, finalFrame);

    if (isNeedRotation)
        finalFrame = finalFrame.t();

    // Add fps label to the frame
    uint64_t currTime = mach_absolute_time();
    double timeInSeconds = machTimeToSecs(currTime - prevTime);
    prevTime = currTime;
    double fps = 1.0 / timeInSeconds;
    NSString* fpsString =
                    [NSString stringWithFormat:@"FPS = %3.2f", fps];
    cv::putText(finalFrame, [fpsString UTF8String],
                cv::Point(30, 30), cv::FONT_HERSHEY_COMPLEX_SMALL,
                0.8, cv::Scalar::all(255));

    finalFrame.copyTo(image);
}
We will use the following function to convert the measured time to seconds:
static double machTimeToSecs(uint64_t time)
{
    mach_timebase_info_data_t timebase;
    mach_timebase_info(&timebase);
    return (double)time * (double)timebase.numer /
                          (double)timebase.denom / 1e9;
}
As you can see, this code contains the
mach_timebase_infostructure that is defined in the following header file:#import <mach/mach_time.h>
In the previous cases, we always created the filter object right before using it. In the case of live video, we cannot do it, because the performance issues come out on top. So we'll initialize the RetroFilter object only once. For this purpose, we have to add a smart pointer, which points to the filter object, to the Controller interface and initialize it after starting the video capturing process. We can't do it in the viewDidLoad method, because we should know the camera resolution from before.
To calculate FPS, we have to add the prevTime field property. We will measure the time between processImage calls with this variable. At the time of the first call to this method, we'll initialize this property with the current time. During the next call, we will be able to measure the working time of the filter function, plus the time needed to get the camera image as a difference between current time and value of the prevTime variable. After that, we can convert it to seconds and calculate the resulting FPS value. In order to display the number on the screen, we'll use the cv::putText function.