

As in the previous appendix, we will use a virtual appliance with the Vertica software and the MicroStrategy machine. The procedure is similar, just the ODBC driver changes.
You need to create a username and log in to the https://my.vertica.com website before downloading; then go to address http://at5.us/AppDU1, and click on the VMWare Server 2.0 and Workstation 7.0 (vmdk) link.
When you unzip the archive, you'll find a Vertica 6.1.2 x64 for VMWare folder, open the Vertica 6.1.2 x64 for VMWare.vmx file. The network card should already be bridged, and there is no need to change it.
Power on the machine; it will boot (see the following screenshot) and stop at a row that says Starting sendmail:
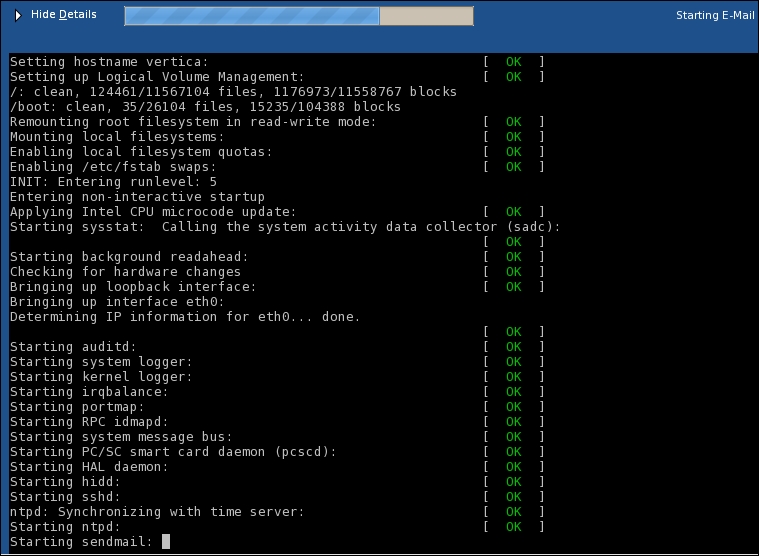
At this point, one may be tempted to shut it down. Don't lose your patience; it is not stuck. I did the same error many times before finding the solution.
Looks like a DNS problem, after about 10 to 20 minutes, when the sendmail daemon times out, the boot will continue.
When the graphical interface appears, we can change the IP address and get rid of the failing services:
Open the System | Administration | Server Settings | Services menu.
When prompted, in Password for root, type
password.In the Service Configuration window, Background Services tab, scroll down to find ntpd, and deselect its checkbox. Scroll down to sendmail and uncheck this as well.
Click on the Save button in the toolbar and close this window.
Now open the System | Administration | Network menu; here, you'll find a couple of lines with two devices named eth0.bak and eth0, select eth0 and click on the Edit button.
In the Ethernet Device window, enable the radio button labeled Statically set IP address.
Ask your network administrator for details here, and fill in the Address, Subnet mask, and Default gateway address fields.
You may need to move up the window to see the bottom; click on OK (the rightmost).
Now go to the Hosts tab, select the line with Vertica and click on Edit.
Change the Address field and write the same IP that you used in step 7, then click on OK.
From the File menu, select Save and click on OK, and then close this window.
Open System | Shutdown and hit Restart.
When the machine reboots, go to System | Administration | Network.
Check that the DNS tab reflects the correct Primary DNS for your network, change it if needed, as shown in the following screen capture:

Reboot the machine. When it restarts open the Applications | Accessories | Terminal menu.
In the blue screen that appears, use the arrow keys to select the row Accept and press the Space bar to check it; then press the Enter key.
In the Main Menu tab of this window, select Exit and press Enter.
When you're back to the command prompt, type:
/opt/vertica/sbin/install_example VMartThe example data installation can take a little while, when it's finished, type the following command:
/opt/vertica/bin/vsqlThis is the Vertica database command-line SQL utility. Now type:
Select count(*) from store.store_sales_fact;The result shows a row count of 5 million. Type
\qto quit vsql and close the terminal withexit.
Open the MicroStrategy virtual machine and test if you can ping the Vertica appliance, then download the HP Vertica Client Package for the Community Edition from:
Select the Windows 32-bit vertica-client-6.1.2-0.32.exe file and save it in C:\install.
We install the ODBC driver:
Run
C:\install\vertica-client-6.1.2-0.32.exeand click your way to the end of the installation accepting the defaults and click on Finish.Go to Start | All Programs | Administrative Tools | Data Sources (ODBC) to open the 32-bit ODBC Data Source Administrator (if you're on 64-bit Windows, it's in the
SysWOW64folder).Click on System DSN and hit the Add… button.
Select the Vertica driver and click on Finish, you'll see the following dialog box:

In the Vertica ODBC Data Source Configuration dialog, type these case-sensitive parameters (change the IP according to your network, as per step 7 in the Getting ready section):
Data Source:
HP VerticaServer:
192.168.1.30Port:
5433Database:
VMart
Click on OK and then on OK again to close the ODBC Data Source Administrator.
Now open the MicroStrategy Desktop application and log in with
Administratorand the corresponding password.Right-click on MicroStrategy Analytics Modules and select Create New Project….
Click on the Create project button and name it
VERTICA, uncheck Enable Change Journal for this project and click on OK.When the wizard finishes creating the project, click on Select tables from the Warehouse Catalog and hit the button labeled as New….
Click on Next and type
HP Verticain the Name textbox of the Database Instance Definition window.In this same window, open the Database type combobox and scroll down until you find Vertica 6.0. Click on Next.
In Local system ODBC data sources, pick HP Vertica and type
dbadminin Database login andpasswordin the Password textbox.When the Warehouse Catalog window appears, pick customer_dimension, product_dimension and store_sales_fact, and move them to the right of the shopping cart. Then select all the three tables in the right side, right-click on them and choose Import Prefix.
Click on Save and Close and then on OK twice to close the Project Creation Assistant.
You can now open the project and update the schema.
From here on the procedure to create objects is the same as in any other project:
Go to the Schema Objects | Attributes folder, and create a new Product attribute with these columns:
ID:
Tables: product_dimension (lookup) and store_sales_fact
Column: product_key
DESC:
Table: product_dimension (lookup)
Column: product_description
Create a new Category attribute with this column:
ID:
Table: product_dimension (lookup)
Column: category_description
Set the Product attribute as a child of Category.
Go to the Fact folder and create a new Sales Dollar Amount fact with the
sales_dollar_amountcolumn from thestores_sales_facttable.Go to the Public Objects | Metrics folder and create a new Sales Dollar Amount metric based on the Sales Dollar Amount fact with
Sumas aggregation function.Go to My Personal Objects | My Reports and create a new report with the Category attribute and the Sales Dollar Amount metric, see image:

Congratulations, you just created your first Vertica report, and it runs pretty fast for a 5 million fact table.
MicroStrategy generates the correct SQL, provided that we import the prefix when selecting the tables in the Warehouse Catalog window; other than that, there is no difference from other systems.
In the download section of the Vertica Community Edition website, in addition to ODBC and JDBC drivers for several platforms, you'll find connectors to work with Hadoop (including Cloudera distribution) and Informatica plugins.
Well, I think there are no more pages left...
This was the last recipe; I would like to thank you for your attention and endurance. I hope you enjoyed the book as much as I did writing it. I have put all my efforts into being as clear and precise as possible; however, in case you find some inaccuracies I would appreciate your feedback at <[email protected]>.
If you liked the book, please tell your friends.