

We have done sufficient groundwork to understand the Hadoop data storage and computation model in previous sections. Now we can write our first MapReduce program to put our knowledge in practice.
In this problem, we will calculate the yearly average stock price of IBM from the daily stock quotes.
Publicly traded companies have fluctuating stock prices. The stock prices are available on various finance portals where you can track day-by-day movement in stock prices. Such datasets are in the public domain. We will download one such dataset that contains the historical daily stock price of IBM (Symbol: IBM). The historical stock price of IBM is available on Yahoo Finance in various formats on this URL: http://finance.yahoo.com/q/hp?s=IBM. The historical price dataset covers the stock prices from 2nd Jan 1962 until today.
We will divide the solution to stock averaging into a problem in several small steps as follows:
Get the dataset
Study the dataset
Cleanse the dataset
Load the dataset on the HDFS
Code and build a MapReduce program
Run the MapReduce program
Examine the result
Further processing of the results
Each small step will help bring us closer to the final solution. Note that we are running a single node Hadoop cluster on an Ubuntu machine installed on Virtual Box. The Virtual Box itself is running on OS X Yosemite version 10.10.2.
On my Ubuntu machine, I can check the OS version as follows:
hduser@anurag-VirtualBox:~$ uname -a
Linux anurag-VirtualBox 3.19.0-25-generic #26~14.04.1-Ubuntu SMP Fri Jul 24 21:16:20 UTC 2015 x86_64 x86_64 x86_64 GNU/Linux
You can see the historical stock price of IBM on Yahoo Finance by visiting its URL at http://finance.yahoo.com/q/hp?s=IBM. You can view the prices on your browser as shown in Figure 10. We are interested in daily stock prices so that we can create a yearly average.
We will first get the dataset from Yahoo's finance website using the wget command, and then save the results in a file called ibmstockquotes.txt:
hduser@anurag-VirtualBox:~$ wget -O ibmstockquotes.txt http://real-chart.finance.yahoo.com/table.csv?s=IBM
--2015-08-24 19:52:51--  http://real-chart.finance.yahoo.com/table.csv?s=IBM
Resolving real-chart.finance.yahoo.com (real-chart.finance.yahoo.com)... 188.125.66.140
Connecting to real-chart.finance.yahoo.com (real-chart.finance.yahoo.com)|188.125.66.140|:80... connected.
HTTP request sent, awaiting response... 200 OK
Length: unspecified [text/csv]
Saving to: 'ibmstockquotes.txt'

    [   <=>                                 ] 861,145     1.67MB/s   in 0.5s

2015-08-24 19:52:52 (1.67 MB/s) - 'ibmstockquotes.txt' saved [861145]
Now we have downloaded the historical stock price data of IBM going back to January 02, 1962 in a file. The file ibmstockquotes.txt contains this data. This file has 13,504 lines in this file, as of August 24, 2015, but none of these lines would depend on when you downloaded this data:
hduser@anurag-VirtualBox:~$ wc -l ibmstockquotes.txt
13504 ibmstockquotes.txt

Let's open the dataset using the head command and examine its contents:
hduser@anurag-VirtualBox:~$ head ibmstockquotes.txt
Date,Open,High,Low,Close,Volume,Adj Close
2015-08-21,151.50,153.190002,148.699997,148.850006,7304900,148.850006
2015-08-20,152.740005,153.910004,152.50,152.660004,3949500,152.660004
2015-08-19,155.149994,155.669998,153.410004,153.940002,4177100,153.940002
2015-08-18,155.509995,156.520004,155.25,156.009995,2013800,156.009995
2015-08-17,155.199997,156.690002,154.699997,156.309998,2242100,156.309998
2015-08-14,155.00,156.210007,154.580002,155.75,3220300,155.75
2015-08-13,156.059998,156.089996,154.320007,155.070007,2505800,155.070007
2015-08-12,154.259995,156.520004,153.949997,156.160004,3560300,156.160004
2015-08-11,155.960007,155.990005,154.860001,155.509995,3143300,155.509995
In this dataset, we have the date, the opening stock quote, the day's high, the day's low, the traded volume and the closing price. The fields are separated by a comma and the first line in the dataset is the header. We will use the opening stock quote to calculate the average. Except for the date and the opening quote, all other fields in this dataset will not be used in the solution.
If the quality of the dataset is not very good, then it should be cleansed before we load it on our single node Hadoop cluster. A good quality dataset is a must for processing. In a bad quality dataset, you might find problems such as missing data fields, data field header mismatches, missing entries and missing delimiters such as commas.
Tip
For very large datasets, it is time-consuming to visually scan the data line by line to check its quality. Therefore, we can cleanse the datasets using common Unix tools such as awk, sed, and grep, or commercial tools such as Talend Open Studio for Data Quality.
Our dataset ibmstockquote.txt is a clean and well-structured dataset, which does not require much cleansing. The first row in the dataset is the header data, which need not be processed. Using a text editor tool such as vieditor, we will remove the first line containing the header from this dataset. We can also remove the first line using the Unix stream editor sed as follows:
$sed '1d' ibmstockquote.txt > ibmstockquote.clean.txt
We also notice that this file contains additional data such as the day's low, day's high, the volume and the closing price, which we do not need to process. We can either remove this data from this dataset, or just leave it as it is, in case we need it for other problems. In this case, we just leave the additional data in the dataset.
At the end of this step, our dataset ibmstockquote.txt has the header line removed, and now it is ready to be loaded on the Hadoop cluster in the next step.
We will use the Hadoop filesystem command to put our dataset on the HDFS. We will first create a directory structure on the HDFS to store our dataset. We will use this directory structure to put the dataset ibmstockquote.txt from our local filesystem on the HDFS.
Let's list the root directory of our Hadoop cluster:
hduser@anurag-VirtualBox:~$ hadoop fs -ls /
Found 2 items
drwx------   - hduser supergroup          0 2015-08-24 11:53 /tmp
drwxr-xr-x   - hduser supergroup          0 2015-08-24 10:50 /user
We will make a new directory structure for our examples, which will be /hbp/chapt1:
hduser@anurag-VirtualBox:~$ hadoop fs -mkdir /hbp
hduser@anurag-VirtualBox:~$ hadoop fs -mkdir /hbp/chapt1
We will copy our dataset in the new directory /hbp/chapt1:
hduser@anurag-VirtualBox:~$ hadoop fs -put ibmstockquotes.txt /hbp/chapt1
Let's examine the contents of the directory /hbp/chapt1 to see if our file is on the Hadoop filesystem:
hduser@anurag-VirtualBox:~$ hadoop fs -ls /hbp/chapt1
Found 1 items
-rw-r--r--   1 hduser supergroup     861145 2015-08-24 21:00 /hbp/chapt1/ibmstockquotes.txt
We can also check the contents of the directory by using the web interface of the HDFS on the URL http://localhost:50070/explorer.html#/hbp/chapt1 as shown in Figure 11. We are running a single node Hadoop cluster locally on the PC. In a production environment, typically the name localhost will be replaced with the hostname or IP address of the NameNode.

Click on the link ibmstockquotes.txt. We can see that the block size for this dataset is 128 MB, and it has occupied exactly one block on the HDFS. If you click the filename link then you will see the additional information such as the block ID and generation stamp, as shown in Figure 12.

In this example, we will write a MapReduce program using the Java programming language. For Java programming, we will make use of the Eclipse IDE to build and package the programs.
You can download Eclipse from https://www.eclipse.org/downloads/.
Note
We have used Eclipse Java EE IDE, 64 bit, for Web Developers Mars Release (4.5.0) in the examples used in this book.
I am using a MacBook Pro to run Eclipse. After installing of Eclipse, launch it by clicking on the Eclipse icon.
The Eclipse select workspace dialog should pop up. This indicates that Eclipse has been successfully installed.
Let's create a new workspace in Eclipse in the directory <your directory>/workspace/hbp/chapt1 and go to the Eclipse workbench by clicking the workbench icon.
We will now install the Hadoop Development tools. You can download the Hadoop Development Tools from http://hdt.incubator.apache.org/download.html.
After downloading, unzip and untar the file in your local directory. Now go to Eclipse Help | Install New Software. In the pop-up dialog, as shown in Figure 13 Adding Hadoop Development Tools in Eclipse, click on the Add. button. You will see another dialog box. In this dialog box, specify the local repository in the directory where you have untared the downloaded file.

We have now set up the environment to start creating our MapReduce project in Eclipse.
We will create a Maven project in Eclipse. Navigate to File | New | Maven Project. We will see the window shown in the following screenshot:

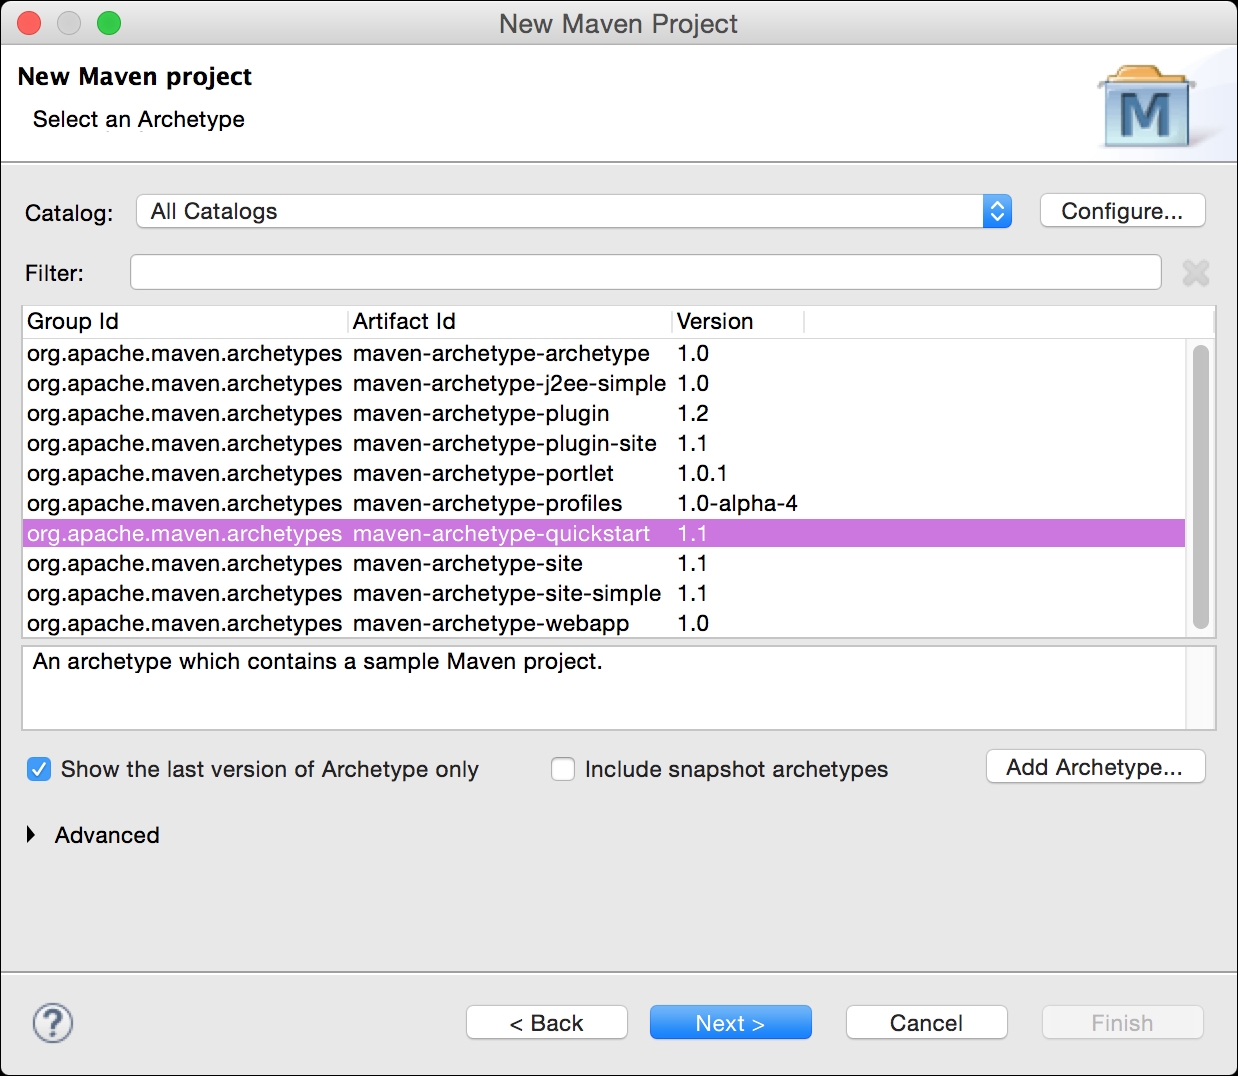
Check the default workspace location and click on the Next button. In the next window, shown in Figure 15, we choose archetype-quickstart and click on the Next button.
We will see the window shown in Figure 16. In this window, we will specify the GroupID and ArtifactId as show in the window. Now click on the Finish button. This will trigger the creation of a Maven project in Eclipse. Eclipse will create the file pom.xml which contains build dependencies and the basic directory structure for the project. It will also create an App.java file. We will not use this file, so you can delete it from your project.

We will need to specify the dependency on the Hadoop libraries in the pom.xml of Maven so that we can build our programs. To do so, you should open the pom.xml file in your newly created project. Add the following lines in the dependencies section of the pom.xml file as shown in Figure 17:
<dependency>
<groupId>org.apache.hadoop</groupId>
<artifactId>hadoop-client</artifactId>
<version>2.7.1</version>
</dependency>

We are building a simple MapReduce program in Java. This program has three Java files:
Mapper :
StockAverageMapper.javaReducer:
StockAverageReducer.javaDriver:
StockAverageDriver.java
We will first create our Mapper file by navigating to File | New | Other in Eclipse. Locate Hadoop in the dialog that has just popped up, as shown in Figure 18. Click on the Next button.

On the next screen, specify the name of your Mapper class, which is StockAverageMapper, as shown in Figure 19.

Now open the newly created StockAverageMapper.java file in Eclipse, and replace the contents of the file with the listing given here:
package hbp.chapt1;

import java.io.IOException;
import org.apache.hadoop.io.DoubleWritable;
import org.apache.hadoop.io.LongWritable;
import org.apache.hadoop.io.Text;
import org.apache.hadoop.mapreduce.Mapper;

public class StockAverageMapper extends Mapper<LongWritable, Text,  Text, DoubleWritable> {
  private DoubleWritable quote = new DoubleWritable(1);
    private Text word = new Text();
  public void map(LongWritable key, Text value, Context context)    throws IOException, InterruptedException {

    //Extract the tokens from the line text
    String line = value.toString();
    String[] tokens = line.split(",");

    //Extract the year value from date
    String year = tokens[0].split("-")[0];

    //Extract the stock quote and convert it into a number
    String quoteStr = tokens[1];
    double quoteVal = Double.parseDouble(quoteStr);

    //Set the key
        word.set(year);

        //Set the value
        quote.set(quoteVal);

        context.write(word, quote);

  }
}
Using steps similar to the ones described in the Mapper class creation, you will now create the Reducer class. Replace the contents of the newly created class with the following listing:
package hbp.chapt1;

import java.io.IOException;

import org.apache.hadoop.io.DoubleWritable;
import org.apache.hadoop.io.Text;
import org.apache.hadoop.mapreduce.Reducer;

public class StockAverageReducer extends Reducer<Text, DoubleWritable, Text, DoubleWritable> {

  public void reduce(Text key, Iterable<DoubleWritable> values,    Context context)
      throws IOException, InterruptedException {
    double quoteAverage = 0;
    double quoteTotal = 0;
    int quoteCount = 0;
    for (DoubleWritable value : values) {
      quoteTotal += value.get();
      System.out.println("Reducer: " + key + " "+ quoteTotal);
      quoteCount++;
    }
    quoteAverage = quoteTotal/quoteCount;
    context.write(key, new DoubleWritable(quoteAverage));
  }

}
Using steps similar to the ones described in the Mapper class creation, you will now create the Driver class. Replace the contents of the newly created class StockAverageDriver with the following listing:
package hbp.chapt1;

import java.io.IOException;

import org.apache.hadoop.fs.Path;
import org.apache.hadoop.io.DoubleWritable;
import org.apache.hadoop.io.Text;
import org.apache.hadoop.mapreduce.Job;
import org.apache.hadoop.mapreduce.lib.input.FileInputFormat;
import org.apache.hadoop.mapreduce.lib.output.FileOutputFormat;

public class StockAverageDriver {

  public static void main(String[] args) throws IOException,
  InterruptedException, ClassNotFoundException {

    Job job = Job.getInstance();

    job.setJarByClass(StockAverageMapper.class);

    job.setJobName( "First Job"  );

    FileInputFormat.setInputPaths(job, new Path(args[0]));
    FileOutputFormat.setOutputPath(job, new Path(args[1]));

    job.setMapperClass(StockAverageMapper.class);
    job.setReducerClass(StockAverageReducer.class);
    job.setOutputKeyClass(Text.class);
    job.setOutputValueClass(DoubleWritable.class);

    boolean success = job.waitForCompletion(true);
    System.exit(success ? 0 : 1);
  };

} We are now ready to run our MapReduce program. We will first run this program locally on our Unix file system before running it on HDFS. In Eclipse, click on Run | Run Configurations…. We will see the dialog shown in Figure 20 Input file and output directory for MapReduce job. We go to the Arguments tab and specify these two values in the Program arguments field:
Input filename:
ibm-stock.csvOutput directory name:
output
Make sure that the file ibm-stock.csv exists in your local project directory. Click on the Run button now. Congratulations. Now you are running your MapReduce program.

After running the program, go to the project directory using a terminal window. Run an ls -l command in your shell. You will see a new directory output. This directory has been created by running your MapReduce program. Run the directory listing for the output directory using an ls -l output command.
In the output directory, you will see two files. The first file is _SUCCESS which indicates that our program has run successfully. The second file is part-r-00000 which contains the results of our MapReduce execution.

We have successfully run the MapReduce program on our desktop. We used this program to process the files stored on our local file system Now, let's run this program on our Hadoop server on a file stored on the HDFS.
Create a JAR file for your program. To do so, right-click on the pom.xml file and go to Run As | Maven build. You will see the Edit Configuration window. Type package in the Field Goals and click on the Run button. You have now created a JAR file called chapt1-0.0.1.SNAPSHOT.jar.
First let's copy the file MapReduce.jar file onto our Hadoop system, where we have the correct environment and libraries to run this program. We have copied this file to our Hadoop system using the scp command:
$ pwd
/Users/anurag/hdproject/eclipse/chapt1
$ ls
ibm-stock.csv  pom.xml    target
output    src
$ ls target
chapt1-0.0.1-SNAPSHOT.jar  maven-status
classes        surefire-reports
maven-archiver      test-classes
$ scp chapt1-0.0.1-SNAPSHOT.jar [email protected]:/home/hduser
[email protected]'s password:
chapt1-0.0.1-SNAPSHOT.jar                           100% 5095     5.0KB/s   00:00
You will recall that you have already copied ibm-stock.csv onto the HDFS in the HDFS directory /hbp/chapt1. You can verify this by running the following command:
hduser@anurag-VirtualBox:~$ hadoop fs -ls /hbp/chapt1
Found 1 items
-rw-r--r--   1 hduser supergroup     861145 2015-08-24 21:00 /hbp/chapt1/ibmstockquotes.txt
Now we will run our program on the Hadoop system using the following command:
hduser@anurag-VirtualBox:~$ hadoop jar chapt1-0.0.1-SNAPSHOT.jar hbp.chapt1.StockAverageDriver /hbp/chapt1/ibmstockquotes.txt /hbp/chapt1/output
Let's examine the contents of the output directory:
hduser@anurag-VirtualBox:~$ hadoop fs -ls /hbp/chapt1/output15/09/12
Found 2 items
-rw-r--r--   1 hduser supergroup          0 2015-09-12 19:16 /hbp/chapt1/output/_SUCCESS
-rw-r--r--   1 hduser supergroup       1273 2015-09-12 19:16 /hbp/chapt1/output/part-r-00000
We can see the part-r-00000 file on the HDFS that contains the output of our MapReduce job.
We have successfully run our MapReduce job but our results are still stored on the HDFS. Now we can use the HDFS copy command to copy the results file to the local filesystem for further processing using other tools such as Microsoft Excel:
hduser@anurag-VirtualBox:~$ hadoop fs -get /hbp/chapt1/output/part-r-00000 /home/hduser/results.csv
Let's view the contents of the file:
hduser@anurag-VirtualBox:~$ head results.csv
1962  433.3511795396825
1963  448.48554415139404
1964  489.16551569960467
1965  480.82985311111105
1966  408.9866005873015
1967  499.4905379123505
1968  425.8838481415928
1969  328.94249967600007
1970  297.1336121732284
1971  321.8779635454545
We have averaged the stock prices by year using Hadoop.