


Let's dive right in and get what you need installed to actually develop Python code with data science on your desktop. I'm going to walk you through installing a package called Enthought Canopy which has both the development environment and all the Python packages you need pre-installed. It makes life really easy, but if you already know Python you might have an existing Python environment already on your PC, and if you want to keep using it, maybe you can.
The most important thing is that your Python environment has Python 3.5 or newer, that it supports Jupyter Notebooks (because that's what we're going to use in this course), and that you have the key packages you need for this book installed on your environment. I'll explain exactly how to achieve a full installation in a few simple steps - it's going to be very easy.
Let's first overview those key packages, most of which Canopy will be installing for us automatically for us. Canopy will install Python 3.5 for us, and some further packages we need including: scikit_learn, xlrd, and statsmodels. We'll need to manually use the pip command, to install a package called pydot2plus. And that will be it - it's very easy with Canopy!
Once the following installation steps are complete, we'll have everything we need to actually get up and running, and so we'll open up a little sample file and do some data science for real. Now let's get you set up with everything you need to get started as quickly as possible:
- The first thing you will need is a development environment, called an IDE, for Python code. What we're going to use for this book is Enthought Canopy. It's a scientific computing environment, and it's going to work well with this book:

- To get Canopy installed, just go to www.enthought.com and click on DOWNLOADS: Canopy:

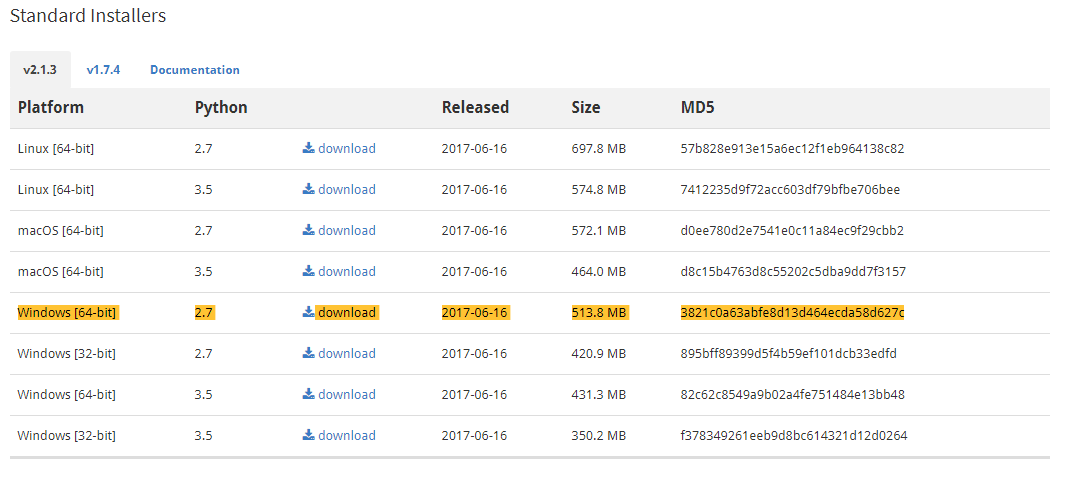
- Enthought Canopy is free, for the Canopy Express edition - which is what you want for this book. You must then select your operating system and architecture. For me, that's Windows 64-bit, but you'll want to click on corresponding Download button for your operating system and with the Python 3.5 option:
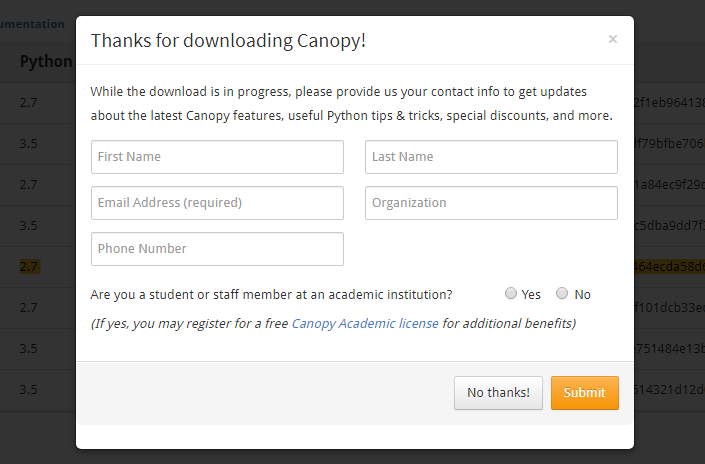
- We don't have to give them any personal information at this step. There's a pretty standard Windows installer, so just let that download:
- After that's downloaded we go ahead and open up the Canopy installer, and run it! You might want to read the license before you agree to it, that's up to you, and then just wait for the installation to complete.
- Once you hit the Finish button at the end of the install process, allow it to launch Canopy automatically. You'll see that Canopy then sets up the Python environment by itself, which is great, but this will take a minute or two.
- Once the installer is done setting up your Python environment, you should get a screen that looks like the one below. It says welcome to Canopy and a bunch of big friendly buttons:

- The beautiful thing is that pretty much everything you need for this book comes pre-installed with Enthought Canopy, that's why I recommend using it!
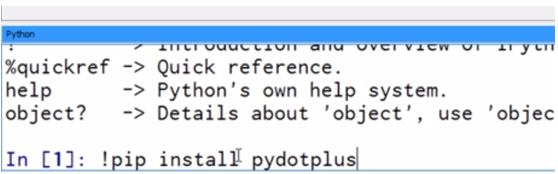
- There is just one last thing we need to set up, so go ahead and click the Editor button there on the Canopy Welcome screen. You'll then see the Editor screen come up, and if you click down in the window at the bottom, I want you to just type in:
!pip install pydotplus
- Here's how that's going to look on your screen as you type the above line in at the bottom of the Canopy Editor window; don't forget to press the Return button of course:
- One you hit the Return button, this will install that one extra module that we need for later on in the book, when we get to talking about decision trees, and rendering decision trees.
- Once it has finished installing pydotplus, it should come back and say it's successfully installed and, voila, you have everything you need now to get started! The installation is done, at this point - but let's just take a few more steps to confirm our installation is running nicely.


