-
Book Overview & Buying
-
Table Of Contents

Mathematics for Game Programming and Computer Graphics
By :
Mathematics for Game Programming and Computer Graphics
By:
Overview of this book
Mathematics is an essential skill when it comes to graphics and game development, particularly if you want to understand the generation of real-time computer graphics and the manipulation of objects and environments in a detailed way. Python, together with Pygame and PyOpenGL, provides you with the opportunity to explore these features under the hood, revealing how computers generate and manipulate 3D environments.
Mathematics for Game Programming and Computer Graphics is an exhaustive guide to getting “back to the basics” of mathematics, using a series of problem-based, practical exercises to explore ideas around drawing graphic lines and shapes, applying vectors and vertices, constructing and rendering meshes, and working with vertex shaders. By leveraging Python, Pygame, and PyOpenGL, you’ll be able to create your own mathematics-based engine and API that will be used throughout to build applications.
By the end of this graphics focussed book, you’ll have gained a thorough understanding of how essential mathematics is for creating, rendering, and manipulating 3D virtual environments and know the secrets behind today’s top graphics and game engines.
Table of Contents (26 chapters)
Preface

Part 1 – Essential Tools
 Free Chapter
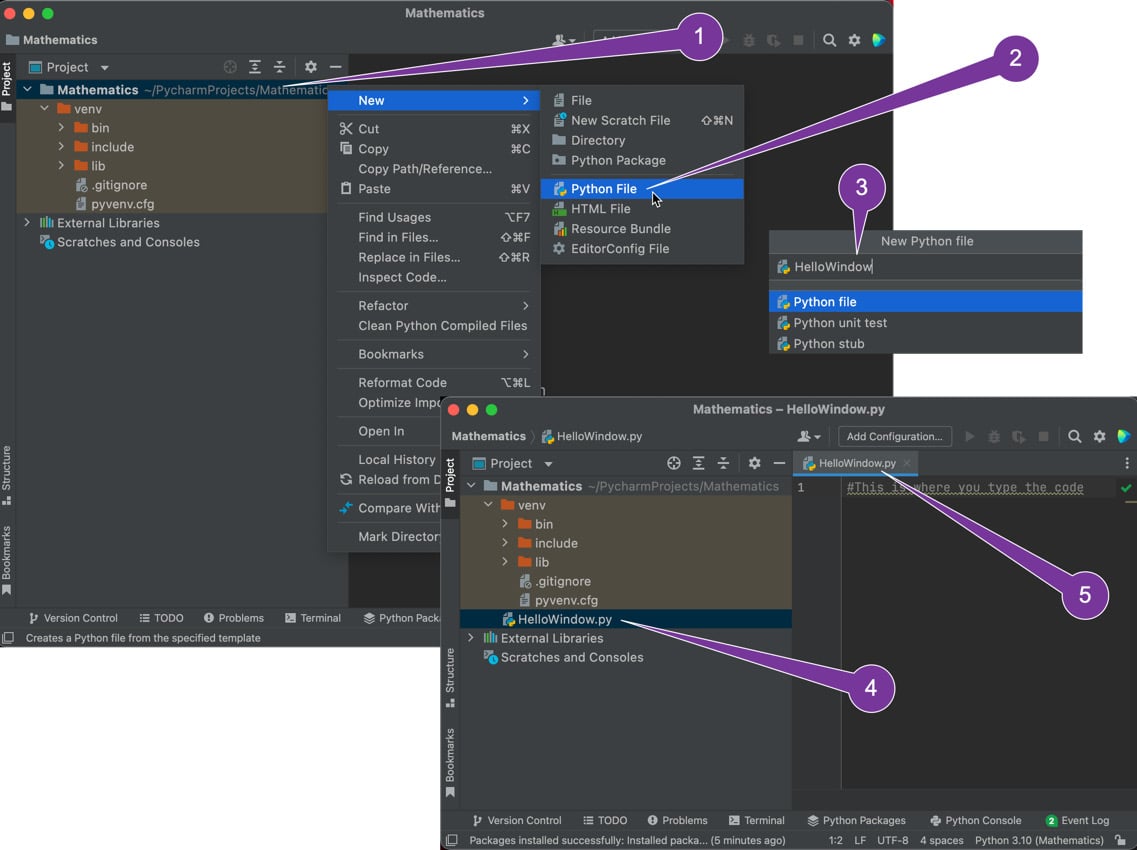
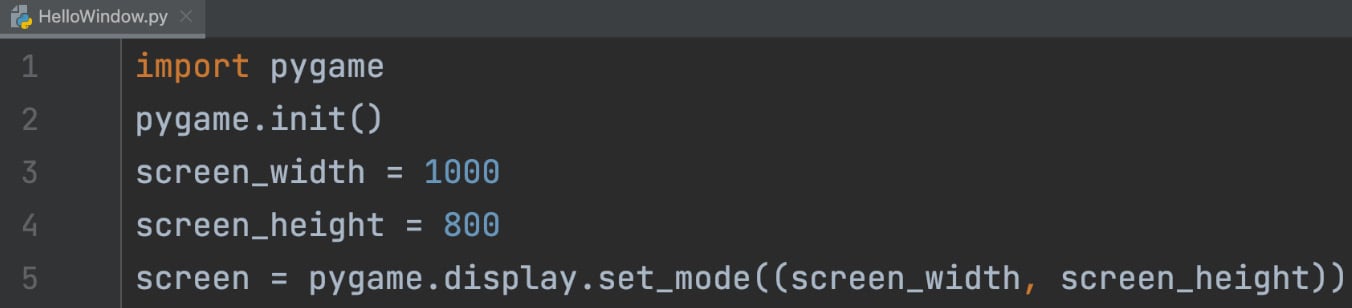
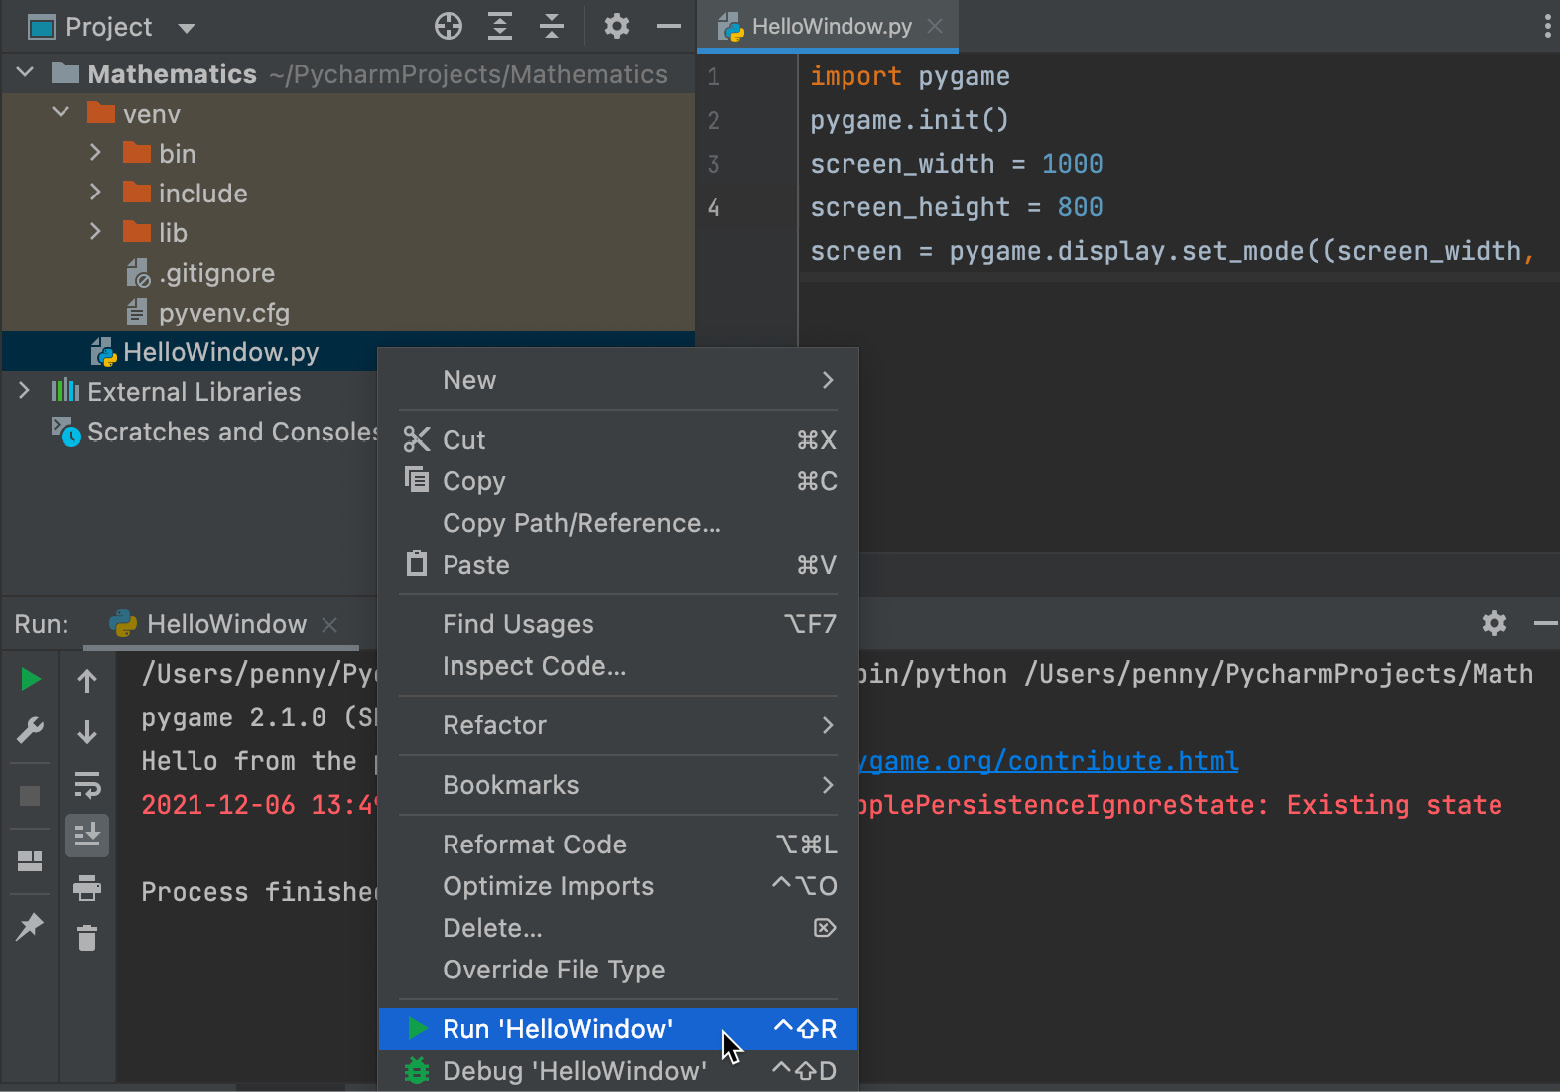
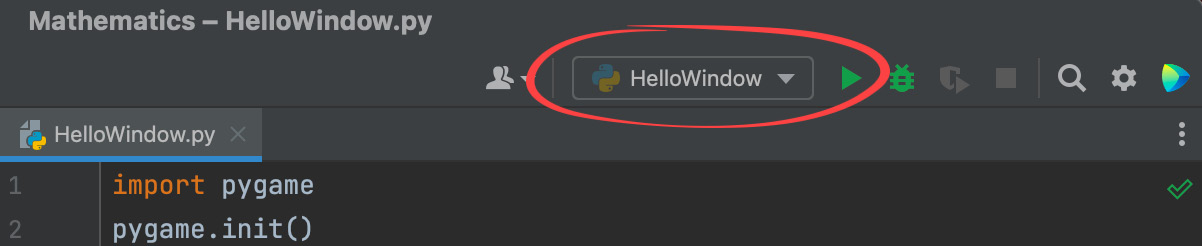
Chapter 1: Hello Graphics Window: You’re On Your Way
Chapter 2: Let’s Start Drawing
Chapter 3: Line Plotting Pixel by Pixel
Chapter 4: Graphics and Game Engine Components
Chapter 5: Let’s Light It Up!
Chapter 6: Updating and Drawing the Graphics Environment
Chapter 7: Interactions with the Keyboard and Mouse for Dynamic Graphics Programs
Part 2 – Essential Trigonometry
Chapter 8: Reviewing Our Knowledge of Triangles
Chapter 9: Practicing Vector Essentials
Chapter 10: Getting Acquainted with Lines, Rays, and Normals
Chapter 11: Manipulating the Light and Texture of Triangles
Part 3 – Essential Transformations
Chapter 12: Mastering Affine Transformations
Chapter 13: Understanding the Importance of Matrices
Chapter 14: Working with Coordinate Spaces
Chapter 15: Navigating the View Space
Chapter 16: Rotating with Quaternions
Part 4 – Essential Rendering Techniques
Chapter 17: Vertex and Fragment Shading
Chapter 18: Customizing the Render Pipeline
Chapter 19: Rendering Visual Realism Like a Pro
Index
Other Books You May Enjoy