Now we are going to change the example a bit. We are going to make a pause dialog from which we can resume or stop the game. This dialog will be shown if the user taps on the pause button and if he or she hits the back key.
Finally, we are going to add one fragment from which the player can start the game and we will separate the game fragment from the menu.
So, we'll be creating MainMenuFragment.java and fragment_main_menu.xml. The content of the layout will be extremely simple:
<?xml version="1.0" encoding="utf-8"?>
<FrameLayout xmlns:android="http://schemas.android.com/apk/res/android"
  android:layout_width="match_parent"
  android:layout_height="match_parent">

  <TextView
    android:layout_gravity="center_horizontal|top"
    style="@android:style/TextAppearance.DeviceDefault.Large"
    android:layout_marginTop="@dimen/activity_vertical_margin"
    android:text="@string/game_title"
    android:layout_width="wrap_content"
    android:layout_height="wrap_content" />

  <Button
    android:id="@+id/btn_start"
    android:layout_width="wrap_content"
    android:layout_height="wrap_content"
    android:layout_gravity="center"
    android:text="@string/start" />

</FrameLayout>
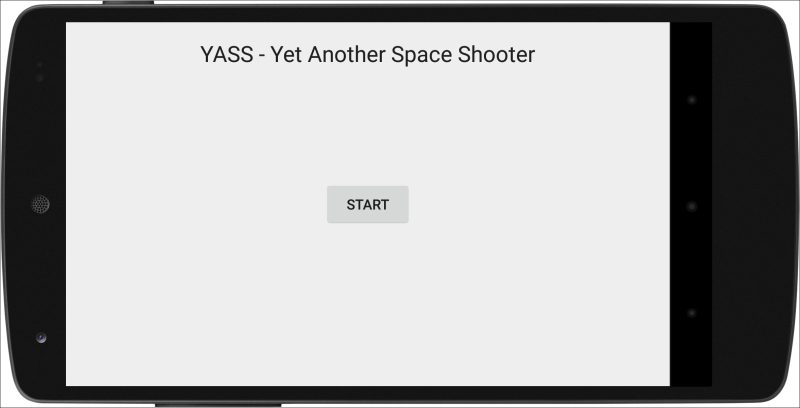
This includes the app title on the screen and a button to start playing:
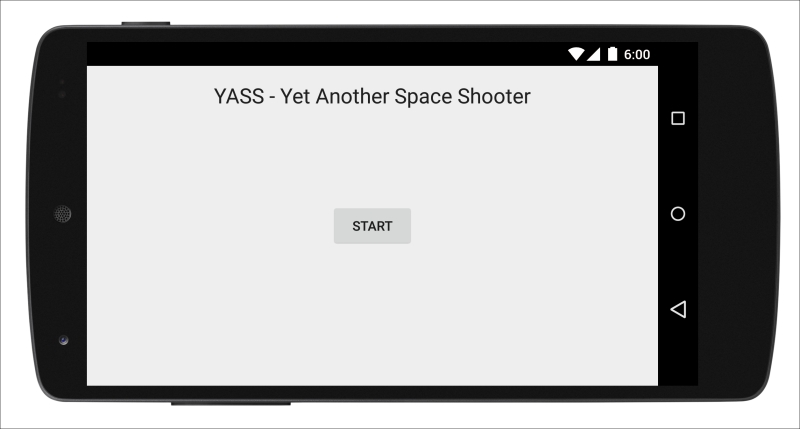
Inside this fragment, we add a listener to the start button and we make it call the startGame method. The code of the startGame method is very simple as well:
public void startGame() {
  getFragmentManager()
    .beginTransaction()
    .replace(R.id.container, new GameFragment(), TAG_FRAGMENT)
    .addToBackStack(null)
    .commit();
}
We are using the fragment manager to transition from the current fragment to GameFragment.
The beginTransition method creates the transition itself and we can configure it with chained methods.
We are replacing the fragment inside the view with the R.id.container id with a GameFragment. This will remove the old fragment. If we use add, both fragments will be shown instead.
Then, we add the fragment to the back stack with no tag, since we don't need any. This is very important, because it allows the system to handle the back key properly. Everything that is on the back stack of the fragment manager will pop up when the back key is pressed.
If we do not add the fragment to the back stack, the default behavior when we tap on the back key will be to close the app. With the fragment on the back stack, we can just rely on the system to handle fragment navigation properly.
Finally, we commit the transition so the fragment is replaced.
Inside the game fragment we have already, we will remove the start/stop dialog and modify the pause button to show a dialog from where we can resume or exit the current game.
We want the game to start immediately, so the onViewCreated method of the GameFragment will now look like this:
@Override
public void onViewCreated(View view, Bundle savedInstanceState) {
  super.onViewCreated(view, savedInstanceState);
  mGameEngine = new GameEngine(getActivity());
  mGameEngine.addGameObject(
    new ScoreGameObject(view, R.id.txt_score));
  view.findViewById(R.id.btn_play_pause)
    .setOnClickListener(this);
  mGameEngine.startGame();
}
We will also modify the onClick method, removing the old code to start or stop, so it looks like this:
@Override
public void onClick(View v) {
  if (v.getId() == R.id.btn_play_pause) {
    pauseGameAndShowPauseDialog();
  }
}
This simpler version only cares about pausing the game and showing a dialog when the pause button is clicked.
For now, we are going to create a default dialog using the AlertDialog framework:
private void pauseGameAndShowPauseDialog() {
  mGameEngine.pauseGame();
  new AlertDialog.Builder(getActivity())
  .setTitle(R.string.pause_dialog_title)
  .setMessage(R.string.pause_dialog_message)
  .setPositiveButton(R.string.resume,
  new DialogInterface.OnClickListener() {
    @Override
    public void onClick(DialogInterface dialog, int which) {
      dialog.dismiss();
      mGameEngine.resumeGame();
    }
  })
  .setNegativeButton(R.string.stop,
    new DialogInterface.OnClickListener() {
    @Override
    public void onClick(DialogInterface dialog, int which) {
      dialog.dismiss();
      mGameEngine.stopGame();
      ((MainActivity)getActivity()).navigateBack();
    }
  })
  .create()
  .show();
}
The positive button will resume the game, so it calls resumeGame in the game engine.
The negative button will exit the game, so it calls stopGame in the GameEngine and then navigateBack in the parent Activity.
The navigateBack method is nothing more than handling a back key pressed in the activity:
public void navigateBack() {
  super.onBackPressed();
}
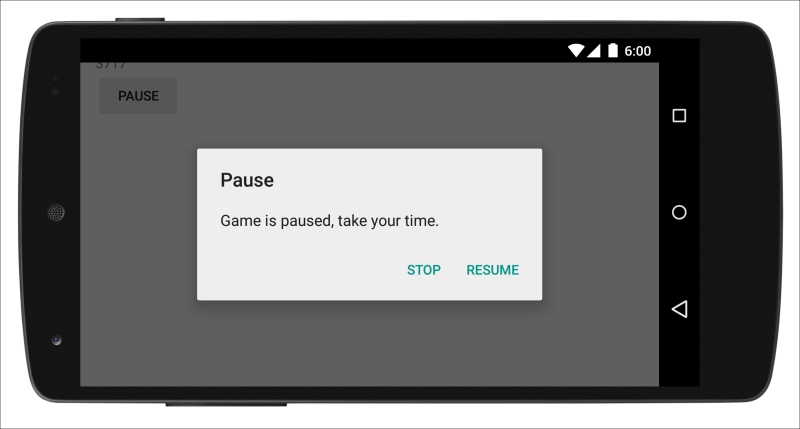
Since we put the fragment in the navigation stack, the MainMenuFragment will be loaded again and the GameFragment will be destroyed. The following is how the Pause dialog looks:
One of the things we want to do is to handle the back key properly. This is something that upsets Android users when it does not work as expected inside games, so we'll be paying some special attention to it. There are two places where it does not work as expected right now.
If we dismiss the Pause dialog using the back key, the game will not resume.
While in the game fragment, the back key should pause the game. At the moment, the back key goes back to the
GameFragment.
For the first problem, we need to add an OnCancelListener to the dialog. This is different from OnDismissListener, which is called every time the dialog is dismissed. The cancel method is only called when the dialog is canceled.
Also, OnDismissListener was introduced in API level 17. Since we don't need it, we will not worry about raising the minSDK of the game.
We update the creation of the Pause dialog with the following code:
new AlertDialog.Builder(getActivity())
  [...]
  .setOnCancelListener(new DialogInterface.OnCancelListener() {
    @Override
    public void onCancel(DialogInterface dialog) {
      mGameEngine.resumeGame();
    }
  })
  .create()
  show();
The remaining item is to pause the game when the back key is pressed during the game. This is something that needs to be handled in the fragment. As it happens, onBakPressed is a method available only for activities. We need to code a way to expand this to the current fragment.
We are going to make use of our YassBaseFragment, the base class for all the fragments in our game, to add the support to onBackPressed. We will create one onBackPressed method here:
public class YassBaseFragment extends Fragment {
  public boolean onBackPressed() {
    return false;
  }
}
In the Activity, we update onBackClicked to allow the fragments to override it if needed:
@Override
public void onBackPressed() {
  final YassFragment fragment = (YassFragment)
    getFragmentManager().findFragmentByTag(TAG_FRAGMENT);
  if (!fragment.onBackPressed()) {
    super.onBackPressed();
  }
}
If the fragment does not handle the back key press, it will return false. Then, we just call the super method to allow the default behavior.
TAG_FRAGMENT is very important; it allows us to get the fragment we are adding and it is set when we add the fragment to FragmentTransition. Let's review the onCreate method of MainActivity, which was created by the wizard, and add the TAG_FRAGMENT to the initial FragmentTransition:
@Override
protected void onCreate(Bundle savedInstanceState) {
  super.onCreate(savedInstanceState);
  setContentView(R.layout.activity_yass);
  if (savedInstanceState == null) {
    getFragmentManager().beginTransaction()
      .add(R.id.container, new MainMenuFragment(), TAG_FRAGMENT)
      .commit();
  }
}
It is also very important that all the fragments of the application must extend from YassBaseFragment, otherwise this method will throw a ClassCastException.
With all the pieces in place, we now override the onBackPressed method inside GameFragment to show the
Pause dialog:
@Override
public boolean onBackPressed() {
  if (mGameEngine.isRunning()) {
    pauseGameAndShowPauseDialog();
    return true;
  }
  return false;
}
With this, the Pause dialog is shown when we click back while in the GameFragment. Note that we will only show the pause dialog if the GameEngine is running. When it is not running, we return false. The default behavior of Android will trigger and the Pause dialog, which must be showing, will be canceled.
Our game should also be consistent with the Activity lifecycle; especially, it should pause whenever the Activity pauses. This is very important for mainly two reasons:
If the game is put in the background, the user wants it to be paused when it returns
As long as the game is running, the update thread will be updating as fast as it can, so it will make the phone feel slower
With the current implementation, none of this will happen. You can try pressing the home button, you will see that the device does not feel responsive. Also, if you put the game again in the foreground using the recent activities button, you will see that the timer is still counting.
Solving this is very simple, we just need to be consistent with the fragment lifecycle, by adding this code to the
GameFragment:
@Override
public void onPause() {
  super.onPause();
  if (mGameEngine.isRunning()){
    pauseGameAndShowPauseDialog();
  }
}

@Override
public void onDestroy() {
  super.onDestroy();
  mGameEngine.stopGame();
}
With this, whenever the fragment is paused, we pause the game and show the dialog, so the player can resume again. Also, whenever the fragment is destroyed, we stop the game engine.
It is important to check whether the game engine is running or not before we pause it, since onPause is also called when we exit the game. So, if we forget to do this, exiting via the pause dialog will make the app crash.
We are building a game. We want to have all the screen space of the device and no distractions. There are two items that take this from us:
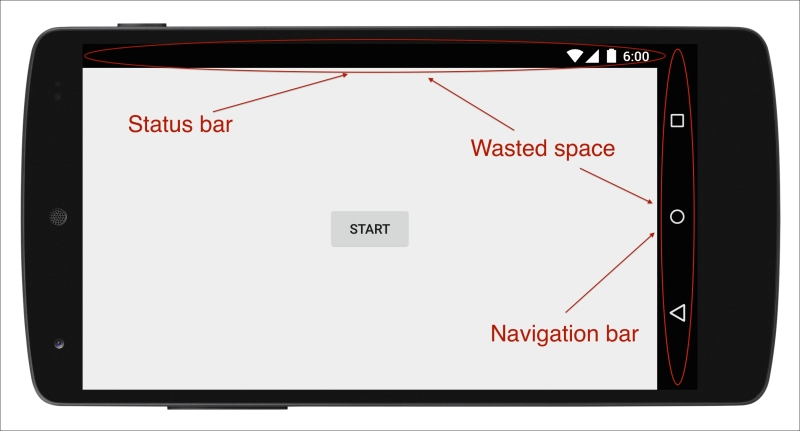
The Status and Navigation bars take up a significant amount of space on the screen
The Navigation bar was introduced on Ice Cream Sandwich as a replacement for physical buttons. But, even today, some manufacturers decide to use physical buttons instead, so it may or may not be there.
The first thing we can do is to tell the system that we want to be fullscreen. There is a flag with the SYSTEM_UI_FLAG_FULLSCREEN name, which seems to be what we are looking for.
The problem is that this flag was introduced in the early versions of Android when there was no Navigation bar. Back then, it really meant fullscreen but, from Ice Cream Sandwich onwards, it just means "remove the Status bar".
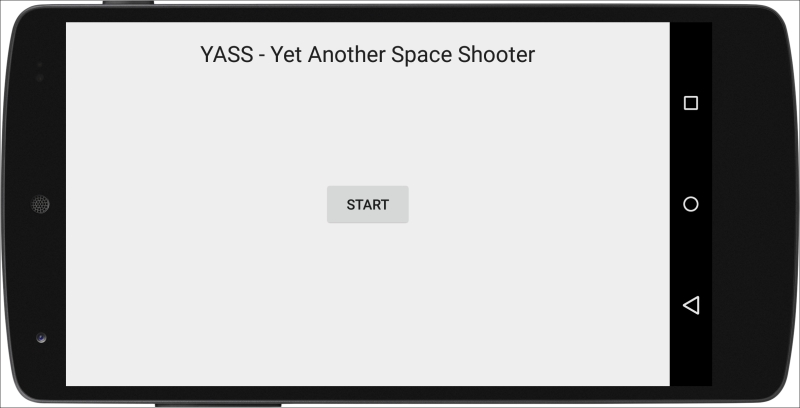
Fullscreen only makes the Status bar go away.
Along with the Navigation bar, some ways to handle fullscreen were added. The approach was revisited in KitKat. So, let's look at our options.
On Android 4.0, together with the Navigation bar, two new flags were added to handle the Navigation bar in addition to the existing fullscreen flag:
SYSTEM_UI_FLAG_HIDE_NAVIGATION: This tells the system to hide the Navigation barSYSTEM_UI_FLAG_LOW_PROFILE: This puts the device in "low profile" mode, dimming the icons on the Navigation bar and replacing them with just dots
While it is true that the "hide navigation" flag hides the Navigation bar completely, the bar will reappear as soon as you touch anywhere on the screen, since this mode is designed to be used for noninteractive activities such as video playback. So, SYSTEM_UI_FLAG_HIDE_NAVIGATION is not much use to us.
Using low profile to dim the navigation bar is a much more logical solution. Although we are not getting any extra screen space, the fact that the icons on the bar are reduced to small dots allows players to focus a lot more on the content. These icons will show when necessary (essentially, when the user taps on the bar) and dim again as soon as they are not needed.
Note
Hiding the navigation bar will only work fine for noninteractive apps. The Navigation bar will appear again as soon as you touch the screen.
All in all, we have to be happy with just dimming the Navigation bar and getting rid of the Status bar.
The low profile mode dims the Navigation bar so it is less obtrusive
This is the code we need to add to the MainActivity to remove the Status bar and put the device in a low profile mode:
@Override
public void onWindowFocusChanged(boolean hasFocus) {
  super.onWindowFocusChanged(hasFocus);
  if (hasFocus) {
    View decorView = getWindow().getDecorView();
    decorView.setSystemUiVisibility(View.SYSTEM_UI_FLAG_LAYOUT_STABLE
      | View.SYSTEM_UI_FLAG_LAYOUT_FULLSCREEN
      | View.SYSTEM_UI_FLAG_FULLSCREEN
      | View.SYSTEM_UI_FLAG_LOW_PROFILE);
  }
}
We are overriding the onWindowFocusChanged method in the main Activity. This is the recommended place to handle the flags, since it is called whenever the window focus changes. When the app regains focus, we don't know in which status the bars are. So, it is a good practice to ensure that things are the way we want them.
There are two more flags we haven't mentioned yet. They were introduced in API level 16 and are designed to take care of how the layout reacts to the appearance and disappearance of elements.
The SYSTEM_UI_FLAG_LAYOUT_STABLE flag means that the layout will be consistent, independent of the elements being shown or hidden.
The SYSTEM_UI_FLAG_LAYOUT_FULLSCREEN flag tells the system that our stable layout will be the one in the fullscreen mode—without the navigation bar.
This means that if/when the status bar is shown, the layout will not change, which is good, otherwise it will look like it is a glitch. It also means that we need to be careful with margins, so nothing important gets covered by the Status bar.
For Ice Cream Sandwich, SYSTEM_UI_FLAG_LAYOUT_STABLE does not work. But there are very few devices with this version and the Status bar is shown on very few occasions, so it is acceptable.
The real fullscreen mode was introduced in KitKat.
On KiKat, a new mode was introduced: the immersive mode.
Immersive mode hides the Status and Navigation bars completely. It is designed, as the name indicates, for fully-immersive experiences, which means games mostly. Even when the Navigation bar appears again, it is semitransparent instead of black and overlaid on top of the game.
Immersive mode can be used in two ways: normal and sticky. Both of them are fullscreen and the user is shown a tip the first time the app is put in this mode with an explanation of how to get out of it:
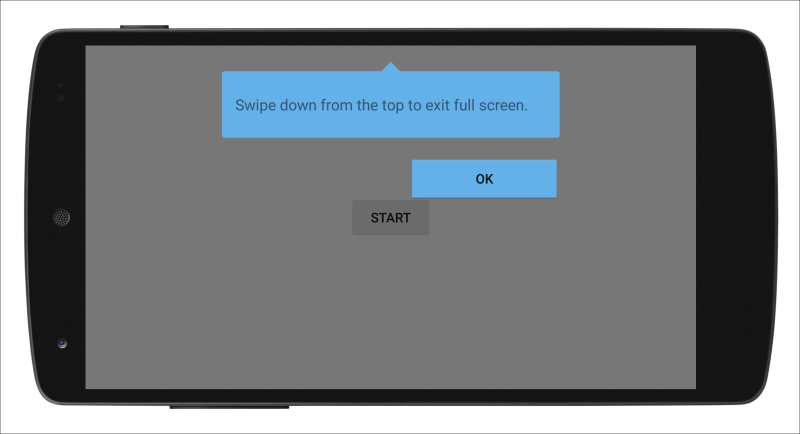
The immersive nonsticky mode will keep the Status and Navigation bars visible once they are shown, while the immersive sticky mode will hide them after a couple of seconds have passed, returning to the real fullscreen. The recommended mode for games is to use sticky immersion.
The code to put the app in the fullscreen sticky immersion mode is as follows:
@Override
public void onWindowFocusChanged(boolean hasFocus) {
  super.onWindowFocusChanged(hasFocus);
  if (hasFocus) {
    View decorView = getWindow().getDecorView();
    decorView.setSystemUiVisibility(View.SYSTEM_UI_FLAG_LAYOUT_STABLE
      | View.SYSTEM_UI_FLAG_LAYOUT_FULLSCREEN
      | View.SYSTEM_UI_FLAG_FULLSCREEN
      | View.SYSTEM_UI_FLAG_LAYOUT_HIDE_NAVIGATION
      | View.SYSTEM_UI_FLAG_HIDE_NAVIGATION
      | View.SYSTEM_UI_FLAG_IMMERSIVE_STICKY);
  }
}
In this case, as in the previous one, we are requesting the use of a stable layout, and we are making it as if it is fullscreen. This time, we include a flag to make the stable layout the one with no Navigation bar (SYSTEM_UI_FLAG_LAYOUT_HIDE_NAVIGATION).
We also add the flags to hide the Status bar (fullscreen) and the Navigation bar (hide navigation). Finally, we ask for the immersive sticky mode. The result is a real fullscreen game:
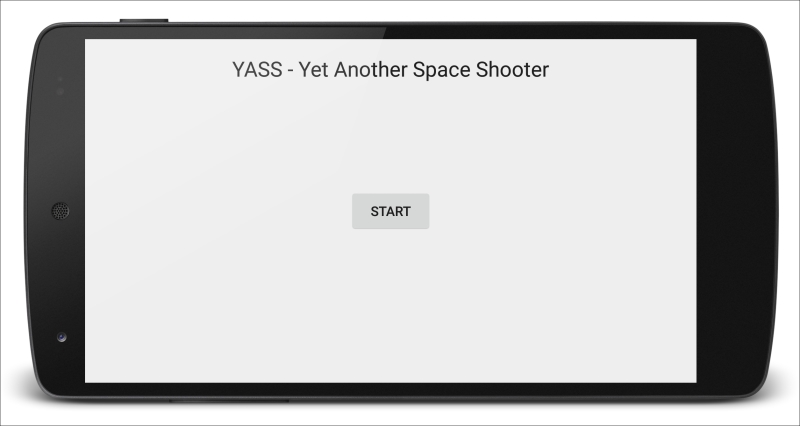
Immersive mode gives us all the screen space on the device
With this configuration, even when the user does a gesture to show the Status and Navigation bars, they are shown in a semitransparent way overlaid on top of our UI:
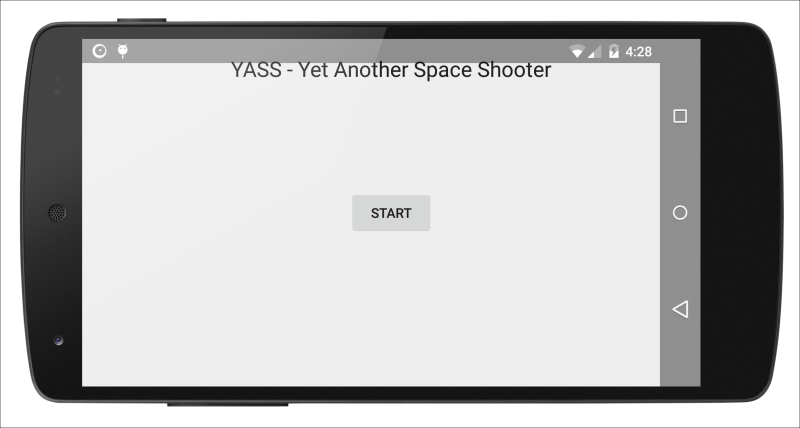
When the bars are shown while in sticky immersion mode, they are overlaid and semi transparent
Unfortunately, the sticky mode requires us to add the SYSTEM_UI_FLAG_HIDE_NAVIGATION flag to put the Navigation bar in the sticky mode. This has a very bad side-effect in the previous versions of Android, making the Navigation bar appear and disappear continuously as soon as you touch the screen, since this flag without the immersive mode means something different.
In addition to this, the SYSTEM_UI_FLAG_LOW_PROFILE flag does not have any effect on the versions in which the immersive mode is available. This makes sense, since it is considered a replacement and an improvement on it.
Since we have two different modes for requesting fullscreen, one prior to KitKat (low profile) and one from KitKat (immersive mode), and the flags for hiding the Navigation bar do not play together nicely, we need to make a different configuration based on which version of Android the device is running on:
@Override
public void onWindowFocusChanged(boolean hasFocus) {
  super.onWindowFocusChanged(hasFocus);
  if (hasFocus) {
    View decorView = getWindow().getDecorView();
    if (Build.VERSION.SDK_INT < Build.VERSION_CODES.KITKAT) {
      decorView.setSystemUiVisibility(View.SYSTEM_UI_FLAG_LAYOUT_STABLE
        | View.SYSTEM_UI_FLAG_LAYOUT_FULLSCREEN
        | View.SYSTEM_UI_FLAG_FULLSCREEN
        | View.SYSTEM_UI_FLAG_LOW_PROFILE);
    }
    else {
      decorView.setSystemUiVisibility(View.SYSTEM_UI_FLAG_LAYOUT_STABLE
        | View.SYSTEM_UI_FLAG_LAYOUT_FULLSCREEN
        | View.SYSTEM_UI_FLAG_FULLSCREEN
        | View.SYSTEM_UI_FLAG_LAYOUT_HIDE_NAVIGATION
        | View.SYSTEM_UI_FLAG_HIDE_NAVIGATION
        | View.SYSTEM_UI_FLAG_IMMERSIVE_STICKY);
    }
  }
}
With this code, we give the expected game experience to each one of the Android versions; a low profile with a dimmed Navigation bar on the versions older than KitKat and the full-immersive mode on the newer devices.


