

Cinema is licensed in a variety of configurations. It's important to understand which features are available in each version before purchasing a license.
The following is a list of the differences between Cinema 4D's various licensing schemes: Prime, Broadcast, Visualize, and Studio.
The difference between the licensing schemes as far as modeling is considered are as follows:
|
Prime |
Broadcast |
Visualize |
Studio | |
|---|---|---|---|---|
|
IGES importer |
X |
X | ||
|
Okino import |
X |
X | ||
|
Sculpting |
X |
When it comes to animation, the following list depicts the difference between the various licensing schemes:
|
Prime |
Broadcast |
Visualize |
Studio | |
|---|---|---|---|---|
|
Cappucino realtime keyframing |
X | |||
|
Driver tag |
X | |||
|
Virtual walkthrough |
X |
X | ||
|
Motion camera |
X |
X |
X | |
|
Thinking particles |
X | |||
|
MoGraph rigid dynamics |
X |
X | ||
|
Rigid and soft body dynamics |
X | |||
|
Cloth Dynamics |
X | |||
|
Hair Dynamics |
X | |||
|
Spline Dynamics |
X | |||
|
MoGraph |
X |
X | ||
|
Advanced character tools |
X |
In the fields of texturing, lighting, and rendering, the difference between the licensing schemes are as follows:
|
Prime |
Broadcast |
Visualize |
Studio | |
|---|---|---|---|---|
|
Camera Matching |
X |
X | ||
|
Sub-polygon displacement |
X |
X | ||
|
Sub-surface scattering |
X |
X |
X | |
|
Terrain mask shader |
X |
X | ||
|
Sketch and Toon |
X |
X | ||
|
Caustics |
X |
X | ||
|
IES lights |
X |
X | ||
|
Global illumination |
X |
X |
X | |
|
Physical renderer |
X |
X |
X | |
|
Depth-of-field post effect |
X |
X | ||
|
Vector motion blur post effect |
X |
X | ||
|
Renderman bridge |
X |
X | ||
|
Pyrocluster |
X |
X | ||
|
Network rendering clients |
0 |
3 |
3 |
unlimited |
When the additional content libraries are considered, the various licensing schemes differ as follows:
|
Prime |
Broadcast |
Visualize |
Studio | |
|---|---|---|---|---|
|
Advanced presets and demos |
X | |||
|
Additional Broadcast library |
X |
X | ||
|
Additional Visualize library |
X |
X |
In four easy steps, you can install Cinema 4D and get it set up on your system.
Before you install Cinema 4D, you will need to make sure that you have all of the required elements, which are listed as follows:
One of the following operating systems:
Mac OS 10.6.8 or higher
Windows XP (32/64 bit), Windows Vista (32/64 bit), or Windows 7 (32/64 bit)
Free hard drive space of 7 GB, 1024 MB of free RAM, an OpenGL capable graphics card (NVIDIA or AMD/ATI), a monitor with minimum resolution of 1280 x 800, and a minimum of 24-bit color depth.
Cinema 4D can be purchased directly from Maxon at www.maxonshop.com. Students can acquire a free educational copy of Cinema 4D studio, by providing student documentation.
You can order a copy of Cinema 4D to be shipped to your location. Alternatively, in certain countries, you can download a digital ISO file instead.
For larger facilities that require floating licenses or a third-party render farm solution, you will need to purchase the additional Maxon License Server application, as well as a single command-line license that covers an entire render farm.
Once you've acquired and mounted either a physical DVD or a digital ISO, launch the installer application (Setup.exe on Windows or Setup.app on Mac OS) and select the language of your choice.
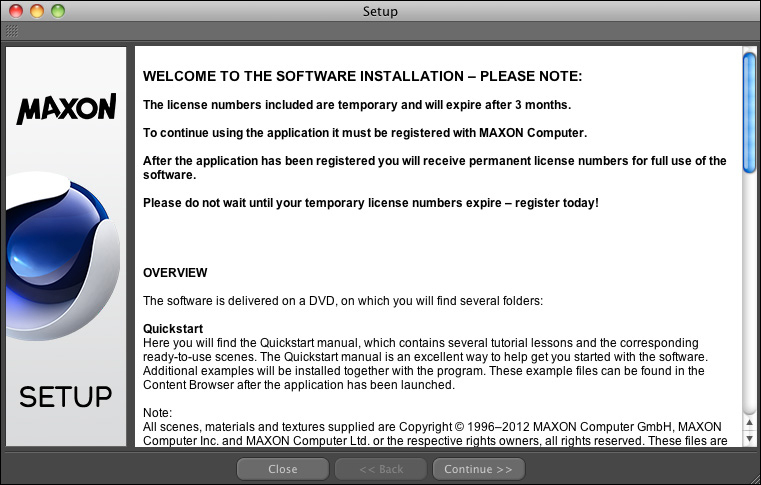
After that you'll see an initial information screen, shown in the following screenshot. This provides some information about registration, the contents of the DVD/ISO, and additional contact information for Maxon.
Click on the Continue>> button and you'll see a registration screen. At this stage you'll be asked to enter personal, company, and licensing information as shown in the following screenshot:
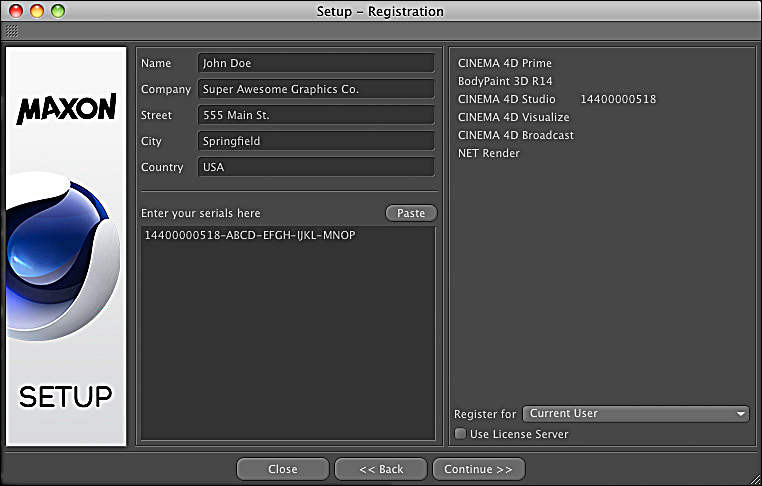
Enter all of the information, as you would if you were registering your software.
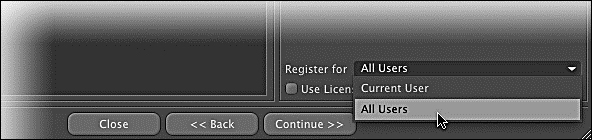
If you would like Cinema to be installed only for the user currently logged in, leave the Register for option at the lower right set to its default value, Current User. Otherwise, if you want cinema to be available to all accounts on that computer, set the Register for option to All Users as shown in the following screenshot:
If you are using Cinema 4D at a facility that uses the Maxon License Server to distribute floating licenses, turn on the checkbox labeled Use License Server. Upon doing so, a floating window will pop up for entering license server information.
If you have a license.ini text file, you can select this file to automatically populate all of the license server information. Once all of the licensing and registration information has been entered, click on the Continue>> button. You'll then be prompted to select the application you want to install as shown in the following screenshot:
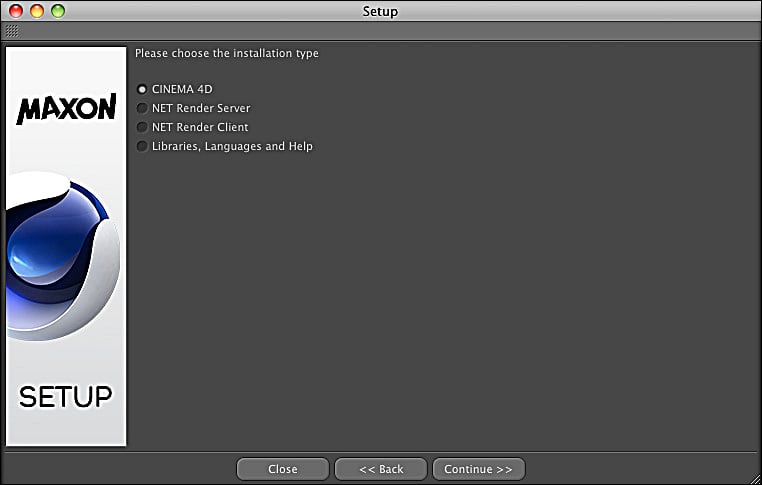
For now, select the CINEMA 4D option. We'll discuss the NET Render options a little later. Click on the Continue>> button. Another setup screen appears, with final options before installing.
The Optional tab allows you to install documentation and alternate language packs. When you are content with all of the installation options, click on the Install button and the installation process will begin. This takes a while, so be prepared to take a break. When the installation is complete, you should see a message.
If you'd like to jump right in and start playing with Cinema 4D, leave the Start Cinema 4D checkbox turned on, and click on the Finish button. Otherwise, uncheck this option and click on the Finish button to exit the installer. The first time you launch Cinema 4D, you have the option to follow some Quick Start tutorials. These can also be accessed via the main menu by navigating to Help | Show Tutorials....
In addition to Cinema 4D, you have the option of installing NET Render Server and NET Render Client. If you have multiple machines to render on, and you don't want to use third-party render farm software, the C4D NET Server and Client application can be used to create a C4D render farm under Broadcast, Visualize, and Studio licenses.
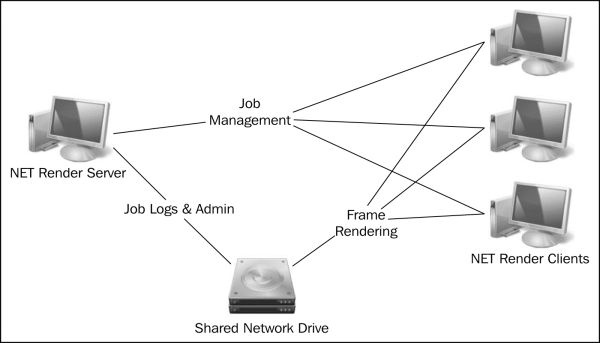
One machine needs to run the NET Server application, and any machine that will be rendering needs the NET Client application installed. The server machine is responsible for managing render jobs and tells the clients the frames that need to be rendered.
Distributed rendering will work only if there is a network-shared drive that is accessible by all computers involved as shown in the following diagram. All computers involved should also be using static IP addresses.
To install either NET Server or NET Client, re-launch the Cinema 4D installer. Follow the same initial steps as with installing Cinema 4D, but choose a different installation type.

After installing NET Render Server and NET Render Client, you'll need to configure them, so that the clients can see the server, the server can see the clients, and all computers can see the shared network drive. Now, follow these steps:
Configure the NET Server application on one computer as shown in the following screenshot:
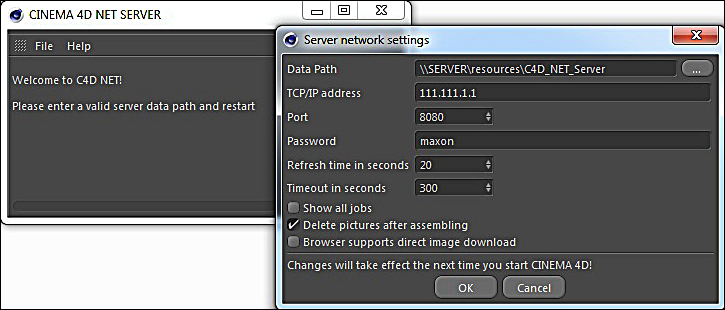
Restart the NET Server application. If it was configured correctly, you should see a Server started message in the NET Server window.
Next, configure the NET Client application on all computers that will be rendered as shown in the following screenshot:
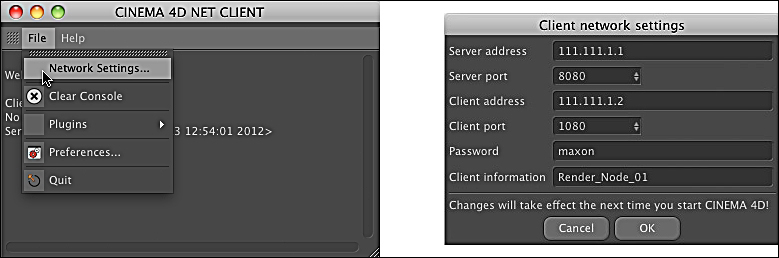
Restart the NET Client application on all render clients. If configured correctly, you will see that each client is initialized and is connected to the render server.
By this point, you should have a working knowledge about the installation process of Cinema 4D and are free to play around and discover more about it. If you also installed NET Server and NET Client application, then you have a Cinema 4D render farm at your disposal.
In the next section, we'll go over the user interface of Cinema 4D, and build an animated 3D scene.