

Let's take one step back now, and talk about terminals and consoles for a minute.
If you are not familiar with Linux, maybe you have never used the computer from the command line, but instead have always used the provided Graphical User Interface (GUI). GUIs are great and provide beautiful graphics, animations, and a superior usability experience overall. However, they also demand a lot of resources. And we're not only talking about memory or CPU performance, but peripherals such as keyboards, monitors, and mice. As you noticed, our board has none of these. Of course, you can connect those via the available USB and HDMI ports, but since our target is to build a standalone system, in this book, we will focus on the remote and console operations of our target.
Now, while performing the steps in the previous section, when we logged into the target, we actually started a terminal session. Here, we can control the board with the command line. Using the command line will take some time to get used to; but once you are comfortable with it, it's very fast and efficient to use. Commands can also be chained to be executed sequentially; this is called scripting. You will find a lot of scripts on the Internet that perform a certain task in a specified order. Did you notice that in the Preparing the host machine section for Linux, we set udev permissions with the mkudevrule.sh file? This was also a command-line script. While it's not necessary to become a command-line guru to write and execute programs on our board, we need to go over a few basic things about console operation.
Tip
Linux, unlike Windows, does not have a central registry that keeps the information of the system. Everything in Linux is built on top of files, even the hardware under the /dev/ folder. Or more accurately, almost everything is accessible in Linux through the filesystem. Some of the files might not be the actual files that are permanently saved onto a disk, but you can still access (read) them in pretty much the same way. It's important to become at least somewhat familiar with operating on files in the console.
When you log into the system, you are placed in the home folder of the user you used to log in as, in our case, root.
Tip
In Linux, root is a user that corresponds to an administrator. He can perform all the tasks on the system and has the rights to add other users, perhaps with fewer privileges. For now, we will keep using root even though it is not a good practice in general. You might want to read up on "Linux and user rights" from the Internet.
You can always see the current folder with the command pwd (think of it as an acronym for the present working directory):
root@beaglebone:~# pwd
/home/root
root@beaglebone:~#
You can move between folders with the command cd (change directory).The cd command takes one input parameter that specifies the directory you want to change to. For example, to go one folder up in the hierarchy, you type cd ...You might have noticed that the current folder structure starts with /. This is the root point of the whole filesystem on our Linux OS. You can go and take a look at it:
root@beaglebone:~# cd /
root@beaglebone:/# ls
bin dev home lost+found mnt run sys usr
boot etc lib media proc sbin tmp var
To list the contents of the current folder, we use the command ls. Here, you can see that there are quite a few folders in the filesystem. For example, /home/folder contains the home folders of all the users of this system. Take another example where, in the folders /bin and /usr/bin, you can find programs and commands that can be executed on this system (programs like ls and pwd are also in the /bin folder). Remember how we said that everything is a file? Well, so are the basic commands!
Tip
Did you notice that when we navigated away from the root user's home folder to the current folder, the last character changed to show the current folder? This is because ~ is a shorthand to indicate the user's home folder. You can always go back to the user's home folder by just typing cd and pressing Enter.
Let's go back to the home folder and look at what we can find there:
root@beaglebone:/# cd
root@beaglebone:~# ls -l
total 4
drwxr-xr-x 2 root root 4096 Jan  1 00:01 Desktop
root@beaglebone:~#
Notice how we first called the change directory command without any parameter? This means that the user wants to change to his or her home folder. In this case, it is /home/root/; other users might have different home folders. This time we also added a parameter -l to the command. A parameter gives additional instructions to the ls command, in this case, to use a long listing format. Now, in the long listing format, there is much more information visible about the files in this directory. The first column is especially important; it defines the access rights to this particular file. There are four basic file-access right properties:
Why are the properties listed several times then? This is because of the nature of how file-access restrictions work in Linux. File restrictions can be specified separately to three levels: user, group, and everyone. They are listed in that order.
For someone who's new to Linux, this might sound a bit confusing; maybe a practical example can help you understand this. Let's create a new file. We can do this, for example, by launching a text editor that comes with the default installation. There are several editors available; for now, we will use an editor called nano. It is easy to understand and will probably feel familiar even to users who have not used command-line editors before.
So, to create a file in the current folder, just type nano testfile.txt and an editor should pop up on the screen:
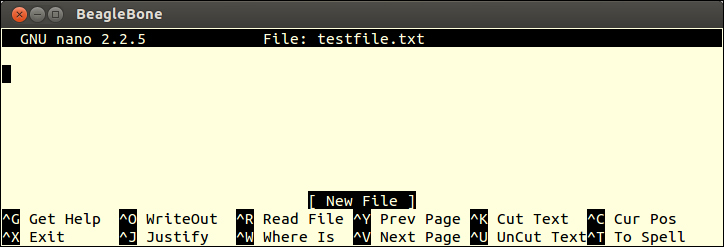
Write any sentence in the window and press Ctrl + X to exit. The program will ask you if you wish to save the file; in that case, press Y and then Enter to confirm the filename, testfile.txt. Now, let's list the directory again:
root@beaglebone:~# ls -l
total 8
drwxr-xr-x 2 root root 4096 Jan  1 00:01 Desktop
-rw-r--r-- 1 root root   20 Jan  1 01:24 testfile.txt
We notice that the freshly created testfile.txt file now has the default file access rights set. You can see that it was created by user root and belongs to the group root (the root root part). Only the owner of this file can write to it (the first part rw-). Let's try modifying the file permissions and give everyone the rights to write to this file. For this, we can use a command called chmod (derived from "change mode"):
root@beaglebone:~# chmod a+w testfile.txt
root@beaglebone:~# ls -l
total 8
drwxr-xr-x 2 root root 4096 Jan  1 00:01 Desktop
-rw-rw-rw- 1 root root    4 Jan  1 02:01 testfile.txt
Now you can see that we gave everyone the (a) rights to write (+w) to that file, and the file permissions string (-rw-rw-rw-) has changed accordingly.
Tip
Logically, if you want to remove a permission, you have to use the minus sign (-) instead of the plus sign (+).
Why it's important to understand the file permissions is because, unlike some systems where only certain file types can be executed, in Linux, any file with an executable bit set is executable. Thus, our Python programs will also require an executable bit to be set. To give executable permissions to a file, we can use the +x flag.
Tip
Usually, you don't necessarily want to give everyone execution rights; for example, you can call chmod u+x, which means that you only grant the current user the execution rights. As you probably already guessed, for groups you can use chmod g+x.
You must be anxious to try and test some code; let's take a look at a basic Hello World example.