Book Image

Expert Android Programming

Book Image

Expert Android Programming

Overview of this book

Android O brings a number of important changes for the users as well as the developers. If you want to create smart android applications which are fast, lightweight and also highly efficient then this is the book that will solve all your problems. You will create a complex enterprise grade app in this book. You will get a quick refresher of the latest android SDK and how to configure your development environment. Then you will move onto creating app layouts, component and module building, creating smart and efficient UIs. The most important part of a modern day app is how real time they are. With this book, you will create a smooth back-end for your app, ensure dynamic and real time communication between different app layers. As we move on, you will learn to leverage the different Android APIs and create an efficient SQLite data layer for your apps. You will implement effective testing techniques to make your app reliable and robust and finally you will learn to deploy it efficiently. The multiple stages of android development will also be simplified by giving you an industry standard set of best practices.
Table of Contents (17 chapters)
10
Building Restaurant finder

Adding a new Gradle library

Making Android Development more awesome, Gradle allows us to incorporate libraries in to Android Studio in different ways. Using these, developers can easily include their libraries using Gradle dependencies. In this section we will discuss the following techniques:

  • Adding a Gradle identifier
  • Adding as a module

Adding a Gradle identifier

To add a new Gradle library, find the Gradle identifier for the third party library, and add it to the dependencies list.

When you make changes to the build configuration files in your project, Android Studio requires that you sync your project files so that it can import your build configuration changes and run some checks to make sure your configuration won't create build errors.

To sync your project files, click Sync Now (as seen in the following figure) in the notification bar (this appears when you make a change), or click Sync Project from the menu bar. If Android Studio notices any errors with your configuration--for example, if your code uses API features that are only available in an API level higher than your compileSdkVersion-- the Messages window appears to describe the issue:

Next, we will discuss how libraries can be added using a module.

Adding as a module

You can also add a library in Android Studio by adding it as a module. To add the module:

  1. First, place the library code in any folder of your choice
  2. Then, you need to Import the library as a module in your app. The figure below shows the steps to add the library as a Module:

This will open a new window where you need to select the library that you have saved to the directory. When you have selected the directory, click on Done. This will import the external library into your project.
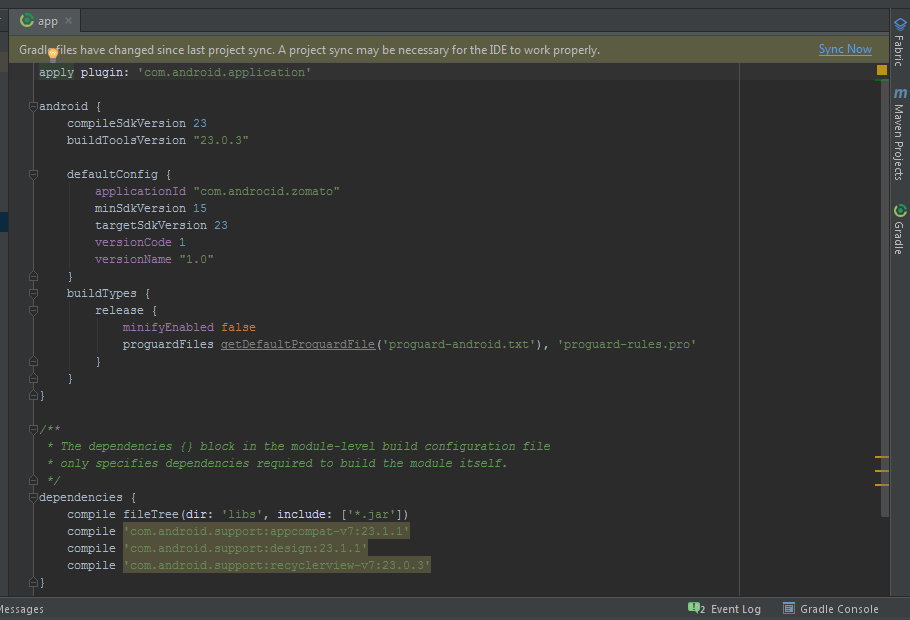
As an example, I have added the module crop image to my project, which appears in my project folder.

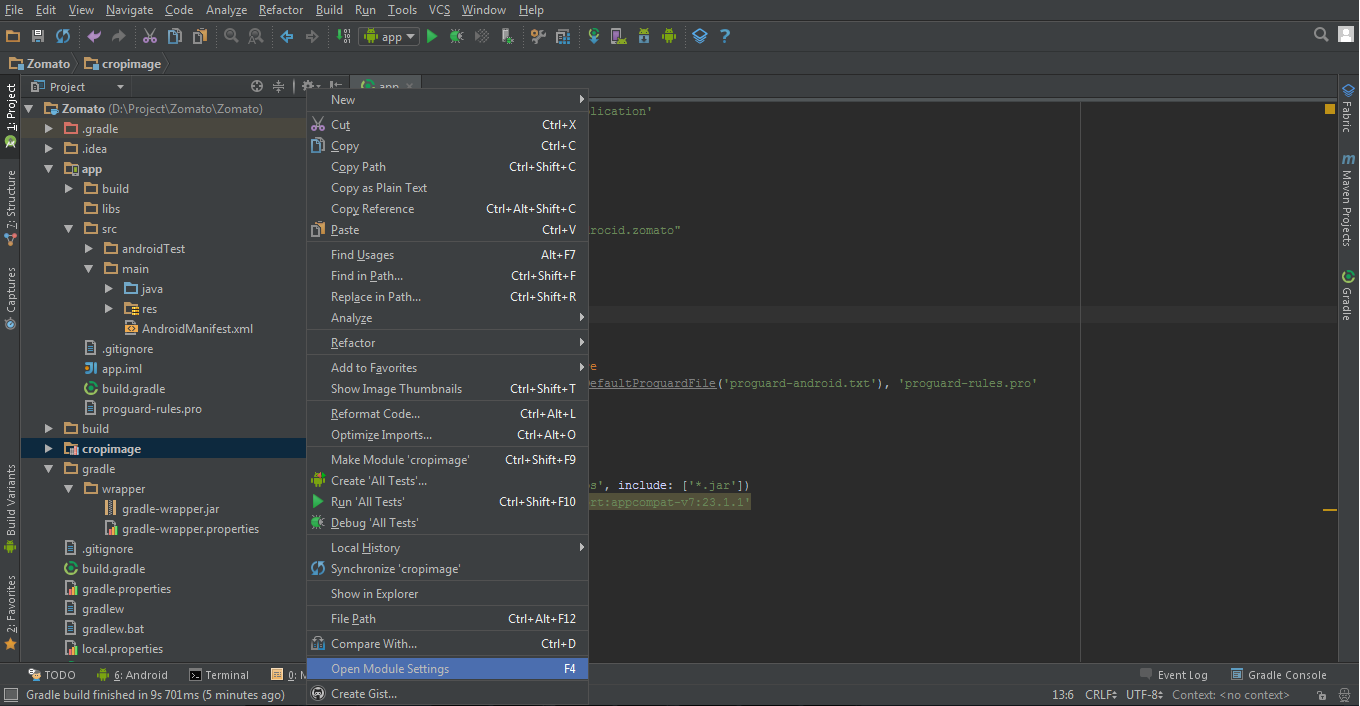
Next, we need to add the module to the app's dependency list. To do this, right click on the module that has been added and click on the Open Module Settings option:

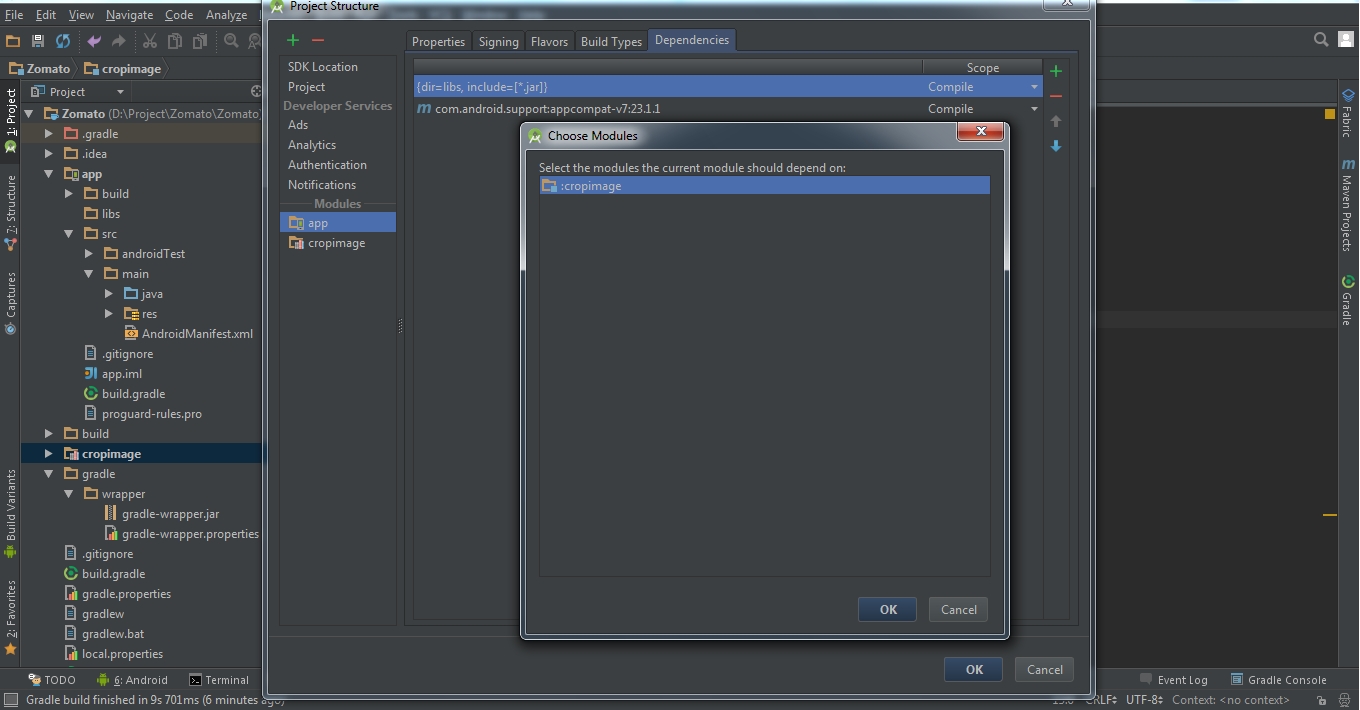
It will open a new window with your app module and library module in the list. Choose you app module, and then select the dependency list.

Next, click on the plus icon which will open another dialog with the module name. Select it and click OK:

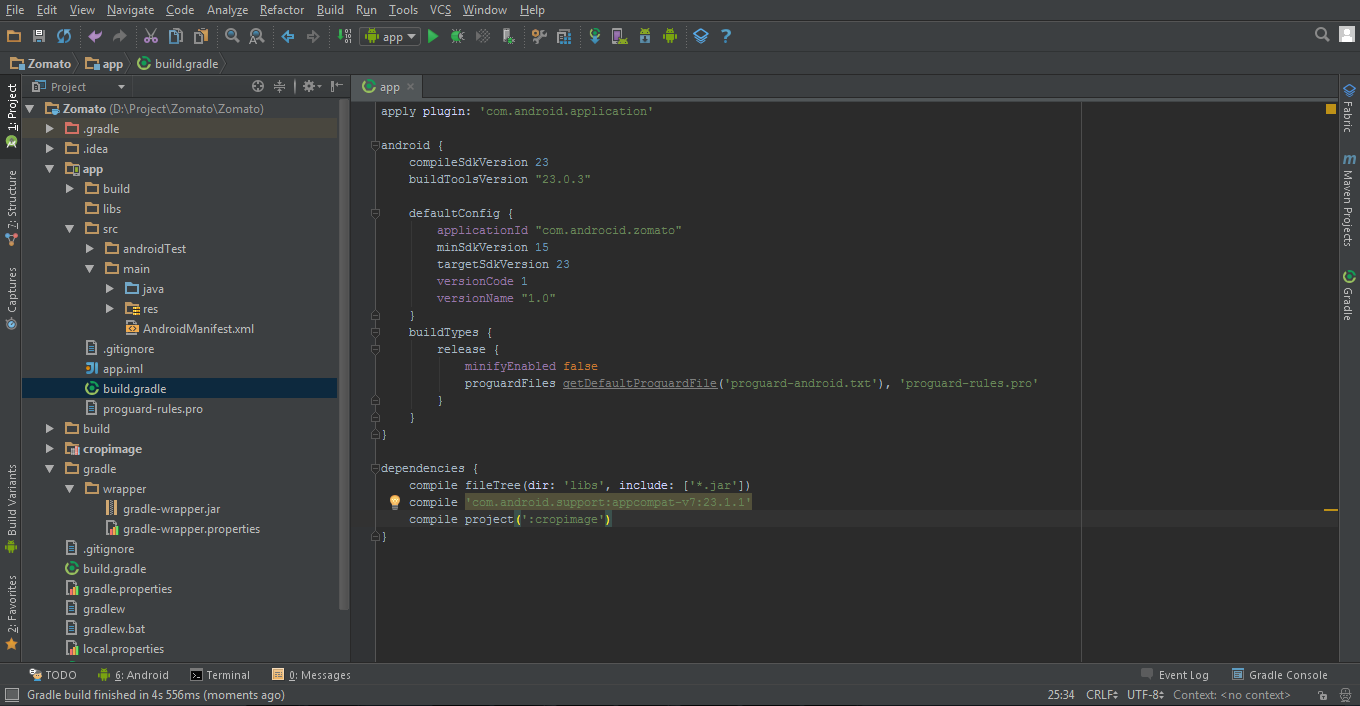
This will build the Gradle and add the module to the build.gradle, and it will be seen as a compiled project here:

Note that Core, UI and Util sub projects can also have their own build.gradle file, depending on their specific needs. Alternatively, you can also define the dependencies of a project in the root build.gradle file, as discussed in the preceding section. In this case, we won't be focusing on these points.