Book Image

JBoss: Developer's Guide

By : Elvadas Nono Woguia
Book Image

JBoss: Developer's Guide

By: Elvadas Nono Woguia

Overview of this book

Have you often wondered what is the best JBoss product to solve a specific problem? Do you want to get started with a specific JBoss product and know how to integrate different JBoss products in your IT Systems? Then this is the book for you. Through hands-on examples from the business world, this guide presents details on the major products and how you can build your own Enterprise services around the JBoss ecosystem. Starting with an introduction to the JBoss ecosystem, you will gradually move on to developing and deploying clustered application on JBoss Application Server, and setting up high availability using undertow or HA proxy loadbalancers. As you are moving to a micro service archicture, you will be taught how to package existing Java EE applications as micro service using Swarm or create your new micro services from scratch by coupling most popular Java EE frameworks like JPA, CDI with Undertow handlers. Next, you will install and configure JBoss Data grid in development and production environments, develop cache based applications and aggregate various data source in JBoss data virtualization. You will learn to build, deploy, and monitor integration scenarios using JBoss Fuse and run both producers/consumers applications relying on JBoss AMQ. Finally, you will learn to develop and run business workflows and make better decisions in your applications using Drools and Jboss BPM Suite Platform.
Table of Contents (10 chapters)

The Forge console

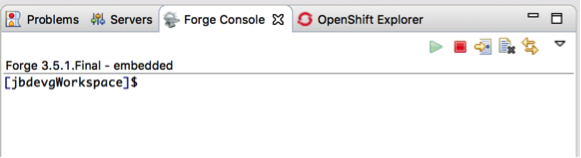
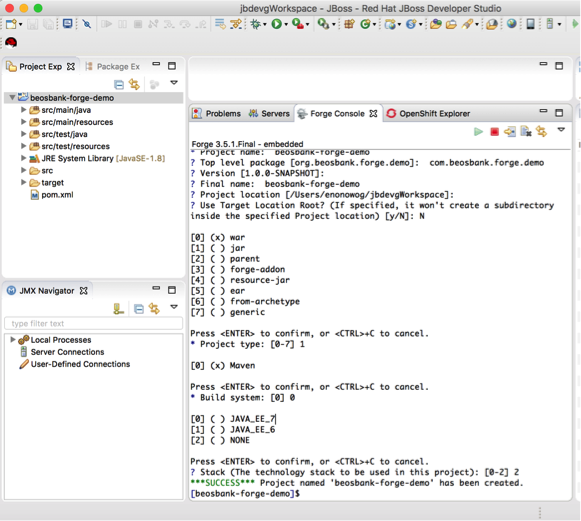
The Forge console provides an integrated command-line interface in the IDE. The Forge console command actions automatically synchronize the workspace views. Forge brings out a powerful command line interface to interact with the IDE. Forge is also available as an Eclipse wizard for users who really don’t want to remember the commands. We will perform various Forge console tasks on a new Java project called Name bank-forge-demo.

Working with the Forge CLI

In order to interact with the Forge CLI, the console needs to be started. In the quickview, search for Forge console; click on the green button to start the Forge CLI:

The command line starts, and a shell is opened on the current workspace directory. You can now enter various commands to create projects, and to interact with the project model and objects. Now, let's see how to create a project using the Forge console.

Creating Maven projects

Use the command list to see the commands available and the man command to get help on a specific command's usage. Forge commands work both interactively and with options. To create a new project, use the project-new command, and provide answers to the interactive questions asked.

[jbdevgWorkspace]$ project-new beosbank-forge-demo
***INFO*** Required inputs not satisfied, entering interactive mode
* Project name: beosbank-forge-demo
? Top level package [org.beosbank.forge.demo]: com.beosbank.forge.demo
? Version [1.0.0-SNAPSHOT] HIT ENTER to pick the default version
? Final name: beosbank-forge-demo
? Project location [/Users/enonowog/jbdevgWorkspace]:
? Use Target Location Root? (If specified, it won't create a subdirectory inside the specified Project location) [y/N]: N
[0] (x) war
[1] ( ) jar
[2] ( ) parent
[3] ( ) forge-addon
[4] ( ) resource-jar
[5] ( ) ear
[6] ( ) from-archetype
[7] ( ) generic
Press <ENTER> to confirm, or <CTRL>+C to cancel.* Project type: [0-7] 1
[0] (x) Maven
Press <ENTER> to confirm, or <CTRL>+C to cancel.* Build system: [0] 0
[0] ( ) JAVA_EE_7
[1] ( ) JAVA_EE_6
[2] ( ) NONE
Press <ENTER> to confirm, or <CTRL>+C to cancel.
? Stack (The technology stack to be used in this project): [0-2] 2
***SUCCESS*** Project named 'beosbank-forge-demo' has been created.

The project is created with the specified input options and is available in the workspace immediately:

By default, the Forge CLI relies on your system's command-line font configuration. After creating a project, the next step may be to add a class; let's see how to create Java class in the project source folder using the Forge console.

Creating a Java class

Use the java-new-class command to add a non-final HelloJBossWorld class to the beosbank-forge-demo project:

[beosbank-forge-demo]$ java-new-class
***INFO*** Required inputs not satisfied, entering interactive mode? Package Name (The package name where this type will be created) [com.beosbank.forge.demo]: HIT ENTER
* Type Name (The type name): HelloJBossWorld
? Extends (The type used in the extends keyword):
? Interfaces []:
? Is Final? [y/N]: N
? Is Abstract? [y/N]: N
? Is Serializable? [y/N]: Y
***SUCCESS*** Class com.beosbank.forge.demo.HelloJBossWorld was created
[HelloJBossWorld.java]$

The new class is empty; you may wonder how to add attributes and methods to this newly created class using the Forge console.

Adding attributes to classes

To add a private name property with getters and setters to the HelloJBossWorld class, use the java-new-field Forge command. This command is applied to the selected classes:

[HelloJBossWorld.java]$ java-new-field
***INFO*** Required inputs not satisfied, entering interactive mode
[0] (x) com.beosbank.forge.demo.HelloJBossWorld
Press <ENTER> to confirm, or <CTRL>+C to cancel.
* Target Class (The class where the field will be created): [0] 0
* Field Name (The field name to be created in this class): name
* Field Type (The type intended to be used for this field) [String]:
[0] ( ) public
[1] ( ) protected
[2] (x) private
[3] ( ) default
Press <ENTER> to confirm, or <CTRL>+C to cancel.
? Access Type (The access type): [0-3] 2
? Generate Getter (Generate accessor method) [Y/n]: Y
? Generate Setter (Generate mutator method) [Y/n]: Y
? Update toString (Updates the toString method by adding the field) [Y/n]:Y
***SUCCESS*** Field name created

We now have a mini project set up with a single class. Forge commands are not only used to create a project's objects but can also serve as gateways to interact with project builder tools such as maven.

Building projects with Forge

Using the Forge CLI, you can run maven goals on your project. The forge build command can be used to run maven goals on the created project:

[HelloJBossWorld.java]$ build
[INFO] Scanning for projects...[INFO]
[INFO] -------------------------------------------------------------------[INFO] Building beosbank-forge-demo 1.0.0-SNAPSHOT
[INFO] ------------------------------------------------------------------------
[INFO]
[INFO] --- maven-clean-plugin:2.5:clean (default-clean) @ beosbank-forge-demo ---
[INFO] Installing /Users/enonowog/jbdevgWorkspace/beosbank-forge-demo/target/beosbank-forge-demo.jar to /Users/enonowog/.m2/repository/com/beosbank/forge/demo/beosbank-forge-demo/1.0.0-SNAPSHOT/beosbank-forge-demo-1.0.0-SNAPSHOT.jar
[INFO] Installing /Users/enonowog/jbdevgWorkspace/beosbank-forge-demo/pom.xml to /Users/enonowog/.m2/repository/com/beosbank/forge/demo/beosbank-forge-demo/1.0.0-SNAPSHOT/beosbank-forge-demo-1.0.0-SNAPSHOT.pom
[INFO] ------------------------------------------------------------------------
[INFO] BUILD SUCCESS
[INFO] ------------------------------------------------------------------------
[INFO] Total time: 8.509 s
[INFO] Finished at: 2017-03-10T14:12:56+01:00
[INFO] Final Memory: 193M/496M
[INFO] ------------------------------------------------------------------------
***SUCCESS*** Build Success
[HelloJBossWorld.java]$

So, the Forge console can be used to invoke maven commands on the project. The Forge console is a powerful tool on which you can rely to be more productive in your development tasks. It comes in complements to various shortcuts available in Eclipse and JBoss Developer Studio.