

Pressed for space? Don't want to overwhelm your users with too much data at once? Paginate.
For this recipe, we're back to a relatively simple HTML table. No special classes are needed for the purpose of this exercise, as we're going to be focused exclusively on an array of rows within the table. Specifically, rows within the table body.
As always, create a table with a unique ID. Also for this recipe create a style block to add some formatting as follows:
<style type="text/css">
  table, a.paginate { font: normal 75% "Trebuchet MS", Verdana, Helvetica, Arial, sans-serif; }
  th.ranking { width: 50px; }
  th.title { width: 150px; }
  th.year { width: 100px; }
</style>

<table border="1" id="pagetable">
<thead>
  <tr>
    <th class="ranking">Ranking</th>
    <th class="title">Movie</th>
    <th class="year">Release Year</th>
  </tr>
</thead>
Next add some rows in the
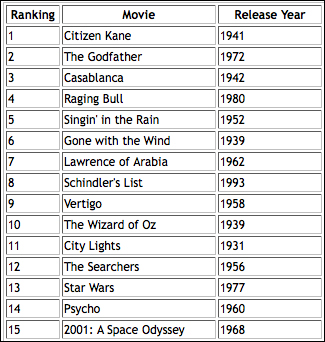
tbodytag:<tbody> <tr> <td>1</td> <td>Citizen Kane</td> <td>1941</td> </tr> <tr> <td>2</td> <td>The Godfather</td> <td>1972</td> </tr> … <tr> <td>15</td> <td>2001: A Space Odyssey</td> <td>1968</td> </tr> </tbody>Pagination wouldn't be worth much without Previous and Next links. Create a
divunderneath the table to hold each link. Give both links a class ofpaginate, but give each a unique ID as follows:<div> <a href="#" class="paginate" id="previous">Previous</a> | <a href="#" class="paginate" id="next">Next</a> </div>
All that's left is to set up the script. For now page four records at a time:
<script type="text/javascript">
$( document ).ready( function() {
  var firstRecord = 0;
  var pageSize = 4;

  var tableRows = $( "#movies tbody tr" );
  $( "a.paginate" ).click( function( e ) {
    e.preventDefault();

    if ( $( this ).attr( "id" ) == "next" ) {
      if ( firstRecord + pageSize <= tableRows.length ) {
        firstRecord += pageSize;
      }
    } else {
      if ( firstRecord != 0 ) {
        firstRecord -= pageSize;
      }
    }

    paginate( firstRecord, pageSize );
  });

  var paginate = function( startAt, pageSize ) {
    var endAt = startAt + pageSize – 1;

    $( tableRows ).each( function( index ) {
      if ( index >= startAt && index <= endAt ) {
        $( this ).show();
      } else {
        $( this ).hide();
      }
    });
  }

  paginate (firstRecord, pageSize );
});
</script>
The table is now less overwhelming, and allows the user to page through via Previous and Next links, as shown in the following screenshot:

There's quite a lot happening here. Start off by defining three variables as follows:
firstRecord: All of the table rows will be stored in an array. This variable holds the value, or the array index position, of the row that's currently being displayed at the first position.pageSize: How many records do we want to display per page? This value is referred to several times in the code, so assigning it to a variable makes it easier to change down the road, should the need arise.tableRows: A collection of all of the rows in the table. The selector syntax used to select the rows should be familiar by now.$( "#pagetable tbody tr" )
Next, listen for a click event that occurs on an <a> element with a class of paginate. This would be both the Previous and Next links.
$( "a.paginate" ).click( function( e )
Make sure the browser doesn't try to reload the page or follow the link by preventing the default behavior from occurring. You did this in the Show/hide rows (Must know) recipe.
e.preventDefault();
The next bit of code conditionally checks to see which link was clicked, the Previous link or the Next link. This is done by checking the id attribute. Remember, while each link has the same class name, each link has a unique ID.
if ( $( this ).attr( "id" ) == "next" )
The first condition fires if the Next link is clicked. The else obviously fires if the Previous link is clicked.
Regardless of which link is clicked, calculate a new value for the firstRecord variable. To start, firstRecord variable's value is 0. Guard conditions within each of the Previous and Next conditions ensure that the value of firstRecord can neither fall below 0, nor exceed the number of records in the collection.
The guard condition around the Next link is as follows:
if ( firstRecord + pageSize <= tableRows.length ) {
  firstRecord += pageSize;
}
The value of firstRecord should never exceed the number of records in the collection. In order to check that clicking on Next will not result in that happening, add the value of pageSize (currently set to 4) to the value of firstRecord (initially 0). As long as that condition is met, a new value can be set for firstRecord.
The guard condition around Previous is a bit more straightforward:
if ( firstRecord != 0 ) {
  firstRecord -= pageSize;
}
As long as the user is not on the first page, where the value of firstRecord is 0, "activate" the Previous link by setting the value of firstRecord to be firstRecord minus the value of pageSize.
If either condition is not met, the existing value of firstRecord simply remains unchanged.
With the value of firstRecord now properly calculated (either to reflect moving forward or backwards, or staying the same in the case that upper/lower boundaries are exceeded), call a named function, passing in both the calculated value for firstRecord as well as pageSize.
paginate( firstRecord, pageSize );
Let's look at that the function a little more closely:
var paginate = function( startAt, pageSize ) {
  var endAt = startAt + pageSize - 1;

  $( tableRows ).each( function( index ) {
    if ( index >= startAt && index <= endAt ) {
      $( this).show();
    } else {
      $( this ).hide();
    }
  });
}
paginate() knows which record to start with, as that value is passed in as an argument to the function. Within the function, the first line calculates the record to end with.
The script has determined which rows to display. It will either be rows 0-3, 4-7, 8-11, or 12-14. Remember that JavaScript is a zero-based system, and the records are being paged four at a time. All of the rows are stored in our tableRows variable. You're already familiar with jQuery's each() function, as it was used in the Sum columns (Must know) and Highlighting cells (Must know) recipes. Loop over the table rows and use jQuery's built-in show() and hide() methods as needed.
$( tableRows ).each( function( index ) {
  if ( index >= startAt && index <= endAt ) {
    $( this).show();
  } else {
    $( this ).hide();
  }
});
You've used each() before, but you haven't yet made use of the index variable. index simply holds the value of the current iteration of the loop. You're free to name it anything you'd like.
For each iteration of the loop, a conditional runs to determine whether or not the index value of the current element in the collection (the table row) falls in between the startAt and endAt values.
If the current value of index is within the specified range, display the table row by applying jQuery's .show() function.
Otherwise, hide the table row by applying jQuery's .hide() function.
Both show() and hide() are built-in jQuery methods that manipulate an element's display property.
The final line of the script block kicks off the pagination by explicitly calling paginate() with a startAt value of 0.
This is a fairly simple/straightforward demonstration of client-side pagination. However, it's not particularly user friendly.
For example, it might be nice to disable the Previous and Next links if the user is at the first or last page within the set.
It also might be nice to display a div above and/or below the table that shows a message, "Now displaying n-m of x records".
But now that we've done the basics, try making the interface a bit more user friendly on your own for extra credit.