
In this section, we will show you how to create your first web map. This Hello World recipe is intended to explain what the key elements to consider are, whenever you want to develop a web map with OpenLayers.
Before starting to write the code, it's a good idea to spend a little time organizing your workspace. Putting everything in order requires just two simple steps:
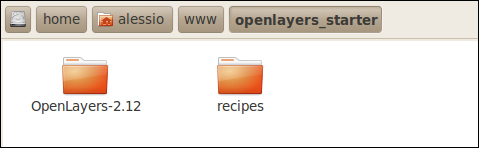
Open the
openlayers_starterfolder created in step 3 of the installation. It should be available at the path/home/${USER}/www/.Create a new folder and name it
recipes.
You just created the folder that will contain all of the recipes we will face until the end of this book. It is at the same level of the OpenLayers library folder as you can see in the following screenshot:
The HyperText Markup Language (HTML) is the language used to define the structure of a web page. Our web browsers read HTML documents, made of tags, and compose them into visible web pages.
In our case, the purpose of the HTML document we will create is to build the skeleton of the application. It provides OpenLayers with a template that decides where to draw your map once its source code is ready to be executed by the web browser.
Creating your first template is extremely easy:
Create an empty file, called
recipe_01.html, into therecipesfolder.Using your text editor or IDE, fill the file with the following code:
<!DOCTYPE html>
<html>
  <head>
    <title>Hello World!</title>
    <style>
      #map { width: 800px; height: 600px; }
    </style>
  </head>
  <body>
    <div id="map">
      <!-- The map will be drawn here -->
    </div>
  </body>
</html>
Tip
Downloading the example code
You can download the example code files for all Packt books you have purchased from your account at http://www.packtpub.com. If you purchased this book elsewhere, you can visit http://www.packtpub.com/support and register to have the files e-mailed directly to you.
Save your first HTML template.
Let's explain the template code:
The declaration of the document type at the first line helps the browser to display the web page correctly, while the
<html>opening tag, immediately below it, marks the beginning of the HTML template.The section between the tags
<head>and</head>represents the header section of the HTML document. Here we have defined its title using the<title>and</title>tags and a CSS between the tags<style>and</style>to establish the size of the area dedicated to accommodate the map.The section between
<body>and</body>represents the part of the template that the browser translates into the visible elements of the web page. It contains only the div tag<div id="map"></div>which, as explained by the comment inside the code, provides OpenLayers with an area to draw the map. This div tag has anid="map"attribute to make it match the CSS rule about width and height.Obviously, your HTML template ends with the
</html>closing tag.
Being a JavaScript library, OpenLayers has to be included in the HTML template to let the browser understand the code written with its classes. The inclusion takes place in the header section, through a reference to the library, using the <script> and </script> tags.
Open your template with the text editor and insert the following line in the header section, just below the title tags, and then save the edits:
<script src="../OpenLayers-2.12/OpenLayers.js">
</script>
The script opening tag is accompanied by the src attribute:
src="../OpenLayers-2.12/OpenLayers.js"
This references the library by its relative path in the workspace.
At this point, the HTML template knows where OpenLayers is and should look like this:
<!DOCTYPE html>
<html>
  <head>
    <title>Hello World!</title>
    <script src="../OpenLayers-2.12/OpenLayers.js"></script>
    <style>
      #map { width: 800px; height: 600px; }
    </style>
  </head>
  <body>
    <div id="map">
      <!-- The map will be drawn here -->
    </div>
  </body>
</html>JavaScript code is normally organized in functions, defined as blocks of code delimited by curly braces ({ }) and preceded by the function keyword. The code inside a function is executed when an event occurs and calls the function.
In this step, we will define a JavaScript function called initMap and invoke it by the browser to initialize the map after the page have finished loading. Let's see how:
Open your template with the text editor and add the following code below the inclusion of the library:
<script type="text/JavaScript">
function initMap() {

}
</script>
Modify the
<body>opening tag and add anonloadevent attribute to it:<body onload="initMap()">
Your updated HTML template should be as follows:
<!DOCTYPE html>
<html>
  <head>
    <title>Hello World!</title>
    <script type="text/JavaScript"
      src="../OpenLayers-2.12/OpenLayers.js">
    </script>
    <script type="text/JavaScript">
      function initMap(){

      }
    </script>
    <style>
      #map { width: 800px; height: 600px; }
    </style>
  </head>
  <body onload="initMap()">
    <div id="map">
      <!-- The map will be drawn here -->
    </div>
  </body>
</html>Now that the HTML template is complete, the OpenLayers library is loaded and the initialization function is ready to run, the last step is to write the actual code of our Hello World web map.
In this step, we will meet some terms commonly used in Object Oriented Programming, such as object and constructor. If you are unfamiliar with this paradigm, take a look at this introduction on the Mozilla Developer Network (https://developer.mozilla.org/en-US/docs/JavaScript/Introduction_to_Object-Oriented_JavaScript).
In OpenLayers, the map object is the first object to instantiate inside the initialization JavaScript function containing the code of your web map. Once a map object is defined, it's necessary to add a layer object and a series of basic controls to make the map appear and behave according to our desires.
Let's populate the initMap function with OpenLayers objects:
The first line you need to add will define the variable containing the
mapobject. The constructornew OpenLayers.Map()takes as argument of the ID of the HTML template element in charge to accommodate the map:var map = new OpenLayers.Map("map");Proceed with creating an OpenStreetMap (OSM) layer object as base layer and add it to the map. The constructor takes a string as first argument, for example, you can use
"Simple OSM BaseMap":var osm = new OpenLayers.Layer.OSM("Simple OSM BaseMap"); map.addLayer(osm);Define and add a layer switcher control showing a list with the names of layers you added to your map:
map.addControl(new OpenLayers.Control.LayerSwitcher());
Define on which part of the Earth's surface your map is centered. Passing a couple of coordinates to the
setCenterfunction applied to the map object does the job, but you must also consider the projection.OpenStreetMapadopts Web Mercator, so you should pass coordinates in its format to theLonLatobject. A convenient alternative is to write coordinates in WGS84 (EPSG:4326) and let the OpenLayers transform function do the projection for us. Don't worry, you will be made aware about projections and EPSG codes in the next section. Finally, the number 5 represents the zoom level at start:map.setCenter( new OpenLayers.LonLat(10.50, 45.00).transform( new OpenLayers.Projection("EPSG:4326"), new OpenLayers.Projection("EPSG:900913") ),5 );
The following is the complete recipe_01.html code with the OpenLayers part highlighted:
<!DOCTYPE html>
<html>
  <head>
    <title>Hello World!</title>
    <script src="../OpenLayers-2.12/OpenLayers.js"></script>
    <script type="text/JavaScript">
    function initMap(){
      var map = new OpenLayers.Map("map");
      var osm = new OpenLayers.Layer.OSM();
      map.addLayer(osm);
      map.addControl(new OpenLayers.Control.LayerSwitcher());
      map.setCenter(
        new OpenLayers.LonLat(10.50, 45.00).transform(
          new OpenLayers.Projection("EPSG:4326"),
          new OpenLayers.Projection("EPSG:900913"),
        ),5
      );
    }
    </script>
  </head>
  </body>
    <div id="map">
      <!-- The map will be drawn here -->
    </div>
  </body>
</html>
Launch your browser and type the URL of your web map. If you have followed all of the steps properly, it is http://localhost/openlayers_starter/recipes/recipe_01.html.
And the result should be something as the following screenshot:
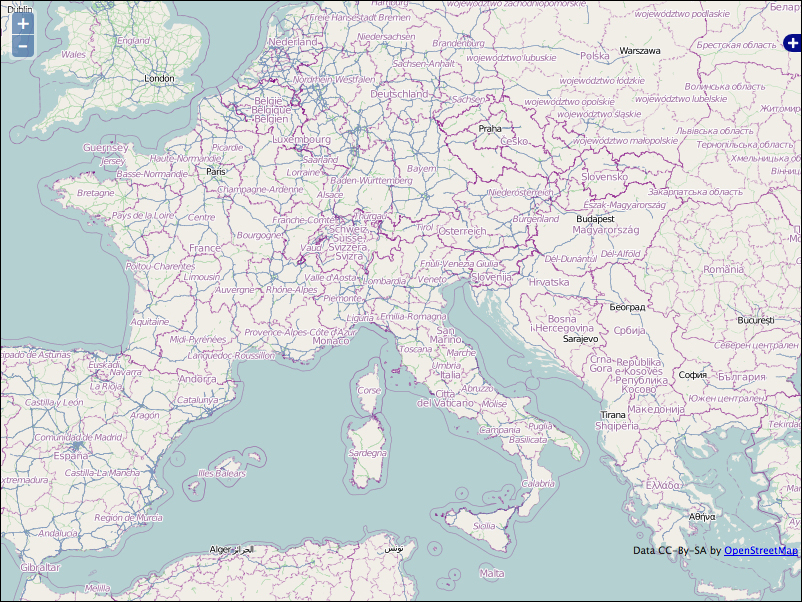
You just created your first web map. Take some time to play with it, panning and zooming around, and prepare to discover in the next section how easy it is to add features.