

To install Vagrant, download the appropriate Version of vagrant packages and the VirtualBox for your system from https://www.virtualbox.org/wiki/Downloads:
Create a location: Choose a location where you would like your VM to be saved. This location is regardless of where you save your VM configuration and files. Create a folder where you decide to store your VM. For example, in Windows, we can use
C:/drupalvm.Install VirtualBox: Download and install the latest version of VirtualBox from https://www.virtualbox.org/wiki/Downloads, depending on the OS package.
Install Vagrant: Installing Vagrant is easy. Just download your OS-specific package from https://www.vagrantup.com/downloads.html. Follow the OS-specific normal installation process.
Create your VM at PuPHPet: Until now, we have installed Vagrant and VirtualBox. Now let's create our VM configuration at PuPHPet. Open the URL https://puphpet.com/. Here we will select what we need from our VM.
VM Settings: On the first page, click on Get started right away. This should lead to the following page. Here I have selected the distro as Ubuntu Trusty 14.04 LTS x64. You can select your distro and other configurations depending on your server choice. You can leave other settings as default if you are not aware of them.

Selecting distro for your machine
Once you have selected your favorite package, hit the System Packages button.
In the next four steps, you can just leave the settings as they are and click on the buttons on the right-hand side to move forward.
You should get the Nginx option. Now I do not want Nginx as a web server. Instead I have opted for Apache.
Just browse to the page's top and uncheck Install Nginx. This should collapse the Nginx configuration form and bring the button to move to the Apache configuration page.
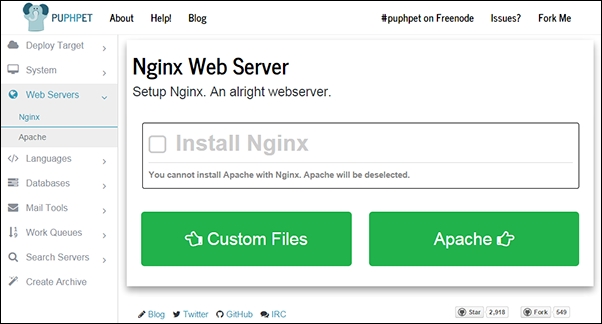
Select the web server of your choice
You can select your web server configuration and move next to select the PHP configuration. Here, I have selected Install Xdebug, a good tool for Debugger, and a profiler tool for PHP.
After this, I just clicked on other language configuration without making any changes and moved on to MySQL.
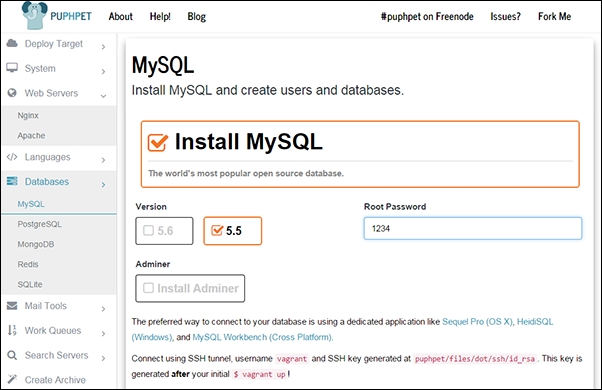
Selecting database
Here you can select the MySQL version and root password, add more users, and create new databases. You can explore other databases too if you like.
Again, keep moving forward until you reach Create Archive, and you are done. Download your custom server config! This will download a ZIP file with the configuration of your custom VM.
Set up your VM: Extract the ZIP file you have downloaded just now and navigate to the location you just extracted your ZIP file to.
Open the Terminal in Mac OS X or Ubuntu. In Windows, you should open the command line with administrative privileges.
In the Terminal, browse to the folder location and type this:
vagrant upHit Enter. It will take a couple of minutes and you should see a message, everything finished installing.
Setting up the host: There is the last step of setting up the hostname before we start using our VM. For Drupal, it is always better to use proper domain names. To create virtual hosts, we need to make changes to the host files on our computer. Browse to the following folders depending on the OS:
Windows:
C:\windows\system32\drivers\etc\hostsLinux (Ubuntu):
/etc/hostsMac:
/private/etc/hosts192.168.1.32 drupal8.dev www.drupal8.dev
You can use your favorite editor with administrative permission to make changes to the host file. I have selected to use
drupal8.devas my domain name. So let's add this line to the host file:We have used this IP address while creating our VM config file on PuPHPet. If you do not remember it now, you can find it by opening
config.yamlin Notepad. Theconfig.yamlfile is located inside yourpuphetfolder, which you placed inside your VM folder earlier. You should see the IP address top next toprivate_network.
We have just completed configuring a VM on our computer. You can open the browser and type your domain name—drupal8.dev.