

As this book is aimed at JavaScript developers, who may or may not have prior experience with Node.js (https://nodejs.org/), I would like to first introduce Node.js. Node.js (commonly referred to as Node) is a platform built on Chrome's JavaScript runtime called V8 for easily building fast and scalable web applications in JavaScript. To put it succinctly: server-side JavaScript.
The thought of server-side JavaScript might seem strange to those unfamiliar with the concept, but it has some big advantages over other server-side technologies such as PHP, Java, Ruby, and many others. For one, V8, on which Node is based, is fast, and has a full-time team in Google constantly improving its performance with each release of Chrome. One of Node's biggest differentiators as compared to other server-side technologies is its single-thread nature, encouraging the asynchronous coding style that you may be familiar with from working with JavaScript on the client side. Among its asynchronous nature, Node.js has many advantages, some of which are as follows:
Reduces the need for multi-threading, always considered a tough problem in application development
Allows sharing of code between browser and server, and avoiding a context switch between working with the browser and client
It comes bundled with npm, currently the biggest package manager and one of the best solutions out there for managing your application dependencies on both client and server seriously, you will struggle to move back from Node after having the luxury of such an excellent resource
As a result of these and many other benefits of Node, many large organizations such as Netflix, Yahoo, Mozilla, PayPal, and of course the organization behind hapi.js, Walmart, have adopted Node. If you aren't familiar with Node or npm, I suggest you take some time to read up on them at https://nodejs.org/about, https://docs.npmjs.com. The Node.js website covers the installation of Node, and I suggest you do this so you can participate in this next part.
Let's take a look at what a simple' hello world' API server looks like in Node.js by using the example from the Node.js website (please take note that you need Node version 4 or greater to run this code, otherwise you will get syntax errors!):
const http = require('http');                           // [1]
const hostname = '127.0.0.1';
const port = 1337;
http.createServer((req, res) => {                       // [2]
  res.writeHead(200, { 'Content-Type': 'text/plain' }); // [3]
  res.end('Hello World\n');                             // [4]
}).listen(port, hostname, () => {                       // [5]
  console.log(`Server running at http://${hostname}:${port}/`);
});
Tip
You can download the example code files for this book from your account at http://www.packtpub.com. If you purchased this book elsewhere, you can visit http://www.packtpub.com/support and register to have the files e-mailed directly to you.
You can download the code files by following these steps:
Log in or register to our website using your e-mail address and password.
Hover the mouse pointer on the SUPPORT tab at the top.
Click on Code Downloads & Errata.
Enter the name of the book in the Search box.
Select the book for which you're looking to download the code files.
Choose from the drop-down menu where you purchased this book from.
Click on Code Download.
Once the file is downloaded, please make sure that you unzip or extract the folder using the latest version of:
WinRAR / 7-Zip for Windows
Zipeg / iZip / UnRarX for Mac
7-Zip / PeaZip for Linux
I won't cover what happens here in detail, but will skim over the need to know parts to help understand how a typical Node server operates. With reference to the numbers in the code comments, let's go through each line:
[1]: This is an example of using modules in Node.js. While many modules need to be downloaded usingnpm install, some modules likehttpare bundled with the Node binaries. In this example, we require thehttpmodule and assign it to the variablehttp. This is where we first see the ES6 syntax being introduced through theconstkeyword. Here,constbasically specifies that we cannot redefine thehttpvariable. If you want to read more about how Node modules work, you can find a good explanation in the Node API documentation at https://nodejs.org/api/modules.html.[2]:Here, we use thecreateServermethod of thehttpmodule. We pass a callback function as an argument, which will then be called every time the server receives a request. This is the second example of the ES6 syntax being introduced, which is the arrow function. I suggest you read up on its differences with a normal function call at https://developer.mozilla.org/en/docs/Web/JavaScript/Reference/Functions/Arrow_functions. The callback function then takes two parameters:req, which contains information about the request that the server has received, andres, which is an object that contains the methods for responding to a request.[3]: Here we see the low level to which the Nodehttpmodule goes, where you must set response headers and status codes; this is done by callingres.writeHead().[4]: The lineres.end()signals to the server that all of the response headers and body have been sent, and the server should consider this request complete.[5]: Now that we have a server defined, we must tell it to accept connections for a particular port and hostname, and this is done by theserver.listen()method.
That was a lot of information at once, so don't worry if it didn't make sense immediately; the concepts introduced here will become clearer as we talk more about them throughout this book.
To run this example, you should have Node installed. As I mentioned previously, instructions can be found on the Node.js website. Next, you need to create a folder and change to its directory:
$ mkdir hello-node && cd hello-node
Then create a file called hello-node.js, paste it in the preceding code and run it using the following command:
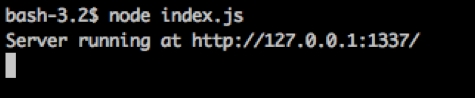
$ node hello-node.js
If all goes well, you will see the following screen:
Looking back at the preceding example, think now, how would you add functionality to this server while keeping your code base manageable? It certainly is not trivial. Especially when taking into account that typical servers will want to be able to serve static content as well as plaintext, JSON, XML and many other types. Often, it would need to deal with different request URLs and respond accordingly. Generally, it would need to interact with some type of persistent data store such as MySQL, and we still haven't even thought about authentication, authorization, validation of requests, and a number of other features that a typical application would need. This is what we refer to as application infrastructure, and this is where hapi.js comes in.
hapi is, in one sense, an abstraction layer on top of this low-level server, for providing more intuitive APIs for solving the previously mentioned problems, so you don't need to. It is a rich framework that allows you, the developer, to focus on writing reusable application logic instead of spending time building infrastructure.