Full-Stack React, TypeScript, and Node
- Second Edition
By :
David Choi
Full-Stack React, TypeScript, and Node
By: David Choi
Overview of this book
In the fast-paced world of web development, React sets the benchmark for high-performance client-side applications, while Node.js and Express enable scalable server-side solutions and web services. TypeScript enhances JavaScript projects with robustness and maintainability, making it essential for large-scale applications. This second edition provides a hands-on guide to mastering these technologies with new chapters and updated content reflecting the latest industry practices.
Start with a solid foundation in TypeScript, building high-quality web applications. Explore React 19, leveraging the latest Hooks API and Redux Toolkit for state management. Transition to server-side development with Express, incorporating modern practices like JWT-based authentication and Prisma ORM for database management.
A key addition is Docker, streamlining deployment with containerized applications. Learn to configure Express projects with Docker and deploy to AWS for scalable solutions. Updates include Vitest for testing, new React features like Suspense, and expanded content on Postgres and Prisma ORM.
By the end of this book, you will have built and deployed a comprehensive full-stack application, ready for production.
Table of Contents (5 chapters)
Full-Stack React, TypeScript, and Node: Build scalable and cloud-ready web applications using React 19, TypeScript, and Docker
JavaScript is known as an Object-Oriented Programminglanguage. And it does have some of the capabilities of other OOP languages. However, JavaScript's implementation is limited when compared to TypeScript. In this section, we'll take a look at how JavaScript does OOP and how TypeScript improves upon JavaScript's capabilities.First, let's list the four pillars of Object Oriented Programming. There are four major principles of OOPi:
Encapsulation
Abstraction
Inheritance
Polymorphism
Let's review each one.
Encapsulation
An easier phrase for understanding encapsulation might be information hiding. In every program, you will have data and methods that allow you to do something with that data. When we use encapsulation, we are taking that data and putting it into a container of sorts. This container is known as a class in most programming languages, and basically, it protects that data so that nothing outside of the container can directly modify or view it.If you want to make use of the data, it must be done through methods that are controlled by the container object. This style of working with object data allows strict control of what happens to that data from a single place in code, instead of being dispersed through many locations across an application.The syntax for controlling information access, of course, varies across languages, but in TypeScript, this syntax is called Accessors. For example, the private accessor only allows members to be accessed by code within the class, and the public accessor allows any code outside or inside the class to modify the affected member. Until recently, there was no direct way of creating accessors in JavaScript. If a developer needed to indicate accessibility, they had to use TypeScript syntax to do so or write more involved JavaScript code structures to do so. However, it is now possible to hide members using plain JavaScript by using the # symbol, and we will prefer this JavaScript syntax in the book.
IMPORTANT NOTE
TypeScript attempts to be as close as possible to the current global standard for JavaScript, known as ECMAScript. Having said that, sometimes TypeScript syntax will be temporarily different from JavaScript until JavaScript “catches up”. Whenever a change to the JavaScript language overlaps with TypeScript’s features, in this book, we will prefer the standard JavaScript syntax.
Note that in the next section, we will provide some simple examples of OOP in TypeScript. However, in Chapter 2, Exploring TypeScript, we will see more robust examples of TypeScript capabilities, including OOP features. For now, let’s keep things simple so we can focus on the core concepts of OOP.Now let’s look at an example of using TypeScript’s accessors to enable encapsulation.Create a new ts file called encapsulation.ts and add the following code to it:
class Encapsulator {
  private name: string;
  get getName(): string {
    return this.name;
  }
  set setName(name: string) {
    this.name = name;
  }
  constructor(name: string) {
    this.name = name;
  }
}
const encapsulator = new Encapsulator("John");
console.log(encapsulator.name);
Now it’s a bit early to start digging too deeply into this code. However, let’s try and understand what is going on here at least at a basic level. First, when creating any kind of system to hide information, we would need some kind of container. And in this case, that is what our class type Encapsulator, is giving us.Next, we can see we have a single field called name. Now, a class does give us a container, but if we don’t expressly indicate any accessor type on our fields, we end up with public fields by default. Therefore, we use the private keyword to make our field name hidden from the outside world (we’ll use the # accessor in later code, but by using the word private, I am emphasizing its hidden nature).Next, we have decided to use getters and setters, getName and setName, in order to expose access to our name field outside of the class, but only indirectly. This means that we control in what manner our name field is accessed and updated or even if it will be allowed to be updated.Now, in order to create a unique instance of our class, we use the new keyword with the class name like this: new Encapsulator(). If you compile and run this file, you should see something like this.
Figure 1.6 – Encapsulation example
As you can see, since our name field is private, it is not accessible directly from outside of our class instance. Let’s do a small update to fix this and view the name of our Encapsulator instance. At the end of our code, replace encapsulator.name with encapsulator.getName Notice getName has no () appended to it. Now, if we compile and run our code, we should see the name John since that’s what we passed to the class’s constructor. We’ve now used a simple feature of TypeScript to perform Encapsulation and hide internal member information. Don’t worry if not everything is crystal clear right now. As stated earlier, we’ll be diving deep into TypeScript in Chapter 2, Exploring TypeScript. Let’s continue with the next pillar of OOP, Abstraction.
Abstraction
Abstraction is related to encapsulation. When using abstraction, you hide the internal implementation of how data is managed and provide a simplified interface to outside code. Primarily, this is done in order to create "loose coupling" of code. Loose coupling means that code responsible for one set of data is independent and separated from other code. In this way, it is possible to change the code in one part of the application without adversely affecting the code in another part.Abstraction for most OOP languages requires the use of a mechanism to provide access to an object, without revealing that object's internal workings. For most languages, this is called an interface or abstract class. Interfaces are like classes whose members have no actual working code. An abstract class is more flexible; you can have members both with and without an implementation. You can consider them to be a shell that only reveals the names and types of object members, but does not implement how they work. This capability is extremely important in producing the loose coupling mentioned previously and allowing code to be more easily modified and maintained. JavaScript does not support interfaces or abstract classes. TypeScript, however, supports both.Let’s look at a simple example to better understand Abstraction.Create a new file called abstraction.ts and add this code to it:
interface User {
  name: string;
  age: number;
  canDrive();
}
class Person implements User {
  name: string;
  age: number;
  constructor(name: string, age: number) {
    this.name = name;
    this.age = age;
  }
  canDrive() {
    console.log("user is", this.name);
    if (this.age >= 16) {
      console.log("allow to drive");
    } else {
      console.log("do not allow to drive");
    }
  }
}
const john: User = new Person("john", 15);
john.canDrive();
Now, in our previous section, we already introduced the concept of an interface with the canDrive example. So, in this code, we are extending that example by fleshing it out a bit more. First, we have our User interface; however, you can see we’ve added an empty function called canDrive. This function has the same signature as our original canDrive function, but is part of the User type. And as you can see, it takes no parameters and returns nothing.Next, we have our class Person. And you can see that when our Person class is declared, it indicates an additional keyword, implements. The keyword implements is telling TypeScript that our class Person is intending to define the implementation, the running code, of the members of User. So then our class Person near the bottom declares canDrive and gives it an implementation. To be clear, we could have given canDrive any implementation we wanted, but in this case, we’ve decided to give it the same implementation as our last example. And then finally we create an instance of Person and call the canDrive function.Now, if you compile and run this code, you will see this:
Figure 1.7 – Abstraction example
The output is basically the same as our prior canDrive example. But by using interfaces, we have now decoupled our code’s implementation from its signature.This is a powerful capability, because we no longer need to write our code for a specific implementation. Instead, we can now write code to just a shell and we can have any implementation we want depending on the situation.
Inheritance
Inheritance is about code reuse. For example, if you needed to create objects for several types of vehicles—car, truck, and motorcycle—it would be inefficient to write distinct code for each vehicle type. It would be better to create a base type that has the core attributes of all vehicles, and then reuse that code in each specific vehicle type. This way, we write some of the needed code only once and share it across each vehicle type. The main feature used to create inheritance structures in both JavaScript and TypeScript is classes.Let’s define a class, as we’ve been referring to classes but haven’t yet defined them. A class is a kind of type that stores a related set of fields (data) and also may have functions called methods that can act on those fields.JavaScript supports inheritance by using a system called Prototypical Inheritance. Basically, what this means is that in JavaScript, every object instance of a specific type shares the same instance of a single core object. This core object is the prototype, and whatever fields or methods are created on the prototype are accessible across the various object instances. This is a good way of saving resources, such as memory, but it does not have the level of flexibility or sophistication of the inheritance model in TypeScript.In TypeScript, classes can inherit from other classes, but they can also inherit from interfaces and abstract classes. We’ve actually already seen the interface form of inheritance in the Abstraction example. We'll dive deep into these features in Chapter 2, Exploring TypeScript, but the point is that TypeScript has a more capable inheritance model than JavaScript. It allows for more kinds of inheritance and, therefore, more ways to reuse code. Let’s look at a single example now.
Let’s create a new ts file called inheritance.ts like this:
In this example, we are creating types for a company that sells many different types of products. First, we have a base class called Item that represents the most rudimentary information for all the products that our store sells. In other words, all the items sold by our store will always have this information: id, description, price, and getId. Since this is true, we don’t need to recreate these fields and methods for each new type of item. We can simply reuse them.The definition of the Bicycle type shows us how to reuse the code in the Item type by using the extends keyword. By using this keyword, our Bicycle type does not need to define those members again and simply inherits them. However, since it is a specific item, it has its own members, wheelCount and getWheelCount, which we have also defined.After the definition of our two types, we can see that we create an instance of the Bicycle and set all of its fields, including those defined in the Item type. And we finish by logging the values of id and wheelCount.
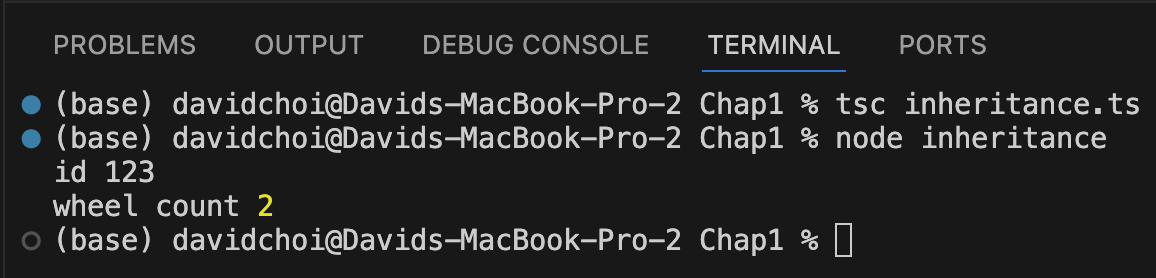
If we run this code, you will see this output:
Figure 1.8 – Inheritance example
As you can see, our id and wheelCount values are displayed.
Polymorphism
Polymorphism is related to inheritance. In polymorphism, it is possible to declare an object that is of some base type and then set that variable at runtime to a specific type that inherits from that base type. This technique is useful for scenarios where the specific type to use can only be known at runtime.In the case of JavaScript, there is no direct language support for polymorphism. It is possible to simulate it to some degree, but there is no built-in way of enforcing the specific types to be used. TypeScript, however, can be used to implement Polymorphism. This topic is a bit complex, and we don’t know enough about TypeScript just yet to explore this concept thoroughly. We’ll learn more about TypeScript in Chapter 2, Exploring TypeScript, and then I’ll provide examples for this topic there.
Read this chapter and the full book FREE of cost - No Credit card required!
Plus access over 8,000 other expert tech books and videos just by signing up - No commitment!
CONTINUE READING
83
Tech Concepts
36
Programming languages
73
Tech Tools
Unlimited access to the largest independent learning library in tech of over 8,000 expert-authored tech books and videos.
Innovative learning tools, including AI book assistants, code context explainers, and text-to-speech.
50+ new titles added per month and exclusive early access to books as they are being written.


 Free Chapter