-
Book Overview & Buying
-
Table Of Contents

Web Development with Blazor - Second Edition
By :
Web Development with Blazor
By:
Overview of this book
Blazor is an essential tool if you want to build interactive web apps without JavaScript, but it has a learning curve. Updated with the latest code in .NET 7 and C# 11 and written by someone who adopted Blazor early, this book will help you overcome the challenges associated with being a beginner with Blazor and teach you the best coding practices.
You’ll start by learning how to leverage the power of Blazor and exploring the full capabilities of both Blazor Server and Blazor WebAssembly. Then you'll move on to the practical part, centered around a sample project – a blog engine. You'll apply all your newfound knowledge about creating Blazor projects, the inner workings of Razor syntax, validating forms, and creating your own components.
This new edition also looks at source generators, dives deeper into Blazor WebAssembly with ahead-of-time, and includes a dedicated new chapter demonstrating how to move components of an existing JavaScript (Angular, React) or MVC-based website to Blazor or combine the two. You’ll also see how to use Blazor (Hybrid) together with .NET MAUI to create cross-platform desktop and mobile applications.
When you reach the end of this book, you'll have the confidence you need to create and deploy production-ready Blazor applications, and you'll have a big-picture view of the Blazor landscape.
Table of Contents (22 chapters)
Preface

Hello Blazor
 Free Chapter
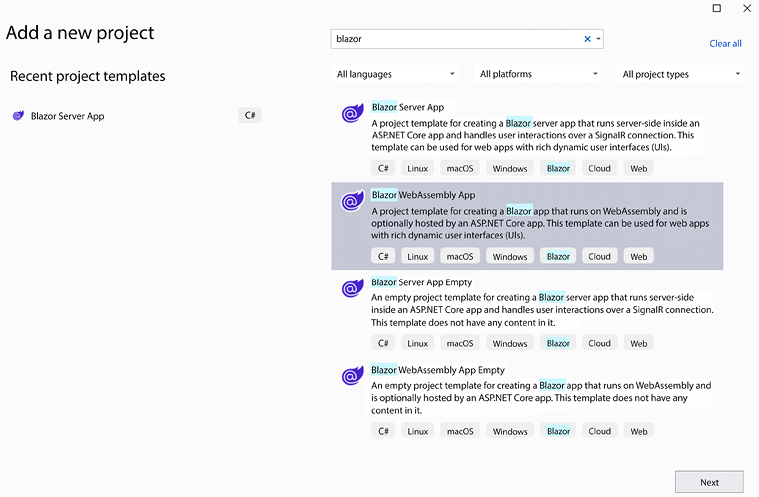
Creating Your First Blazor App
Managing State – Part 1
Understanding Basic Blazor Components
Creating Advanced Blazor Components
Building Forms with Validation
Creating an API
Authentication and Authorization
Sharing Code and Resources
JavaScript Interop
Managing State – Part 2
Debugging the Code
Testing
Deploy to Production
Moving from, or Combining, an Existing Site
Going Deeper into WebAssembly
Examining Source Generators
Visiting .NET MAUI
Where to Go from Here
Other Books You May Enjoy
Index