

At this stage, there is a working database with a username and password, and the archive file has been uploaded to the host site. At last, we finally move from working on the development machine to working on the live site. First thing's first though; we need to…
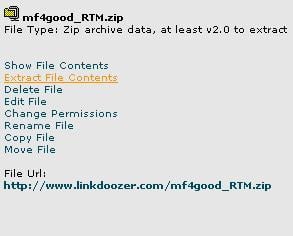
Extract the archive file to the public_html folder—most likely your hosts will provide native ZIP functionality. (If there is no way to decompress files, then transfer files over without compression). Take note of the second option in the list shown here:
With these files extracted, there is now a replica of the files from the development machine on the host's site. Check this by browsing through the live site—you should find that if any attempt to browse one of the pages no longer results in a "page-not-found error", but some other type of error—most likely a MySQL error because we don't have a database connection yet.
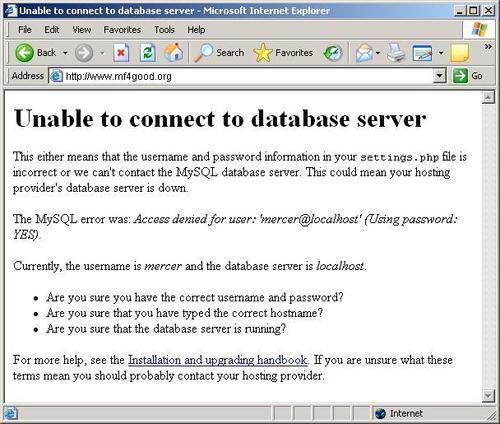
This is great news because it means that we are able to browse the files that are now on the live site with no problem. The fact that there is a Drupal error message here confirms that we are in fact browsing Drupal pages—note that the error message shown in the previous screenshot mentions a username that is not correct. This is here to demonstrate more clearly that we are browsing Drupal, but we have not yet entered the correct database or configuration settings.
If you have access to phpMyAdmin on the host site, then open it up and follow along:
1. In the left-hand panel on the phpMyAdmin homepage, click on the name of the database installed earlier. (Recall that for the demo site, this was entitled
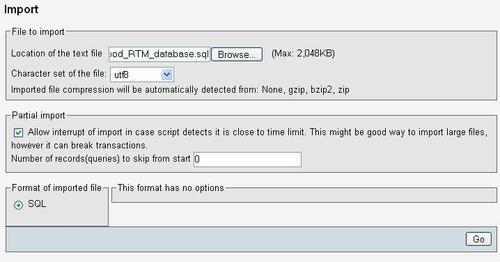
wwwlink_mf4good.)2. In the new page that opens up, click on the Import tab along the top of the page.
3. Click Browse for the Location of the text file option.
4. Locate the database backup file to run against the database, and click Go as shown here:
Assuming the file executes successfully, you can now take a look through phpMyAdmin to ensure that the database has got whatever tables are needed.
In the event that something goes wrong, ensure that the backup file was created with utf8 encoding and that the version of MySQL being used is sufficient for Drupal 6 (Discussed in the Requirements section of INSTALL.txt within the Drupal download).
If phpMyAdmin is not available, then install the database using the .sql file in whatever manner is appropriate for your particular site. Recall that the .sql file can be run from the command line if you have access to that—if not, it's time to get in touch with the support team and find out how they recommend populating the database.
With the database in place, go back to the settings.php file in the sites/default/ folder on your live site and alter it according to the live system's setup—ensure that you add precisely the names and passwords required by your live database to $db_url.
Note
File permissions on this file may prevent you from accessing it initially. Take note of the permission settings before altering them to allow you to edit its information. As soon as you are done, return the permission settings to their original state—to prevent others writing to the file.
Once the configuration settings are set appropriately, try browsing some pages. With a bit of luck, you will see everything more or less as it was on the development machine.
Try to log into the administrator's account. I suspect that more than a few of you will come across a somewhat nasty surprise in that the browser will, no doubt, tell you that it cannot find the page you are looking for. If this is the case, it is more than likely because the .htaccess file was not successfully ported to the live site:
Note
You must ensure that Drupal's
.htaccess
file is present on the live site!
.htaccess in the Drupal parent folder contains instructions and information vital to the healthy operation of the site. Ensure that you transfer it directly, or cut and paste its contents into the live site's .htaccess file.
When viewing the contents of the .htaccess file on the live site (most likely in the document root depending on how things are set up), you should see something like this:
#
# Apache/PHP/Drupal settings:
#
# Protect files and directories from prying eyes.
<FilesMatch "\.(engine|inc|info|install|module|profile|po|schema|sh|.*sql|theme|tpl(\.php)?|xtmpl)$|^(code-style\.pl|Entries.*|Repository|Root|Tag|Template)$">
Order allow,deny
</FilesMatch>
# Don't show directory listings for URLs which map to a directory.
Options -Indexes
# Follow symbolic links in this directory.
Options +FollowSymLinks
# Customized error messages.
ErrorDocument 404 /index.php
# Set the default handler.
DirectoryIndex index.php
...
If that is the case, then it should be possible to browse the live site as normal. Now that pages can be browsed, it's time to quickly re-enable any important settings that were disabled for deployment—such as caching, logging, and even clean URLS.
If you experience problems with the site once clean URLs are enabled, then it is possible that you can make some modifications to .htaccess in order to get things working. Please view the Drupal documentation at http://drupal.org/node/15365 for more information.
The only thing left on the list of things to do now is…