
There are many ways to install Moodle. One of the simplest ways is to download one of the all-in-one installers from http://moodle.org. These are labeled as Moodle for Windows and Moodle for Mac OS X under the Downloads menu at http://moodle.org. These all-in-one installers contain both Moodle and all of the necessary server software, including Apache, PHP, and MySQL. While these packages are not recommended for production use, they can provide a convenient starting point for a developer new to Moodle.
To manually install Moodle, download the Moodle source code files from http://moodle.org. You will find a variety of download packages. Each package is labeled with the version number. Major versions of Moodle are numbered in tenths: 1.6, 1.7, 1.8, and so on. Major versions focus on adding new features and bug fixes, which require major system changes to be implemented. Each major release has a number of minor point releases. For example: 1.9.1, 1.9.2, 1.9.3, and so on. Minor point releases focus on bug fixes and security updates. Finally, there are 'plus' releases that contain nightly or weekly fixes.
From a developer's perspective, it makes sense to use the official CVS feeds to get Moodle's source code. This allows for easier updates and code merges, as well as integrating with many popular development tools. See http://docs.moodle.org/en/CVS_for_Administrators.
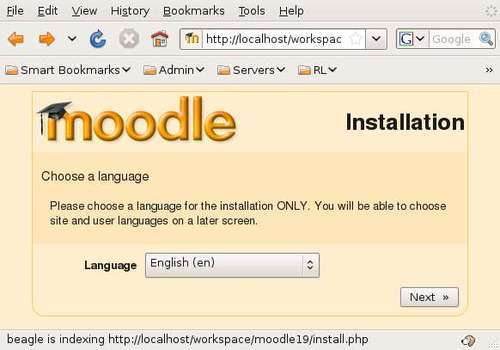
Once you have the source code, it needs to be copied to your server's web root. You should then create a folder (outside of the web root) for Moodle data, which is writable by the web server software. From your SQL server, create an empty database for Moodle to use. Finally, once this is done, you should enter the server's address and path to Moodle into your web browser. This will initiate the Moodle web installer and walk you through the rest of the installation options. During the installation you will be asked to enter details for your database. Once these have been entered, Moodle will connect to the database and create all 200+ tables. At the end of the installation it will write a config.php file to your Moodle directory with the values that you entered during installation. The following screenshot illustrates the first screen of the Moodle installer, where we select our default language:
Upgrades follow the same basic pattern. Download the new code, copy it on the server in place of the old code (note that in most cases, you can copy the new code over the top of the old folder contents), and then visit the Moodle site in your web browser. Moodle will detect a version change by comparing the version tags stored in its configuration database against the ones reported in the module code, and then initiate the upgrade. Each module is responsible for its own database upgrades.
The final consideration for our development environment is to have a development tool for writing our code. While it is perfectly possible to write PHP code in any text editor (and many do), a popular option is to use the PHP plugin for Eclipse, or NetBeans. Detailed instructions for optimizing this setup can be found at http://docs.moodle.org/en/Setting_up_Eclipse_for_Moodle_development.