

The most basic building blocks of Moodle, or indeed any VLE, are static resources. Chances are that you have already created a wealth of worksheets and supporting documents for your subject area and these may already exist on an Intranet. An Intranet is an internal network, as opposed to the Internet, which is the network of computers outside of your organization. The Intranet resources can easily be added to Moodle, but in a more structured way than just allowing students access to a named folder on an Intranet. In addition, they can be organized with a more meaningful context and linked in to other more interactive resources to build a detailed learning resource.
In order to add material to the site, it first needs to be placed on the server itself. Moodle is a web-based system that links material stored in an area designated for the course being used to an easy-to-use web interface. Therefore, you need to upload your material to the site in order to make the resource available.
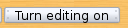
In order to do this, you first need to enable the edit functions on the course itself. You can achieve this by clicking the following button, which appears at the top-right corner of all your courses:
To add a file to the site, choose the Add a resource drop-down bar, as shown in the following screenshot, and select the option to Link to a file or web site. The resource menu that opens will be common to most elements you add to Moodle, so is worth looking at in some detail. Once you have understood this process, it is easy to modify and replicate it for all other aspects of Moodle; again, this is a very useful design feature in and of itself.

The process of adding material to Moodle courses involves the following steps:
1. Naming the element.
2. Summarizing the element.
3. Linking to the resource (such as a file or website).
4. Presentation of the information.
5. Assigning permissions to user groups.
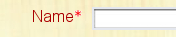
As you can see in the following screenshot, the name is required (designated by the *) as this will appear as the link in the course itself:
Giving some detail to the element may help students understand its purpose better if it is not immediately obvious. The field itself is labeled as Description and will be displayed to students in the main window when they first access the resource. You could use this to add some more detail if the resource or website link itself is not obvious. For example, you might note that the website link you have provided will help them with a specific aspect of their coursework.
As you can see, you can either type in a web address as the link to the resource, or you upload a file to the system and then click on Choose to make it available. If you choose an uploaded file, the system will present you with a file manager window and ask you to select a file to upload. This can be done from anywhere, which gives a great deal of flexibility. If the file is already there, then simply click on the Choose or upload a file button, as shown in the following screenshot:

Moodle is an online system, and as such, it is based on open standards and practices. Many students may not have access to proprietary office software at home and may therefore be disadvantaged by being asked to use that software for their homework, though Microsoft does provide free readers for Word and PowerPoint. If you use something such as OpenOffice, you can give your students a copy to take home on a CD, thus guaranteeing they have the same software and are not using something that was illegally obtained. OpenOffice also outputs files as .docs and .pdfs. A PDF reader is also freely available on the Internet.
Once you have chosen the material, such as a health and safety guideline for working with metals or corrosive construction materials such as lime, you need to decide if it is easier to display in the same window or a new one. I find it less distracting if the resource opens into another window, but this is a personal choice.
The grouping feature needs to be explained briefly, though it will be covered in a later chapter as it is very useful. It also needs to be enabled by the site administrator in order to be available (for details, please see Chapter 9, Tracking Progress with the Gradebook). Its main use here is for the purpose of differentiation. If grouping has been enabled at the site level, and assuming you have set your class up into groups such as Intermediate and Advanced, you can specify a grouping for this particular element resource. The students who make that group will see and use the resource, but all other students will not. This makes it useful for either advanced material for gifted and talented students, or more remedial material for students who have not yet grasped the concepts fully and need extra support. For example, a sub-group of your Product Design group may be working on some extra credit work relating to the electronic elements used in circuit design. These students can work on this material without the remainder of the group being distracted by material that they do not understand yet.