

Building a Simple Recipe Management Application
Let's do some simple exercises to test your knowledge. We are going to build a recipe-sharing platform throughout this book, and the API is the interface we expose to the public. We will first define what functions we want to provide and the corresponding URLs. These are the basic functions that we will probably need:

Figure 1.4: HTTP methods and functions
A typical recipe should have the following attributes
ID: The unique identifier for the recipeName: The name of the recipeDescription: The description of the recipe
We are going to build an API that lists all the recipes stored in our system. The API will be designed to return different results with different URLs. For example, http://localhost:5000/recipes is going to give us all the recipes stored in our system, while http://localhost:5000/recipes/20 will give us the recipe with ID = 20. Upon successful recipe retrieval, we will also see the HTTP status is set to 200 (OK). This indicates that our request has been successful.
When we create a new recipe, we use the HTTP POST method to query http://localhost:5000/recipes with all the necessary parameters to describe our recipe in JSON format. The JSON format is simply a key/value pair. If our request is successful, the recipe will be created in the backend and will return HTTP status 201 (Created). Together with the HTTP status, it will also send the recipe that has just been created in JSON format.
When we update a recipe, we use the HTTP PUT method to send the data to http://localhost:5000/recipes/20 with all the necessary parameters for the updated recipe in JSON format. If our request is successful, the recipe will be updated in the backend and it will return HTTP status 200 (OK). Together with the HTTP status, it will also send the updated recipe in JSON format.
When we delete a recipe, we can use the HTTP Delete method to send the data to http://localhost:5000/recipes/20. This will remove the recipe with ID = 20.
Now you know where we are heading to, let's roll up our sleeves and get our hands dirty!
Virtual Environment
It is always recommended for developers to develop their application inside a virtual environment instead of directly on their local environment.
The reason is that virtual environments are independent application development environments. We can create multiple virtual environments on a local machine, and these virtual environments can have their own version of Python, their own packages, their own environment variables, and so on. These virtual environments won't interfere with each other even though they are built on the same local machine.
In the following exercise, we will create a development project in the PyCharm IDE. We will show you how to set up a virtual environment for this project in PyCharm.
Exercise 1: Building Our First Flask Application
We are going to build our first Flask application in this exercise. You will realize how simple it is to build an application along the way. PyCharm is a great integrated development environment (IDE) with a nice GUI that will make our development process easier. We will learn about the workflow of application development, including the creation of the application project and installing the necessary Python packages:
- Create a new project in PyCharm with File > New Project. Name our project
basic-api. PyCharm will automatically help us to create a virtual environment for this new project.
Figure 1.5: Creating a new project
It's a good practice for projects to run on their own assigned independent virtual environments, so these projects can run on different packages and they won't affect each other.
- Install the necessary packages in our virtual environment. To do that, we can create a file named
requirements.txtin our project and type in the following text. We want to installFlask(version1.0.3) andhttpie(version1.0.2):Flask==1.0.3 httpie==1.0.2
Following screenshot shows the installation of Flask and httpie in
requirements.txt:
Figure 1.6: Installing Flask and httpie in requirements.txt
PyCharm is going to prompt us on the missing package, as shown in the screenshot. Clicking on Install requirement will let PyCharm take care of the installation for us in the virtual environment. Once the installation is done, we can create our first Python file, called
app.py.Note
To install the Python packages, we can also run the
pip install -r requirements.txtcommand in Terminal. It will yield the same result.The Flask package that we are installing is a web micro-framework. It is extremely lightweight and allows us to build a web service with just a few lines of code.
- Let's type in the following code in
app.py, then right-click on the filename ofapp.pyin the left panel, and select runappto execute our first web service in Flask:from flask import Flask app = Flask(__name__) @app.route("/") def hello(): return "Hello World!" if __name__ == "__main__": app.run()What this does is it first imports the Flask package in
app.py, then it instantiates aFlaskobject, and finally, it assigns it to theappvariable. We have created the main function as the entry point for our startup script. This subsequently brings up the Flask web server. After that, we have defined our first API function,hello, which returns a "Hello World" response. Using the Flask decorator, we can route the GET request URL to this function. - Now open the browser and type
http://localhost:5000, You will see the string Hello World!. No special format, just plaintext. This means your first web service passed the test, it works!
Figure 1.7: Browser showing Hello World in plaintext
This is a very good start! Though this web service merely returns the plain text string, we can build a lot of stuff on top of that.
I hope you can see how simple it is to build a web service using Flask; it is literally just a few lines of code. In fact, there are more Flask extensions out there that can help us build fancy functions. And be patient, we will talk about that in the subsequent chapters. For now, let's stay simple and get ourselves familiar with Flask first.
For production-grade applications, data is usually stored in a database. We haven't looked at how to interact with the database yet, so for now, we are going to simply store them in memory. Since we are building a recipe sharing platform, we will be creating two recipes in our next exercise, and we'll let them live in the memory.
Exercise 2: Managing Recipes with Flask
In this exercise, we are going to work on our recipe management application with Flask. We will implement functionality to get recipes, to create recipes, and to update recipes. Without further ado, let's get started:
Note
For the complete code, please refer to https://github.com/TrainingByPackt/Python-API-Development-Fundamentals/tree/master/Lesson01/Exercise02.
- First, clean up
app.pyand start everything all over again, import the packages that we need for this web service from the preceding code:from flask import Flask, jsonify, request
The jsonify package here is to convert our Python objects (such as a list) to JSON format. It will also change the content type in our HTTP response to application/json. Simply put, it takes care of the heavy lifting of converting to JSON format for us.
- Then we import the
HTTPStatusenum, which includes different HTTP statuses:from http import HTTPStatus
For instance, we will have
HTTPStatus.CREATED (201)andHTTPStatus.NOT_FOUND (404). - Create an instance of the
Flaskclassapp = Flask(__name__)
- Define the recipes list. We store two recipes in the list. They are stored in the memory
recipes = [ { 'id': 1, 'name': 'Egg Salad', 'description': 'This is a lovely egg salad recipe.' }, { 'id': 2, 'name': 'Tomato Pasta', 'description': 'This is a lovely tomato pasta recipe.' } ] - Use the route decorator to tell Flask that the
/recipesroute will route to theget_recipesfunction, and themethods = ['GET']argument to specify that the route decorator will only respond to GET requests:@app.route('/recipes', methods=['GET']) def get_recipes():Note
Please note that if we don't specify methods argument, the default will still be only responding to GET requests.
- After that, use the
jsonifyfunction to convert the list of recipes to JSON format and respond to the client:return jsonify({'data': recipes}) - After getting a specific recipe, if you only want to retrieve one specific recipe, then use the
/recipes/<int:recipe_id>route to trigger theget_recipe(recipe_id)function.@app.route('/recipes/<int:recipe_id>', methods=['GET'])The syntax
<int:recipe_id>syntax means the value in the route will be assigned to the integer variable id integer variable and can be used in the function. Our functionget_recipe(recipe_id)function will then loop through the whole "recipes" list and locate the recipe that has the id that we are looking for. If that recipe exists, then we will return it. - Take a closer look at our
get_recipefunction. Get the next recipe in the loop by usingrecipe = next((recipe for recipe in recipes if recipe['id'] == recipe_id), None). Here, the linefor recipe in recipesiterates through all the recipes in our recipe collection and finds out the recipe withid = recipe_id. Once we have found it, we store it in the iterator and retrieve it using the next function. If there is no such recipe with that ID,Nonewill be returned:def get_recipe(recipe_id): recipe = next((recipe for recipe in recipes if recipe['id'] == recipe_id), None) if recipe: return jsonify(recipe) return jsonify({'message': 'recipe not found'}), HTTPStatus.NOT_FOUND - Next, we will work on the
create_recipefunction, which creates a recipe in memory. Use the/recipesroute to thecreate_recipefunction and the "methods = [POST]" argument to specify that the route decorator will only respond to POST requests:@app.route('/recipes', methods=['POST']) - After that, use the
request.get_jsonmethod to get the name and description from the client POST request. These two values together with a self-incremented id that we generate will be stored in the recipe (dictionary object) and then appended to our recipes list. At this point in time, the recipe is created and stored:def create_recipe(): data = request.get_json() name = data.get('name') description = data.get('description') recipe = { 'id': len(recipes) + 1, 'name': name, 'description': description } recipes.append(recipe) - Finally, return the recipe that has just been created in JSON format, together with an HTTP 201 (CREATED) status. The following code highlights this:
return jsonify(recipe), HTTPStatus.CREATED
- The next part of code is about updating recipes. Again, use the same line of code here,
recipe = next((recipe for recipe in recipes if recipe['id'] == recipe_id), None)to get the recipe with a specific ID:@app.route('/recipes/<int:recipe_id>', methods=['PUT']) def update_recipe(recipe_id): recipe = next((recipe for recipe in recipes if recipe['id'] == recipe_id), None) - The next few lines of code say that if we can't find the recipe, we will return a
recipe not foundmessage in JSON format, together with aHTTP NOT_FOUNDstatus:if not recipe: return jsonify({'message': 'recipe not found'}), HTTPStatus.NOT_FOUND - If we found the recipe, then perform the
recipe.updatefunction, and put in the new name and description you get from the client request:data = request.get_json() recipe.update( { 'name': data.get('name'), 'description': data.get('description') } ) - Finally, we convert the updated recipe to JSON format using the
jsonifyfunction and return together with a default HTTP status 200 (OK). The following code highlights this:return jsonify(recipe)
- The last few lines of code in our program is for starting up the Flask server:
if __name__ == '__main__':
    app.run()
- Once the code is done, right-click on the
app.pyfile and click run to start the application. The Flask server will be started up and our application is ready to be tested. The full code looks like this:from flask import Flask, jsonify, request from http import HTTPStatus app = Flask(__name__) recipes = [ { 'id': 1, 'name': 'Egg Salad', 'description': 'This is a lovely egg salad recipe.' }, { 'id': 2, 'name': 'Tomato Pasta', 'description': 'This is a lovely tomato pasta recipe.' } ] @app.route('/recipes/', methods=['GET']) def get_recipes(): return jsonify({'data': recipes}) @app.route('/recipes/<int:recipe_id>', methods=['GET']) def get_recipe(recipe_id): recipe = next((recipe for recipe in recipes if recipe['id'] == recipe_id), None) if recipe: return jsonify(recipe) return jsonify({'message': 'recipe not found'}), HTTPStatus.NOT_FOUND @app.route('/recipes', methods=['POST']) def create_recipe(): data = request.get_json() name = data.get('name') description = data.get('description') recipe = { 'id': len(recipes) + 1, 'name': name, 'description': description } recipes.append(recipe) return jsonify(recipe), HTTPStatus.CREATED @app.route('/recipes/<int:recipe_id>', methods=['PUT']) def update_recipe(recipe_id): recipe = next((recipe for recipe in recipes if recipe['id'] == recipe_id), None) if not recipe: return jsonify({'message': 'recipe not found'}), HTTPStatus.NOT_FOUND data = request.get_json() recipe.update( { 'name': data.get('name'), 'description': data.get('description') } ) return jsonify(recipe) if __name__ == '__main__': app.run()
The output is shown in the following screenshot:
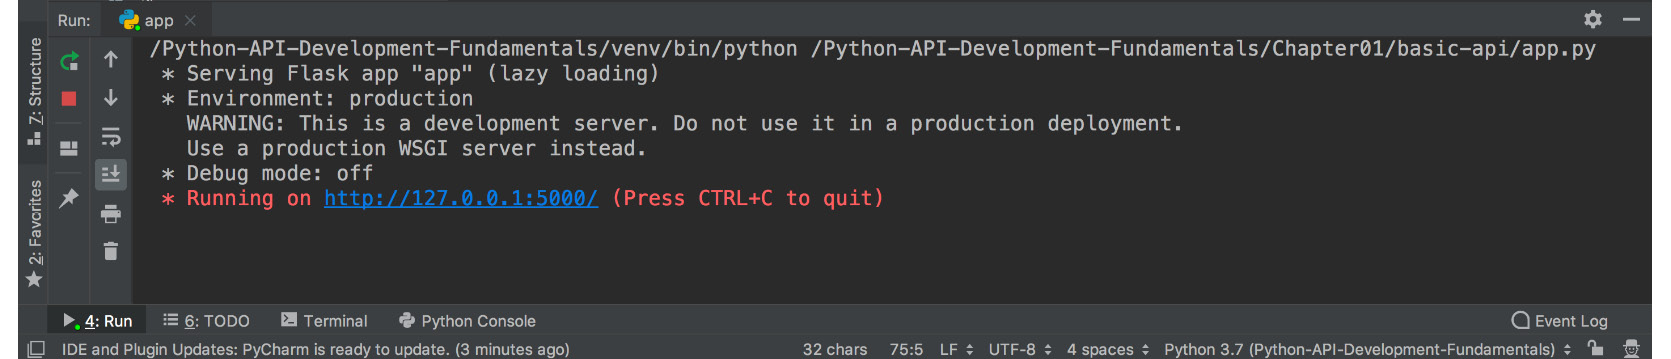
Figure 1.8: The final Flask server
In the following sections, we will show you how to test your web service using curl/httpie or Postman.