

Everything you do in Dreamweaver requires that you first create a Dreamweaver site. Without that Dreamweaver site, nothing really works in Dreamweaver.
Why is that? Basically, this is because the web pages you learn to build in the course of this book involve dozens of files. Dozens? Really? Well, count them: a few JavaScript files, links to internal and external pages, embedded audios, videos, and images, links to CSS files, and embedded content from other pages using the iFrame technique. We're up to dozens already!
If any of the relationships or links between these files gets corrupted—through a file being moved, renamed, or deleted—our page collapses. But if we are working within (and following the rules for working in) a Dreamweaver site, Dreamweaver keeps track of all the files in all your web pages—for example, embedded image files and video clips and links to other web pages—and makes sure all those files work together.
A Dreamweaver site also provides tools to manage file transfers between our local (preview) site and the online remote version of the site.
All this starts with defining a separate (and just one) Dreamweaver Site for every website you manage with Dreamweaver. We have "Site" in italics and capitalized here to emphasize that we are not talking about organizing files in a "website", but defining a very specific Dreamweaver thing—a Site.
The easiest way to do that from any interface in Dreamweaver is through the Site menu. And the first (and only essential) part of defining a site is to create a local version on your own computer; linkage to a remote (online) server can come later.
Before defining a Dreamweaver site, create a folder on your computer (your desktop is a convenient place) that will serve as the root folder for your site. Avoid spaces or special characters while naming that folder (that is, daves-website not Dave's Website!).
To define a local site, follow these steps:
With Dreamweaver CS6 launched, choose Site | New Site. The Site Setup dialog opens.
In the Site Name field, enter any content that helps you distinguish this site from other sites. There are no constraints on using spaces or special characters.
In the Local Site Folder field, use the Browse for Folder icon to locate the folder you created to serve as your site's root folder.

The preceding screenshot shows how to create a root folder for a Dreamweaver site.
After you click on the Browse for Folder icon, the Choose Root Folder dialog opens. Navigate to your root folder and click on Choose. This returns you to the Site Setup dialog.
Click on Save to complete the local site's definition:

The previous screenshot shows a Dreamweaver site with the Local Site Folder file defined.
We'll return shortly to our local site and see how to use it, but first let's walk through how to define a remote connection for our site.
Most websites are intended for public distribution on the Internet. They are hosted on servers that enable this; these server hosts are easy to find (one reliable list of pricing and features is at http://reviews.cnet.com/web-hosting-plans/).
You need to have contracted for remote hosting before you can define a Dreamweaver CS6 link to a remote server. This hosting service will provide you with three essential pieces of information—an FTP address, a username, and a password. Some hosting setups include a defined root directory as well. Record that information when you contract for hosting, or look up the login info for your current hosting service if you are incorporating that server into a Dreamweaver site only now.
With your FTP address, username, and password taken care of, the following steps walk through what is required to define a remote connection for your Dreamweaver site. Or don't. Remember, a remote site is not necessary to build a site on your own computer, and you'll be able to work through almost everything in this book without a remote connection.
To define a remote connection for a Dreamweaver site, follow these steps:
With Dreamweaver CS6 launched, choose Site | Manage Sites. This opens the Manage Sites dialog, and by the way, you use this technique (managing a site) to edit anything in your Dreamweaver site definition, not just the remote connection.
In the Manage Sites dialog, double-click on your site from the Your Sites list to open the Site Setup dialog again.
In the list of categories on the left-hand side of the Site Setup dialog, select Servers.
Click on the Add New Server (+) button. Another dialog named Site Setup… opens.
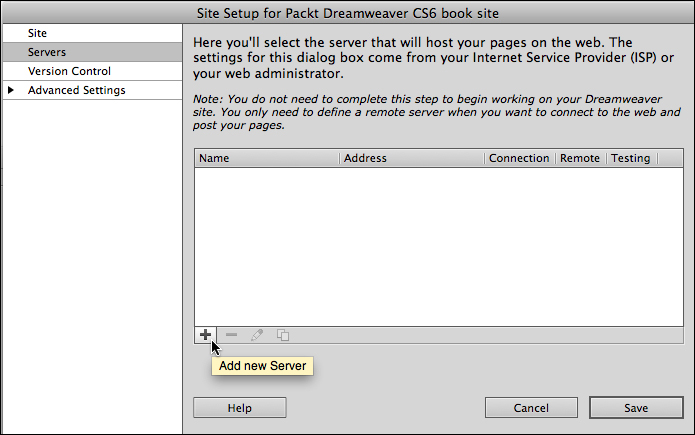
The previous screenshot shows a new server connection being added to a site definition.
In the Server Name field, enter any text that helps you remember what server you are connecting to.
In the FTP Address field, enter the FTP address provided by your hosting administrator, in the Username field enter the provided username, and in the Password field enter your password. Most sites use Port 21, so don't change the default value in the Port field unless instructed by your site administrator.
Selecting the Use Passive FTP and Use FTP Performance Optimization checkboxes can be advantageous in avoiding connection glitches. To see these options, expand the More Options section of the Site Setup… dialog. By default, these checkboxes are selected in Dreamweaver CS6.
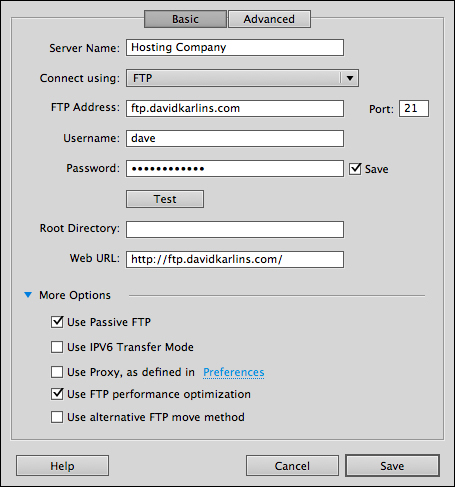
The preceding screenshot illustrates a defined remote connection.
The Web URL field is filled in automatically by Dreamweaver based on what you enter in the FTP Address field. This information is used by Dreamweaver for tools such as its built-in, link-checking features, but it is not relevant to, and serves more as a distraction from the process of defining a site. If you wish, you can replace the generated URL with the actual URL for your website.
Don't click on Save yet. First, click on the Test button. If you get an error message, check your FTP address, login credentials, and password with your site-hosting company (and be sure you are connected to the Internet). When the Test button produces a message saying that you have connected to your web server successfully, click on Save.
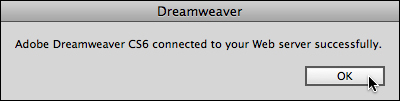
The preceding screenshot illustrates a successfully tested remote connection.
After you save the remote connection, the Site Setup … dialog reappears. Click on Save again. Then, click on the Done button in the Manage Sites dialog. Your site is now defined!
After you define a Dreamweaver site, you can view files in either the local or remote version of the site in the Files panel. Like any other panel in Dreamweaver, you can view or hide the Files panel through the Window menu.
There are two drop-down menus in the toolbar at the top of the Files panel. Use the first one to select a Dreamweaver site. If you have only one site, that site will be selected by default.
The second drop-down menu in the Files toolbar toggles between four views, two of which are relevant and two of which are esoteric for most designers. The first two options toggle between viewing files on the local or remote versions of the site. The Testing server option is for backend programming scripts, which manage data, and the Repository view option is for stored code snippets.
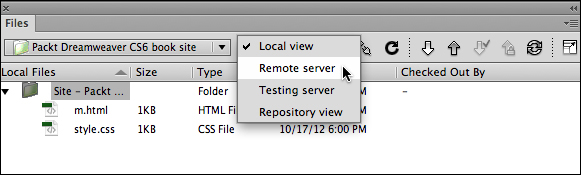
The preceding screenshot illustrates toggling between local and remote views.
When you click on the Connect to Remote Server button, you can use the Files panel to view files in your remote site. You can split the Files panel by clicking on the Expand/Collapse icon at the far right of the Files panel toolbar:
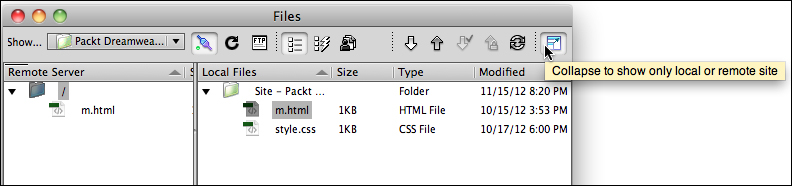
In the preceding screenshot, the Connect to Remote Server button is pressed, and the Collapse/Expand button is hovered over; this allows us to toggle between viewing both local and remote views together, (when expanded) or only the local or remote view (when collapsed).
You can drag files from the local to remote sides of the Files panel, or use the Get Files (down arrow) or Put Files (up arrow) notation to download or upload your files respectively.