
Let's put our hands on our first code. The following is yet another Hello World program:
1. # File name: hello.py
2. import kivy
3. kivy.require('1.7.0')
4.
5. from kivy.app import App
6. from kivy.uix.button import Label
7.
8. class HelloApp(App):
9.   def build(self):
10.     return Label(text='Hello World!')
11.
12. if __name__=="__main__":
13.   HelloApp().run()
This is merely a Python code. Launching a Kivy program is not different from launching any other Python application. In order to run the code, you just have to open a terminal (line of commands or console) and specify the command, python hello.py --size=150x100 (--size is a parameter to specify the screen size). In the preceding code, the lines 2 and 3 verify if you have the appropriate version of Kivy installed in your computer.
Note
If you try to launch your application with an older Kivy version (say 1.6.0), an exception is raised for the specified version. There is no exception raised if you have a more recent version. Of course, backwards compatibility is desired but not always possible, and so you might face problems if you use a newer version.
We omit this statement in most of the examples inside the book, but you will be able to find it again in the online codes, which you can download, and its use is strongly encouraged in real life projects. The program uses two classes from the Kivy library (lines 5 and 6): App and Label. The App class is the starting point of any Kivy application. The following screenshot shows the window containing a Label with the Hello World text:
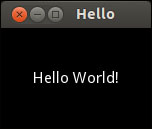
Hello World Output
The way we use the App class is through inheritance. App becomes the base class of HelloApp (line 8), the subclass or child class. In practice, this means that the HelloApp class has all the properties and methods of App in addition to whatever we define in the body (lines 9 and 10) of the HelloApp class.
In this case, the HelloApp's body just modifies one of the existent App's methods, the build(self) method. This method returns the window content. In this case, a simple Label saying Hello World! (line 10). Finally, the line 13 creates an instance of HelloApp and runs it.
So, is Kivy just another library for Python? Well, yes. But as part of the library, Kivy offers its own language to separate the logic from the presentation. For example you could write the preceding Python code in two separate files. The first file would then include the Python lines as shown in the following code:
14. # File name: hello2.py
15. from kivy.app import App
16. from kivy.uix.button import Label
17.
18. class Hello2App(App):
19.   def build(self):
20.     return Label()
21.
22. if __name__=="__main__":
23.   Hello2App().run()
The hello2.py code is very similar to hello.py. The difference is that the line 20 doesn't have the Hello World! message. Instead, the message has been moved to the text property in the second file (hello2.kv) which contains the Kivy language:
24. # File name: hello2.kv
25. #:kivy 1.7.0
26. <Label>:
27.   text: 'Hello World!'
How does Python or Kivy know that these files are related? This is quite important and tends to be confusing at the beginning. The key is in the name of the subclass of the App, that is, HelloApp.
Note
The initial part of the App's subclass name has to coincide with the name of the Kivy file. For example, if the definition of the class is class FooApp(App), then the name of the file must be foo.kv and it must be in the same directory of the main file (the one that executes the App's run() method).
Once that consideration is included, this example can be run in the same way we ran the hello.py. We just need to be sure that we are calling the new main file (hello2.py), python hello2.py -–size=150x100.
This is your first contact with the Kivy language, so let's go slowly. The #:Kivy 1.7.0 line of the hello2.kv code tells Python the minimal Kivy version that should be used. The line does the same that the lines 2 and 3 did in the hello.py code. The instructions that start with #: in the header of a Kivy language are called directives. We will also be omitting the version directive along the book, but remember to include it in your projects.
The <Label>: rule (line 26) indicates that we are going to modify the Label class by setting 'Hello World!' in the text property (line 27). This code generates the same output that was shown in the previous screenshot. There is nothing you can't do using pure Python and importing the necessary classes from the Kivy library as we did in the first example (hello.py). However, the separation of the logic from the presentation results in simpler and cleaner code. Therefore, this book explains all the presentation programming through the Kivy language, unless dynamic components are added.
You might be worrying that modifying the Label class affects all the instances we create from Label, because, they will all contain the same Hello World text. That is true. Therefore, in the following section, we are going to learn how to directly modify specific instances instead of classes.