Book Image

OpenCV 3 Computer Vision with Python Cookbook

By : Aleksei Spizhevoi, Aleksandr Rybnikov
Book Image

OpenCV 3 Computer Vision with Python Cookbook

By: Aleksei Spizhevoi, Aleksandr Rybnikov

Overview of this book

OpenCV 3 is a native cross-platform library for computer vision, machine learning, and image processing. OpenCV's convenient high-level APIs hide very powerful internals designed for computational efficiency that can take advantage of multicore and GPU processing. This book will help you tackle increasingly challenging computer vision problems by providing a number of recipes that you can use to improve your applications. In this book, you will learn how to process an image by manipulating pixels and analyze an image using histograms. Then, we'll show you how to apply image filters to enhance image content and exploit the image geometry in order to relay different views of a pictured scene. We’ll explore techniques to achieve camera calibration and perform a multiple-view analysis. Later, you’ll work on reconstructing a 3D scene from images, converting low-level pixel information to high-level concepts for applications such as object detection and recognition. You’ll also discover how to process video from files or cameras and how to detect and track moving objects. Finally, you'll get acquainted with recent approaches in deep learning and neural networks. By the end of the book, you’ll be able to apply your skills in OpenCV to create computer vision applications in various domains.
Table of Contents (11 chapters)

Jumping between frames in video files

In this recipe, you will learn how to position VideoCapture objects at different frame positions.

Getting ready

You need to have OpenCV 3.x installed with Python API support.

How to do it...

The steps for this recipe are:

  1. First, let's create a VideoCapture object and obtain the total number of frames:
import cv2
capture = cv2.VideoCapture('../data/drop.avi')
frame_count = int(capture.get(cv2.CAP_PROP_FRAME_COUNT))
print('Frame count:', frame_count)
  1. Get the total number of frames:
print('Position:', int(capture.get(cv2.CAP_PROP_POS_FRAMES)))
_, frame = capture.read()
cv2.imshow('frame0', frame)
  1. Note that the capture.read method advances the current video position one frame forward. Get the next frame:
print('Position:', capture.get(cv2.CAP_PROP_POS_FRAMES))
_, frame = capture.read()
cv2.imshow('frame1', frame)
  1. Let's jump to frame position 100:
capture.set(cv2.CAP_PROP_POS_FRAMES, 100)
print('Position:', int(capture.get(cv2.CAP_PROP_POS_FRAMES)))
_, frame = capture.read()
cv2.imshow('frame100', frame)

cv2.waitKey()
cv2.destroyAllWindows()

How it works...

Obtaining the video position and setting it is done using the cv2.CAP_PROP_POS_FRAMES property. Depending on the way a video is encoded, setting the property might not result in setting the exact frame index requested. The value to set must be within a valid range.

You should see the following output after running the program:

Frame count: 182
Position: 0
Position: 1
Position: 100

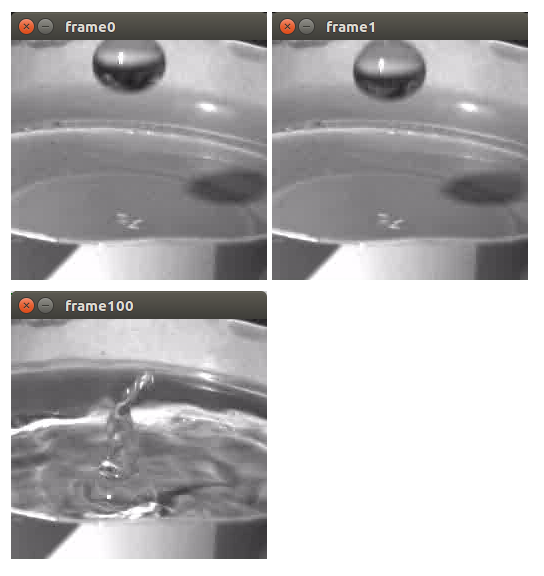
The following frames should be displayed: