In this recipe, we will learn how to enable the handling of mouse input in your OpenCV application. An instance that gets events from a mouse is the window, so we need to use cv2.imshow. But we also need to add our handlers for mouse events. Let's see, in detail, how to do it by implementing crop functionality through selecting image regions by mouse.
Making your app interactive through handling user input from a mouse
Getting ready
You need to have OpenCV 3.x installed with Python API support.
How to do it...
The steps for this recipe are as follows:
- First, load an image and make its copy:
import cv2, numpy as np

image = cv2.imread('../data/Lena.png')
image_to_show = np.copy(image)
- Now, define some variables to store the mouse state:
mouse_pressed = False
s_x = s_y = e_x = e_y = -1
- Let's implement a handler for mouse events. This should be a function that takes four arguments, as follows:
def mouse_callback(event, x, y, flags, param):
    global image_to_show, s_x, s_y, e_x, e_y, mouse_pressed

    if event == cv2.EVENT_LBUTTONDOWN:
        mouse_pressed = True
        s_x, s_y = x, y
        image_to_show = np.copy(image)

    elif event == cv2.EVENT_MOUSEMOVE:
        if mouse_pressed:
            image_to_show = np.copy(image)
            cv2.rectangle(image_to_show, (s_x, s_y),
                          (x, y), (0, 255, 0), 1)

    elif event == cv2.EVENT_LBUTTONUP:
        mouse_pressed = False
        e_x, e_y = x, y
- Let's create the window instance that will be capturing mouse events and translating them into the handler function we defined earlier:
cv2.namedWindow('image')
cv2.setMouseCallback('image', mouse_callback)
- Now, let's implement the remaining part of our application, which should be reacting to buttons pushes and cropping the original image:
while True:
    cv2.imshow('image', image_to_show)
    k = cv2.waitKey(1)

    if k == ord('c'):
        if s_y > e_y:
            s_y, e_y = e_y, s_y
        if s_x > e_x:
            s_x, e_x = e_x, s_x

        if e_y - s_y > 1 and e_x - s_x > 0:
            image = image[s_y:e_y, s_x:e_x]
            image_to_show = np.copy(image)
    elif k == 27:
        break

cv2.destroyAllWindows()
How it works...
In cv2.setMouseCallback , we assigned our mouse events handler, mouse_callback , to the window named image.
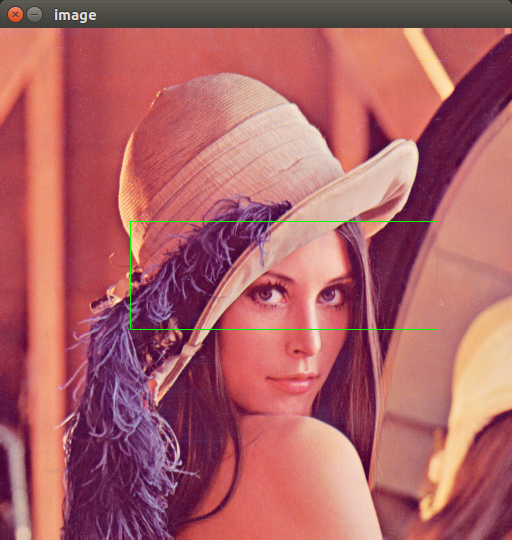
After launching, we will be able to select a region by pushing the left mouse button somewhere in the image, dragging the mouse to the end point, and releasing the mouse button to confirm that our selection is finished. We can repeat the process by clicking in a new place—the previous selection disappears:
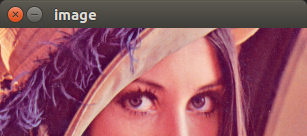
By hitting the C button on the keyboard, we can cut an area inside the selected region, as follows: