

In the previous sections, we talked about downloading the Backbase package and about trying out the demos on the Developer Network site of Backbase. We also showed what a Backbase starter page looks like, so finally, we can show real Backbase code.
It is time to say "Hello Backbase!" We will do so by showing typical "Hello World" examples as follows:
The first example shows a simple alert when you click on the Click me text. It serves to make sure that we have the right setup for our applications.
The second and third examples are a bit more interesting: a balloon from the Backbase Tag Library is shown, with the text that you typed in an input field. The difference between the two is the use of JavaScript or the XML Execution Language, as you will see.
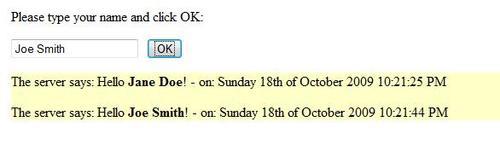
The fourth example is an AJAX example. It involves communication with a server, which echoes the text typed in, together with a timestamp. The response is added to earlier responses without refreshing the page.
Note
Downloading the example code for the book
Visit http://www.packtpub.com/files/code/9126_Code.zip to directly download the example code.
The downloadable files contain instructions on how to use them.
We assume that you have a web development environment set up now and that you have put the Backbase libraries at the right place. We will take a follow-along approach for explaining the "Hello World!" examples, but of course you can also just execute the ready-to-run downloaded source code instead of typing the code yourself.
Start with creating a new folder named bookApps, or whatever name you like better. Next, create a subfolder of the bookApps folder named helloWorld.
Create an HTML file named hello1.html and put this file in the helloWorld folder. Copy the skeleton file that we saw in the previous section into hello1.html. Remember the following:
In this file, we made sure that the Backbase Framework Client Runtime will be loaded because of the
<script>tag in the head section of the HTML document.The
<script>tag in the body section of the HTML document has a type declaration,application/backbase+xml, which tells the client runtime to process whatever is contained within the tag.The first thing that the client runtime is asked to process is the inclusion of the
config.xmlfile, which contains the bindings that define the UI widgets.
The position where <!-- YOUR APPLICATION CODE GOES HERE --> is placed tells the runtime that it should process whatever we replace this with.
Namespace declarations are needed for all the namespaces used, in the tag where they are used, or a parent tag within the document.
Replace <!-- YOUR APPLICATION CODE GOES HERE --> with the following content:
<div>
<e:handler
xmlns:e="http://www.backbase.com/2006/xel"
event="click" type="text/javascript">
alert('Backbase says hello!');
</e:handler>
Click me
</div>
To see your first "Hello" example in action, you can either double-click on hello1.html in the Windows explorer (if you are running Windows), or, if you have started your local server, you can open a browser and type something like this in the address bar: http://localhost/bookApps/helloWorld/hello1.html.
After clicking on the Click me text, you should see a result that is similar to what is shown in the following picture:
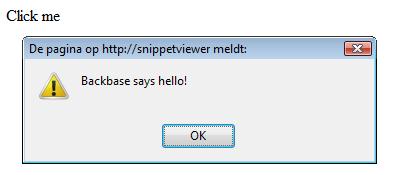
What if you do not see anything? The most common problem that could be the cause is that the path to boot.js or config.xml is not correct. If you are running with a server, check that it is running properly, and that it can find your hello1.html.
When all is well: Congratulations! The Backbase Client Framework is running successfully.
Let us look at the code:
The interesting part of the code is the event handler for the
divelement that contains the Click me text. Thee:handlertag is part of the XML Execution Language (XEL), a custom markup language that is provided with the Backbase Client Framework, and that can be used as a replacement for JavaScript in many cases.The namespace that we need for using XEL is declared in the
e:handlertag itself; it could also have been declared in the<div>or<html>tags.Between the start and end
e:handlertags, you can code either JavaScript, as in this example, or XEL, as we will see in the next "Hello World!" example.
You could have coded the example also as "Hello World" without the Backbase event handler: <div onclick="alert('Backbase says hello!');"> Click me! </div>. At first sight, this is shorter, so why would we need Backbase for this? Well, usually, you need more in the event handler than just a short alert. In such case, you have two choices: either clutter your page with hard to read JavaScript or create a JavaScript function that you put in the head section. Before you know it, you will have many of these functions, which become hard to maintain and organize. In the case of the XEL event handler, you can write well-formatted and well-structured JavaScript code that stays local to the widget where you put the event handler. Of course, you can define more global functionality as well and you will see examples of this in several variations later in the book.
Note
XML namespaces! In this first example, you saw again a new XML namespace, this time for XEL. We already saw the XHTML and the XInclude namespace declaration in the page skeleton; in the next section you will see the Backbase Tag Library, the Commands, and the Forms namespace. Yes, that is a lot of namespaces and we will see a few more in the rest of the book. We promise that you will find out how useful these are and that you will get used to it.
This was a very simple example that made sure the Backbase framework is working right. In the next three examples, we will expand your knowledge by demonstrating a personalized "Hello World", using a tag from the Backbase Tag Library. The last "Hello World" example will demonstrate the AJAX functionality of the Backbase Client Framework by showing a form with one input field, which, when submitted, causes a response to be displayed somewhere in the page without a page refresh.
This section contains a pair of examples showing how to create a BTL balloon that is filled with custom text.
Note
The balloon widget displays an image similar to that of a dialogue box in a comic book. The balloon can contain text, images, or other widgets. The user can click on the x icon in the balloon to close it or the balloon can be displayed for a limited amount of time. The balloon is positioned in relationship to its parent widget.
The balloon widget is similar to a toolTip because they represent information that becomes available only after an action is performed. Most often, these widgets are used to present contextual information about a widget in your application.
This is not the easiest example for showing a Backbase GUI widget from the Backbase Tag Library. However, we have chosen it because we wanted to show an example that illustrates the power of using pre-built widgets.
The example is done twice, to show that BTL can be coded in two ways, either by using an event handler with JavaScript content, or by using no JavaScript at all. The second version of the example shows the Backbase-specific XML Execution Language (XEL) and Backbase Commands instead of JavaScript. Any combination of these two styles is also possible, as many examples in the Backbase documentation and in this book will show.
Below is a picture of what the result of trying the example will look like:
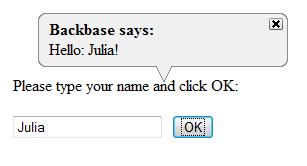
The user will type a name, and after clicking OK, the balloon will appear. The user can click on the x to close it. Otherwise, it will disappear automatically after a while.
The first balloon example uses JavaScript in the event handler of the button, similar to the previous example, which had an event handler on the div element using the XML Execution Language.
We saw the XEL namespace before. The Backbase Tag Library (BTL) namespace is new; we need it because the balloon widget belongs to it.
Create a file in the helloWorld folder that you created in the first tutorial, name it hello2.html, and then add a copy of the starter skeleton as content. Make sure that you understand what the contents of the hello2.html file represent. Look back if needed.
Because we need more namespace declarations than in the previous example, it is more convenient to add them to the <html> tag of the skeleton page:
xmlns:b="http://www.backbase.com/2006/btl" xmlns:e="http://www.backbase.com/2006/xel"
Replace the part where it says <!-- YOUR APPLICATION CODE GOES HERE --> in the starter page skeleton with the following code:
<div style="margin: 80px 0 0 20px; width: 300px;">
<p> Please type your name and click OK: </p>
<input id="myInput" type="text" />
<button style="margin-left: 10px;">
OK
<e:handler event="click" type="text/javascript">
var oBalloon = bb.document.getElementById('myBalloon');
var oInput = bb.document.getElementById('myInput');
var sValue = bb.getProperty(oInput,'value');
bb.command.setText(oBalloon, 'Hello: ' + sValue,'replaceChildren');
oBalloon.setAttribute('open', 'true');
</e:handler>
</button>
<b:balloon label="Backbase says:"
id="myBalloon" mode="top-center"
timeout="10s" width="250px" />
</div>
Save your work and type this in the address bar: http://localhost/bookApps/helloWorld/hello2.html. After typing your name in the input field and clicking OK, you should see the balloon appear.
Let's examine the code:
You will see that there are two namespace prefixes present: the
e:prefix for XML Execution Language that we saw before and theb:prefix for the Backbase Tag Library, which contains the balloon widget. We chose this time to add the namespace declarations to the<html>tag.There is a
b:balloonwidget on the page. Initially, you do not see it because theopenattribute isfalseby default. We need the event handler on the OK button to set theopenattribute totrue.The balloon will stay visible for 10 seconds after it appears and will be positioned at the top left of its parent widget, the
divin this case. We specified a margin for thediv, to give theb:balloonenough space.The balloon in our code has a label, but no content. We want to build the content of the balloon dynamically, using the value in the input field at the time the OK button is clicked.
The event handler for the click event of the button is specified in the same way as in the "Backbase says hello!" alert example, except that it contains a lot more JavaScript code. Now the usefulness of the XEL event handler becomes more convincing—if you would have placed the code in a single
onclick="..."line, it would have become rather unreadable. By the way, you can still use your old ways of coding JavaScript if you prefer.The
bbobject that is used in the code is of particular interest. The Backbase Client Runtime creates an additional DOM-like layer that shields you from browser incompatibilities. You can address the Backbase elements on this layer in the same way as the elements in the original DOM layer by using thebbobject. Thebbobject is instantiated when the Client Runtime is loaded.In our example, we need to find two elements by ID in the Backbase space. To do so, you should use the
bb.documentobject provided by the Client Runtime, instead of thedocumentobject provided by the browser. The variableoBalloonreceives a reference to the balloon, by looking up its ID usingbb.document.getElementById().Although the
inputwidget looks like a normal HTML widget, it is in fact also a Backbase widget because it is placed in the Backbase area. Therefore, we use thebbobject again to find it by ID.We find the value of what is typed in the input field by using
bb.getProperty. The next line requires some explanation: we need to have the text that is displayed in a text node. We create the text node by using the command functions,bb.command.setText.Finally, the
openattribute is set totrueand the balloon will be shown.
We will have more information about the bb object and the commands later in the book. For specific details, the Backbase documentation is a good source, in particular, the Backbase Reference at http://download.backbase.com/docs/client/current/Reference.chm.
You have now seen that the BTL widgets can be used and extended in a straightforward way using JavaScript. The next example looks exactly the same when you try it out, but the event handler now uses XEL instead of JavaScript.
As in the previous example, create a file in the helloWorld folder and this time name it hello3.html. Add a copy of the starter skeleton as content and replace <!-- YOUR APPLICATION CODE GOES HERE --> with the following content:
<div xmlns:b="http://www.backbase.com/2006/btl"
xmlns:c="http://www.backbase.com/2006/command"
xmlns:e="http://www.backbase.com/2006/xel"
style="margin: 80px 0 0 20px; width: 300px;">
<p> Please type your name and click OK: </p>
<input id="myInput" type="text" />
<button style="margin-left: 10px;">
OK
<e:handler event="click">
<c:setText
select="concat('Hello: ',
id('myInput')/property::value,'!')"
destination="id('myBalloon')"
mode="replaceChildren" />
<c:setAttribute
with="id('myBalloon')"
name="open"
select="'true'" />
</e:handler>
</button>
<b:balloon label="Backbase says:"
id="myBalloon" mode="top-center"
timeout="10s" width="250px" />
</div>
In this example, using the Backbase Tag Library (BTL), XML Execution Language (XEL), and Command Functions libraries may look daunting to you. While in the later chapters of the book we will fill in the details, we want you to look at the code here, see that it is more compact than the JavaScript version and that it is pure XML instead of JavaScript encapsulated within XML tags. We will explain now what is going on from a higher level:
In this example, the
<div>tag contains the namespace declarations that we put at the<html>tag in the previous example. This is done not only to show you that you can put namespace declarations in any parent tag of the tag where the namespace is used, but also to prepare ourselves for modularization of the code. We could carve out the<div>tag with its contents and put it in a separate file. We could then put an XInclude instead. If you do this, the declaration on the<html>tag would be useless, while the declaration on the<div>tag would be just what you need, except that you would have to add the default namespace for XHTML again to make the file a self-contained proper XML.The
e:handlertag does not have atypeattribute here because using XML as content is the default.When the button is clicked, the value in the text node is concatenated from three string parts, where the middle part is an XPath expression that extracts the value from the input field.
The destination of the newly created text node is the balloon.
A
setAttributefunction from the Backbase Command Functions language is used to open the balloon.The
b:balloonitself is the same as in the previous example.
We have now said "Hello!" using real Backbase BTL widgets and we peeked into XEL to see how we can code event handlers in a more structured way, choosing between JavaScript and XEL. You can use either, depending on your preferences.
The next example is a real AJAX example: we will communicate with a server asynchronously, and the updates are placed on the page doing a partial page reload, without refreshing the whole page.
To many people, AJAX is almost synonymous with XMLHttpRequest, the API that allows client programs to communicate asynchronously with a server. This example page shows the "Hello World" example communicating via AJAX using a Backbase form. If you are using the Backbase AJAX framework, it is possible that you will never use an XMLHttpRequest object directly, because its use is made transparent to you. If you wish however, it is possible to use it.
Here, we will look at using an ordinary looking form, still the most common means to enter information to be sent to a server. Instead of refreshing the whole page, AJAX is used when you tell the framework that you want to put the response to the form submitted at a particular spot on your page, by using the bf:destination attribute. As a server scripting language, we use PHP in our example because we assume that the majority of developers will be able to understand it. In addition, we show what the response file that PHP generates looks like. You can see from its structure how you could code an AJAX response in other languages.
Below you can see a snapshot of what the result could be of executing the example:
By now, you know the drill: create a file in the helloWorld folder, name it helloServer.html, and add a copy of the starter skeleton as content of this file.
Replace the part where it says <!-- YOUR APPLICATION CODE GOES HERE --> in the starter page skeleton, with the following code:
<div style="margin-left: 20px;">
<p>Please type your name and click OK:</p>
<form xmlns:bf="http://www.backbase.com/2007/forms"
action="response.php"
bf:destination="id('server-response-area')"
bf:mode="appendChild" method="post">
<input id="name" name="name" type="text" />
<input type="submit" style="margin-left: 10px;"
value="OK" />
</form>
<div id="server-response-area" style="background: #FFFFC8;"></div>
</div>
This form is not very interesting, except a few things that are as follows:
Adding a
bf:destinationattribute to the form will cause the submitted data to be sent asynchronously. Instead of refreshing the complete page, the contents of the response will be put at the defined destination by the Client Runtime, at thedivelement with IDserver-response-areain our example.We have also coded a
bf : modeattribute with the valueappendChild. This means that the response of the server will be put as the last child node of thedivelement. Every click of the OK button will add one more response line to the page, leaving intact what was there before. TheappendChildvalue is the default. Therefore, we could have omitted it here.
We will be looking at the server side next.
From the action that is specified in the form, you can see that response.php will be invoked when the form is submitted. Therefore, you should create a file in the helloWorld folder and name it response.php. Add the following as content:
<?php
header('Content-type: application/xml');
echo '<?xml version="1.0" encoding="UTF-8"?>';
?>
<div xmlns="http://www.w3.org/1999/xhtml">
<?php
$myname = $_POST['name'];
echo " <p>";
echo "The server says: Hello <strong>$myname</strong> ! - on: ";
echo date('l jS \of F Y h:i:s A');
echo " </p>\n";
?>
</div>
To see this "Hello Server" example in action, open a browser and type something like this in the address bar: http://localhost/bookApps/helloWorld/helloServer.html. Type something in the input field and click on OK. Change the input field and click on OK again. Repeat this a few times. You will see the list of responses grow, while the rest of the page is not touched. Some points to note are:
This time you cannot execute the example from the file system by double clicking on the
helloServer.htmlfile, because the web server needs to be activated to interpret the PHP script.The server script that receives the request should be aware that it should not send a complete page in return, and that the response should be valid XHTML.
In order for the browser to recognize that it is XML that it receives, the response header must be set appropriately. Using PHP, you can do this as follows: header('Content-type: application/xml');. If your scripting language is JSP, you could code: response.setHeader("Content-Type", "application/xml");.
For those of you who are not so familiar with PHP, we show here an example of a response file that might have been generated by response.php, as an actual response file:
<?xml version="1.0" encoding="UTF-8"?>
<div xmlns="http://www.w3.org/1999/xhtml">
<p>
The server says: Hello <strong>John Doe</strong>! - on:
Friday 30th of May 2008 12:50:43 PM
</p>
</div>
The server response includes a timestamp of when the response is sent. We did this to show that the page really stays put and is only partially changed. By entering new information in the input field and clicking the Submit button, a new line will be appended in the yellow box where the server messages are shown.