

Now that we are ready for the coding phase, as mentioned previously, we only need to implement the various methods that we have listed. Moving from this, we need to code the following steps:
Adding class fields.
Initializing the HornetQ environment.
Creating a connection, session, and looking for a JMS queue.
Creating a message and sending it to the queue.
Receiving the message sent in the previous step.
Saving to MongoDB.
Closing all connections and freeing up resources.
Every time you need to access a HornetQ queue, you need to create a connection as for a database, and create a session. If you access a queue as a message producer or as a message consumer, you need to create a connection and a session in it. All the configuration options that are needed to identify the queue or manage the connections will be described in Chapter 2, Setting Up HornetQ. For the moment, we will only describe how to create the connection and session. In our example class, both the session and connection are shared between the message producer and message consumer, so we will instantiate them only once. But in most of the cases, if you decide to write separate classes that access the queue from the consumer or the producer layer, you have to configure and open the session in both, separately.
In our example, we
will avoid the import directive and use objects identified by their fully qualified namespace, so that the reader can see where the objects are located in the namespace. The import statements do not affect runtime performance even if they affect compile-time ones, but using a wildcard, in our opinion, affects core readability.
So let us start with the fields needed through the various methods:
	javax.naming.Context ic = null;
	javax.jms.ConnectionFactory cf = null;
	javax.jms.Connection connection =  null;
	javax.jms.Queue queue = null;
	javax.jms.Session session = null;

	com.mongodb.Mongo m;
	com.mongodb.DB db;

	String destinationName = "queue/DLQ";
Note
Downloading the example code
You can download the example code files for all Packt books you have purchased from your account at http://www.PacktPub.com. If you purchased this book elsewhere, you can visit http://www.PacktPub.com/support and register to have the files e-mailed directly to you.
As you can see, we need to have a Context object that is responsible for mapping names to the objects, because the discovery of the queue name and other configuration options is done using JNDI in a .xml configuration file.
We also have a ConnectionFactory object that is able to create multiple connections to HornetQ.
The connection is an object that will be used from the message producer layer and message consumer layer to send/receive messages.
The queue is an object that maps the queue defined in HornetQ configuration files. The DLQ queue is a particular one that we will use in this example, only to simplify the code. We will see how to create our own queues in the following chapters.
Finally, we have the Mongo and db objects that are responsible for connecting and storing data in the MongoDB database.
The destinationName string variable stores the queue name. The name should be exactly the one above otherwise our example will not work.
You are
probably asking yourself where all these configuration parameters are stored. We will describe them in depth in Chapter 2, Setting Up HornetQ; for now, all we can say is that you can mimic JBoss configuration files. Also, HornetQ comes with a set of XML-based configuration files that are stored in the HORNETQ_ROOT\config folder.
Now, we
are ready to code the GetInitialContext method. This method is implemented in the following way:
java.util.Properties p = new java.util.Properties();

p.put(javax.naming.Context.INITIAL_CONTEXT_FACTORY,
"org.jnp.interfaces.NamingContextFactory");

p.put(javax.naming.Context.URL_PKG_PREFIXES,
"org.jboss.naming:org.jnp.interfaces");

p.put(javax.naming.Context.PROVIDER_URL, "jnp://localhost:1099");

ic = new javax.naming.InitialContext(p);
We instantiate a Properties object to store three key/value properties that are needed by Context to identify where to find the .xml files that contain the information for the HornetQ instance that we are going to use. The most significant file, for the moment, is the third one that tells us where the HornetQ server is running. By default, when it is started without other configuration issues, the HornetQ server is running on localhost and starts a Java naming provider on port 1099. As you can see these values (hostname and port) are mapped as the value for the provider_url object.
When InitialContext is created as an object, it can throw a runtime javax.naming.NamingException, which should be managed in case something goes wrong; for example, the name/IP address of the Java naming provider server could be wrong or the port may not be accessible from other machines due to the firewall configuration. In our case, everything should work fine considering that we are running everything from the same machine.
Now
that we have our InitialContext object correctly assigned and created, we are ready to open the real connection to the HornetQ server.
This is done by the connectAndCreateSession method. The following code shows how to arrange the connection:
cf = (javax.jms.ConnectionFactory)ic.lookup("/ConnectionFactory");
queue = (javax.jms.Queue)ic.lookup(destinationName);
connection = cf.createConnection();
session = connection.createSession(false, javax.jms.Session.AUTO_ACKNOWLEDGE);
connection.start();
First, we
use a lookup on the context that is mapped to the hornetq-jms.xml file inside the HORNETQ_ROOT\config folder containing the configuration properties to identify the entry/ConnectionFactory. How JNDI queries the naming context to find the value is out of the scope of this book, but from a higher level of abstraction, it uses a tree directory-like structure. The ConnectionFactory object uses Netty, an asynchronous, event-driven application framework that supports lots of protocols, such as FTP , SMTP, HTTP, and SSL.
After the ConnectionFactory object has been created, we can also create the queue to store the messages. Using a lookup, we search for the queue whose name is queue/DLQ as defined in the class fields. It is important to notice that we use such a name because it was one of the default queues created by the standalone HornetQ server. If you take a look at the HornetQ default log stored in the HORNETQ_ROOT\logs folder, created when launching the run.bat script, you should see some lines like the following ones:
[main] 06:51:25,013 INFO trying to deploy queue jms.queue.DLQ
[main] 06:51:25,053 INFO trying to deploy queue jms.queue.ExpiryQueue
So the server that you started created two queues—one named DLQ and the other one named ExpiryQueue.
Now, you are ready to create the connection by calling the createConnection() method of ConnectionFactory. Before opening the connection, we will create a single session on it. Creating the session is pretty easy, but we need to describe the two parameters needed. The first one is a boolean value that tells if the session is transacted or not. This means that if you choose the session to be transacted, the delivery of the messages within that specific transaction will be made once you call the Commit() method of that session; so, this could potentially cause a significant overhead on the HornetQ server. In this case, we choose "not transacted" messages for easiness.
The second parameter tells us how the messages are delivered in that session.
The possible choices are:
Client_Acknowledge mode: This is not a feasible option (when you have the freedom to choose from the other two options) since the JMS server cannot send subsequent messages till it receives an acknowledgement from the client.
Auto_Acknowledge mode: This mode follows the policy of delivering the message once and only once, but it incurs an overhead on the server to maintain this policy.
Dups_Ok_Acknowledge: This mode has a different policy of sending the message more than once, thereby reducing the overhead on the server (imposed when using the Auto_Acknowledge mode), but imposing an overhead on the network traffic by sending the message more than once. The Auto_Acknowledge mode cleans up resources early from the persistent storage/memory, due to which the overhead is reduced.
Session_Transacted mode: This mode should be used when the session is transacted.
In summary, the Client_Acknowledge mode or Dups_Ok_Acknowledge mode give a better performance than the Auto_Acknowledge mode.
Apart from the specific parameter, it is always good to remember that the session is specific to the connection; so once opened and used, it is good practice to close it before closing the connection.
Finally, we are able to start the connection with the specific session inside it. So we are now ready to move on to the production of our first message. ECG observation can be stored using ANSI protocols like HL7. This is too specific to our purpose, so we code a simple string that contains the patient's unique identifier, which was the date when it was recorded and the three ECG signals that were recorded.
For example, propose that we use a string that is like a line of a CSV (Comma Separated Value), so one single measurement will be a string like the following one:
1;02/20/2012 14:01:59.010;1020,1021,1022
The string is pretty self explanatory, so we move on to the createMessage method.
We are now ready to create our first
JMS message and store it on queue/DLQ.
String theECG = "1;02/20/2012 14:01:59.010;1020,1021,1022";
javax.jms.MessageProducer publisher = session.createProducer(queue);
javax.jms.TextMessage message =
session.createTextMessage(theECG);
publisher.send(message);
System.out.println("Message sent!");
publisher.close();
Once we have instantiated the queue and the session, we create a MessageProducer object, and using a TextMessage object, we send it to the chosen queue. The pushing of the object on the "queue.DLQ" is done using the send method on the MessageProducer object. We recall for the moment that, following the JMS specifications, the message producer object is equipped with the following four main properties:
Destination: This is a JMS-administrated object
deliveryMode: This specifies how the message should be delivered
Priority: This specifies what the priority of the message is
timeToLive: This specifies how many milliseconds the message should be alive for, in the queue
At the moment, we won't specify any of the parameters; we will manage that when dealing with the expiration of messages in Chapter 5, Controlling Message Flow, but such parameters greatly impact the performance, so they need to be carefully configured in a high-performance environment.
As good programming practice, close the messageProducer object once it has done its job.
We are now ready to have a first run of our code. If everything is ok, you should see on the Console tab of the Eclipse IDE what is shown in the following screenshot:
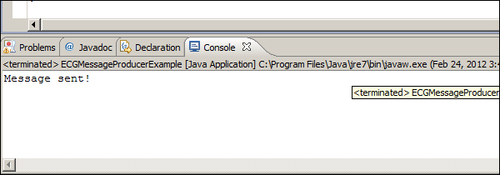
So your first program, publishing a JMS Message on HornetQ, has been successfully coded! But there are two more steps to be implemented to complete the example. First, we need to read the message just stored on the queue, retrieve it, and save it to the MongoDB database. In the end, we will close all the resources involved in the correct way.
Let us now start by
introducing the code for the consumeMessage method. Inside this, we will call a private method called storeIntoMongo
to perform the commit operation to MongoDB. How MongoDB manages and stores the document using the NoSQL paradigm is an extensive task, which does not affect this book. But we would like to demonstrate how to store information to a final destination. The reader should think that the consumer of the messages of a HornetQ server should do some other tasks apart from reading the messages. The obvious one would be to store the message for a second-stage analysis, such as storing log messages for parsing and using historical data.
Note
For the interested reader, I would like to suggest to you, only as an exercise, to think of how to code the message storing using your preferred RDBMS, or even modify the method we implemented to store the messages on a text file.
Before doing this exercise, you should take a look at the following consumeMessage code:
javax.jms.MessageConsumer messageConsumer = session.createConsumer(queue);
javax.jms.TextMessage messageReceived = (TextMessage)messageConsumer.receive(5000);
insertMongo(messageReceived);
System.out.println("Received message: " + messageReceived.getText());
messageConsumer.close();
As you can see, the code is
somewhat similar to the produceMessage method. On the same session object and the same queue that we used to produce the message, we consume it. This time, we create a MessageConsumer object. The messageConsumer object can receive messages in a synchronous or asynchronous way, the main difference being that the synchronous way can be obtained by simply calling the receive method; while in the asynchronous way, when a new message is received, an event is triggered. So with asynchronous message consumption, we need to register with the messageConsumer object a new MessageListener event whose onMessage() method will be called. In this case, we have implemented a synchronous receive() method using a long number that gives the time in milliseconds. In this case, messageConsumer receives the next message in a time frame of 5 seconds. Once we have the TextMessage message, we pass it to the method that will insert it into the MongoDB database, print the message to the console, and close the messageConsumer object.
As we said before, the messageConsumer object can receive the messages in a synchronous/asynchronous way. In both the cases, however, when you call the close method, the action is blocked until a receive method or message listener is in progress.
As the last part of our
example program, we will show you how to get the messageConsumer text message and store it in MongoDB. Again, we will not focus on the details too much, as managing push storage into a NoSQL database is a little bit different from a common insert statement in a classical RDBMS and requires different concepts. We won't be looking at this in much depth, but I would like to show you how things work.
The code of the insertMongo method is as follows:
try {
		m = new com.mongodb.Mongo();
		db = m.getDB( "hornetqdb" );
	} catch (UnknownHostException | MongoException e) {
		e.printStackTrace();
	}

	com.mongodb.DBCollection coll = db.getCollection("testCollection");
	com.mongodb.BasicDBObject doc = new com.mongodb.BasicDBObject();

   doc.put("name", "MongoDB");
   doc.put("type", "database");

   com.mongodb.BasicDBObject info = new com.mongodb.BasicDBObject();

   info.put("textmessage", messageReceived.getText());
The first try/catch block
creates a new instance of MongoDB and connects to the hornetqdb database. If the database does not exist the first time you launch the program, MongoDB will create it for you. Remember that if, at this time of your test, you have closed the command prompt that launched the MongoDB database, simply go into the main MongoDB root folder inside the bin folder, and relaunch it.
The next step
is to create a document collection that somehow is like a schema on a RDBMS database, declare it as a database, and put it inside a document named textmessage, whose value is the string we received from the message consumer, using the getText method of the messageReceived object. If you have your MongoDB window open, you should see a text message similar to the following:
Mon Feb 20 14:51:24 [initandlisten] connection accepted from 127.0.0.1:49867 #2
Mon Feb 20 14:51:24 [conn2] end connection 127.0.0.1:49867
This tells you that you were able to successfully store your message in MongoDB.
This first example is nearly over. Consider that the message producer and message consumer layer insist on the same connection, and on the same session. So, it is important to close them to free up the resources. The garbage collector is not in charge of closing unreferenced objects. Here is the closing connection method that follows the best practices in closing the connection and session associated to a JMS queue:
if (session != null ) {
		try {
			session.close();
		} catch (JMSException e) {
			e.printStackTrace();
		}
	}

	if (connection != null) {
		try {
			connection.close();
		} catch (JMSException e) {
e.printStackTrace();
		}
	}
The first step tries to close the session object, and if it succeeds, closes the associated connection. In this case, the connection has been closed in the simplest way, but we have to observe that if we deal with a transactional message producer, then a better way to deal with the closing would be to commit all the transactions that are still pending, or your code will be exposed to the problem of losing messages from the production layer. Similarly, if you use an asynchronous message consumer, you should make sure to close all the connections and sessions while you don't have messages in transaction.
We will cover more advanced features such as this in Chapter 5, Some More Advance Features of HornetQ. Let's recap what we have covered:
First of all, we set up a fully working environment to code a simple JMS example using HornetQ
For the moment, we chose a standalone, non-clustered server for our developing purpose, and we have seen how to launch it
As an optional task, we will also install and configure a single instance of the MongoDB NoSQL database
Using Eclipse, we coded a class for connecting to the default queue launched by HornetQ, and for creating a session on it
Within the session, we coded a simple JMS
messageProducerobject to send a composite string to the default queueFrom the same session object, we instantiated a synchronous
messageConsumerobject that reads the message stored and passes it for storing to the MongoDB instance we created