Cascading Style Sheets (CSS) is a language used to describe how HTML elements should be displayed on a web page. For instance, CSS is often used to define common styling elements for a page or set of pages, such as the font, background color, font size, link colors, and many other things related to the visual design of a web page. Take a look at the following code snippet:
<style>
  html, body {
    height: 100%;
    width: 100%;
    margin: 0;
    padding: 0;
  }

  #map{

    padding:0;
    border:solid 2px #94C7BA;
    margin:5px;
  }
  #header {
    border: solid 2px #94C7BA;
    padding-top:5px;
    padding-left:10px;
    background-color:white;

    color:#594735;

    font-size:14pt;
    text-align:left;
    font-weight:bold;
    height:35px;
    margin:5px;
    overflow:hidden;
  }
  .roundedCorners{
    -webkit-border-radius: 4px;
    -moz-border-radius: 4px;
    border-radius: 4px;
  }
  .shadow{

    -webkit-box-shadow: 0px 4px 8px #adadad;
    -moz-box-shadow: 0px 4px 8px #adadad;
    -o-box-shadow: 0px 4px 8px #adadad;
    box-shadow: 0px 4px 8px #adadad;
  }
</style>
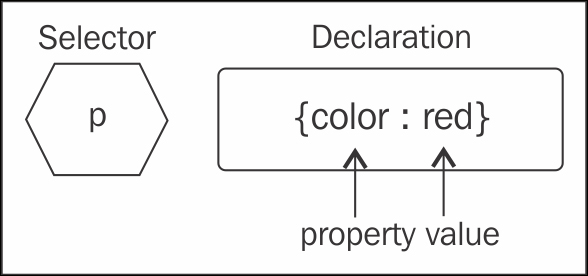
CSS follows certain rules that define what HTML element to select along with defining how that element should be styled. A CSS rule has two main parts: a selector and one or more declarations. The selector is typically the HTML element that you want to style. In the following diagram, the selector is p. A <p> element in HTML represents a paragraph. The second part of a CSS rule comprises of one or more declarations, each of which consists of a property and a value. The property represents the style attribute that you want to change. In our example, we are setting the color property to red. In effect, what we have done with this CSS rule is define that all the text within our paragraph should be in red.
We have used p {color:red}, as shown in the following diagram:

You can include more than one declaration in a CSS rule as you see in the following example. A declaration is always surrounded by curly brackets and each declaration ends with a semicolon. In addition, a colon should be placed between the property and the value. In this particular example, two declarations have been made: one for the color of the paragraph and another for the text alignment of the paragraph. Notice that the declarations are separated by a semicolon:
p {color:red;text-align:center}CSS comments are used to explain your code. You should get into the habit of always commenting on your CSS code just as you would in any other programming language. Comments are always ignored by the browser. Comments begin with a slash followed by an asterisk and end with an asterisk followed by a slash. Everything in between is assumed to be a comment and is ignored:
/*
h1 {font-size:200%;}
h2 {font-size:140%;}
h3 {font-size:110%;}
*/
In addition to specifying selectors for specific HTML elements, you can also use the id selector to define styles for any HTML elements with an id value that matches the id selector. An id selector is defined in CSS through the use of the pound sign (#), followed by an id value.
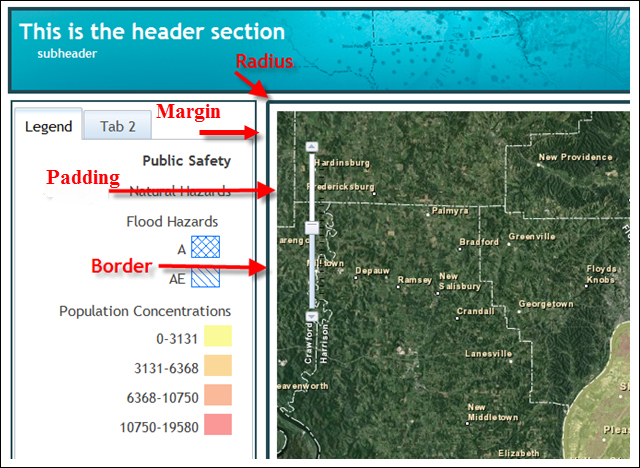
For instance, in the following code example, you see three id selectors: rightPane, leftPane, and map. In ArcGIS API for JavaScript applications, you almost always have a map. When you define a <div> tag that will serve as the container for the map, you define an id selector and assign it a value that is often the word map. In this case, we are using CSS to define several styles for our map, including a margin of 5 pixels along with a solid styled border of a specific color and a border radius:
#rightPane {
    background-color:white;
    color:#3f3f3f;
    border: solid 2px #224a54;
    width: 20%;
}
#leftPane {
    margin: 5px;
    padding: 2px;
    background-color:white;
    color:#3f3f3f;
    border: solid 2px #224a54;
    width: 20%;
}
#map {
    margin: 5px;
    border: solid 4px #224a54;
    -mox-border-radius: 4px;
}
Unlike id selectors that are used to assign styles to a single element, the class selectors are used to specify styles for a group of elements, all of which have the same HTML class attribute. A class selector is defined with a period, followed by the class name. You may also specify that only specific HTML elements with a particular class should be affected by the style. Examples of both are shown in the following code example:
.center {text-align:center;}
p.center {text-align:center;}
Your HTML code would then reference the class selector as follows:
<p class="center">This is a paragraph</p>
There are three ways to insert CSS into your application: inline, internal stylesheets, and external stylesheets.
The first method of defining CSS rules for your HTML elements is through the use of inline styles. This method is not recommended because it mixes style with presentation and is difficult to maintain. It is an option in some cases where you need to define a very limited set of CSS rules. To use inline styles, simply place the style attribute inside the relevant HTML tag:
<p style="color:sienna;margin-left:20px">This is a paragraph.</p>
An internal stylesheet moves all the CSS rules into a specific web page. Only HTML elements within that particular page have access to the rules. All CSS rules are defined inside the <head> tag and are enclosed inside a <style> tag, as seen in the following code example:
<head>
    <style type="text/css">
        hr {color:sienna;}
        p {margin-left:20px;}
        body {background-image:url("images/back40.gif");}
    </style>
</head>An external stylesheet is simply a text file containing CSS rules and is saved with a .css file extension. This file is then linked to all web pages that want to implement the styles defined within the external stylesheet through the use of the HTML <link> tag. This is a commonly used method to split the styling from the main web page and gives you the ability to change the look of an entire website through the use of a single external stylesheet.
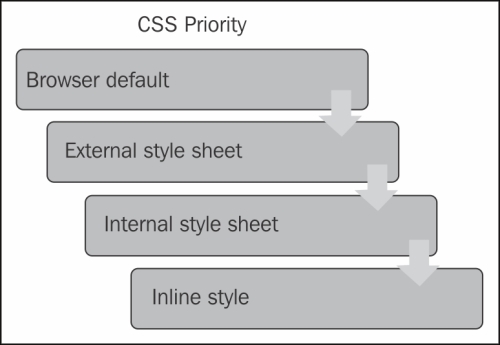
Now let's put some emphasis on the cascading part of cascading stylesheets. As you now know, styles can be defined in external stylesheets, internal stylesheets, or inline. There is a fourth level that we didn't discuss, which is the browser default. You don't have any control over that though. In CSS, an inline style has the highest priority, which means that it will override a style defined in an internal stylesheet, an external stylesheet, or the browser default. If an inline style is not defined, any style rule defined in an internal stylesheet would take precedence over styles defined in an external stylesheet. The caveat here is that if a link to an external stylesheet is placed after the internal stylesheet in HTML <head>, the external stylesheet will override the internal sheet!
That's a lot to remember! Just keep in mind that style rules defined further down the hierarchy override style rules defined higher in the hierarchy, as shown in the following diagram:

These are the basic concepts that you need to understand with regard to CSS. You can use CSS to define styles for pretty much anything on a web page, including backgrounds, text, fonts, links, lists, images, tables, maps, and any other visible objects.


