Another option in building Spring 5.0 projects is through the use of Gradle. STS Eclipse includes Gradle as one of its tooling and project management tools. In our case, we will be installing an STS Eclipse module extension in the easiest way in order to fully use Gradle.
Install the Gradle module extension in our STS Eclipse 3.8 in order to clean, build, and deploy projects in Gradle. Perform the following steps:
- Click the
Dashboardtoolbar option of your Eclipse. After clicking, you will be opening the main dashboard of the IDE:

- On the dashboard, look for
IDE EXTENSIONSand click that button. A new window showing all the available Eclipse STS extensions will pop up. Click onGradle (STS Legacy) Supportand install it:

- The next steps will just be similar to installing new Eclipse plugins. Just click the
Installbutton and follow the installation wizard. Eclipse needs to be restarted after a successful installation.
- If you want to change the Gradle distribution, you can replace the Eclipse embedded Gradle installation with some new version at https://gradle.org/gradle-download/. Or you can shift to Eclipse Buildship with Gradle Plugin if some of the files are not supported by the installed Gradle plugin:

After installing the Gradle STS extension, perform the following steps to install the Spring Gradle project:
- After installing, you are ready to create a Gradle project for Spring development. Go to the
New project wizard(Ctrl-N) of STS Eclipse and create a Gradle project.
- On the
Gradle ProjectwizardJava Quickstartfor theSample projectoption. ClickFinishand it will take a while to create, build, clean, and install your Gradle STS project. - Delete unnecessary project files. Right-click on the project and click on
Gradle (STS) |Refresh all.
- Open the
build.gradleand overwrite the existing configuration with this:
apply plugin: 'eclipse'
apply plugin: "war"

sourceCompatibility = 1.8
version = '1.0'

war {
    baseName = 'ch02-gradle'
    version = '1.0'
}

sourceCompatibility = 1.8

repositories {
    mavenCentral()
    jcenter()
}- Right-click on the project and click
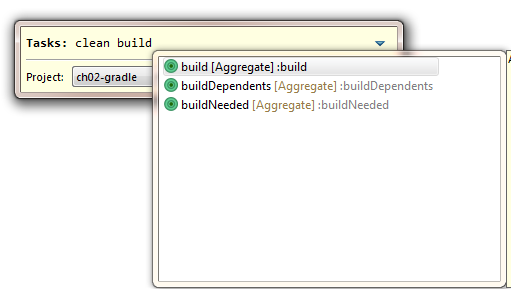
Gradle (STS)|Tasks Quick Launcherto run theGradle Task Launcher. Using the launcher,cleanandbuildthe project for the first time:

- Finally, at this point, you have created your Spring Gradle project which will look like this:

The most important configuration file in a Gradle project is the build.gradle. First, we have to add apply plugin: 'java' to tell Gradle that Java is the core language in building the scripts, testing the codes, executing compiled objects, creating Javadoc, and deploying JAR or WAR files. Since all project management and tooling depends on STS Eclipse, there is a need to add apply plugin: 'eclipse' in order to tell Gradle that all descriptors are Eclipse-specific and can be integrated and executed with Eclipse core and extension plugins. A by-product of its project installation and execution are the Eclipse folders such as .project, and .classpath. And since this is a web development project, we need to apply plugin: 'war' to indicate that the deployment is at WAR mode. Later on we will be adding some plugins needed in the development of our recipes.
In the properties section, the configuration must tell Gradle the version of the JDK through the sourceCompatibility property. Another property is the version of the WAR or project deployment, which is at first set to 1.0. Since the mode of deployment is the web, Java must know the name and the version of the WAR file to be generated.
On the repositories section, the configuration must define where to find the dependencies, which are at JCenter and MavenCentral.


