

Till now, you've just opened and customized the look and feel of Spoon. It's time to do some interesting tasks beyond looking around. As mentioned before, in PDI we basically work with two kinds of artifacts: transformations and jobs. In this section, we will introduce transformations. First of all, we will introduce some basic definitions. Then, we will design, preview, and run our first Transformation.
A Transformation is an entity made of steps linked by hops. These steps and hops build paths through which data flows: the data enters or is created in a step, the step applies some kind of Transformation to it, and finally, the data leaves that step. Therefore, it's said that a Transformation is data flow oriented. Graphically, steps are represented with small boxes, while hops are represented by directional arrows, as depicted in the following sample:
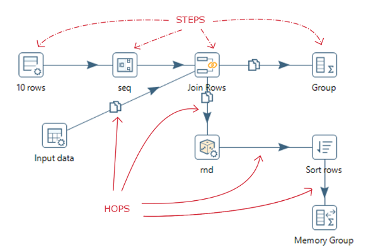
Steps and hops
A Transformation itself is neither a program nor an executable file. It is just plain XML. The Transformation contains metadata, which tells the Kettle engine what to do.
A step is a minimal unit inside a Transformation. A big set of steps is available, either out of the box or the Marketplace, as explained before. These steps are grouped in categories, as, for example, input, output, or transform. Each step is conceived to accomplish a specific function, going from a simple task as reading a parameter to normalizing a dataset.
A hop is a graphical representation of data flowing between two steps: an origin and a destination. The data that flows through that hop constitutes the output data of the origin step and the input data of the destination step.
That's enough theory for now. Let's see it in practice.
In this section, we will design, preview, and run a simple Hello World! Transformation; simple, but good enough for our first practical example.
Here are the steps to start working on our very first Transformation. All you need for starting is to have PDI installed:
- Open Spoon.From the main menu and navigate to
File|New|Transformation. - On the left of the screen, under the
Designtab, you'll see a tree ofSteps. Expand theInputbranch by double-clicking on it.
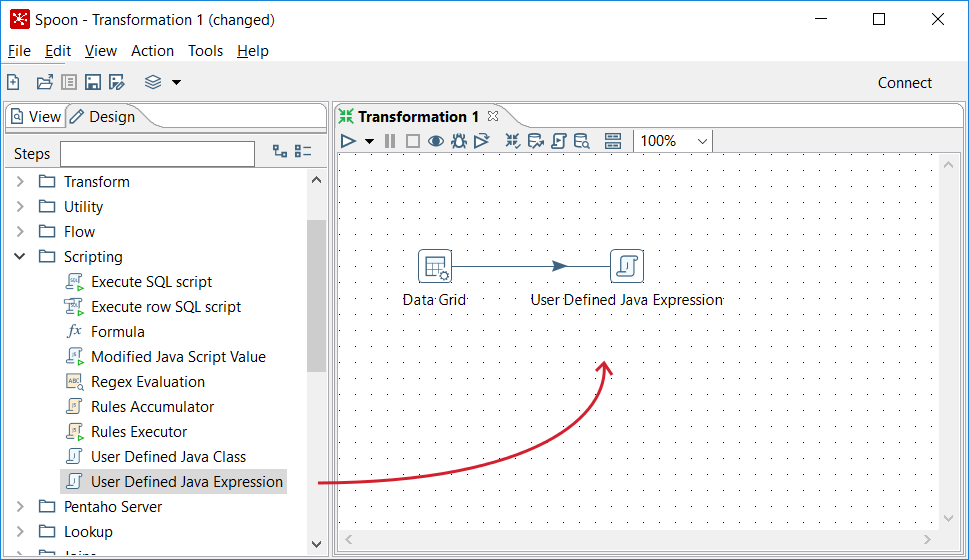
- Then, left-click on the
Data Gridicon and without releasing the button, drag and drop the selected icon to the main canvas. The screen will look like the following screenshot:
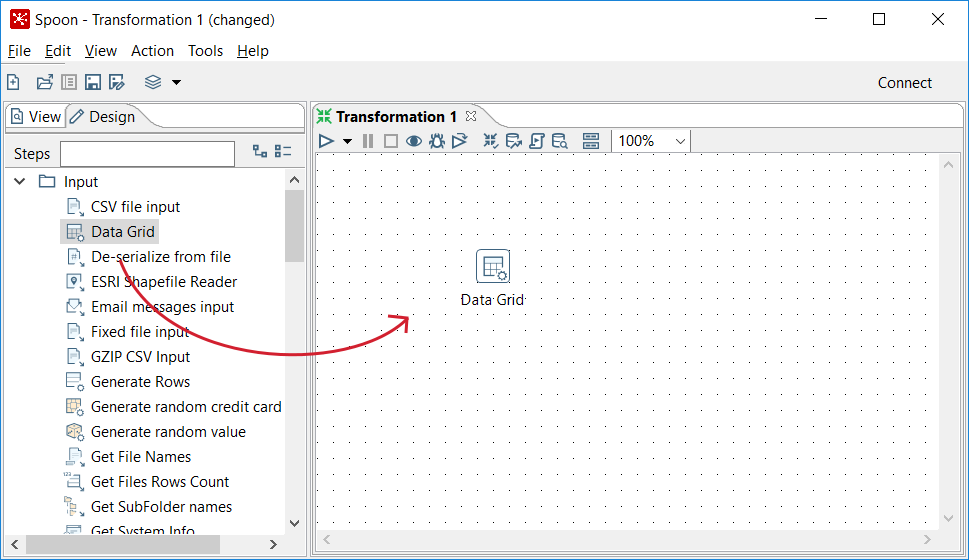
Dragging and dropping a step
Note
The dotted grid appeared as a consequence of the changes we made in the options window. Also, note that we changed the preferred language back to English.
- Double-click on the
Data Gridstep you just put on the canvas, and fill theMetatab as follows:
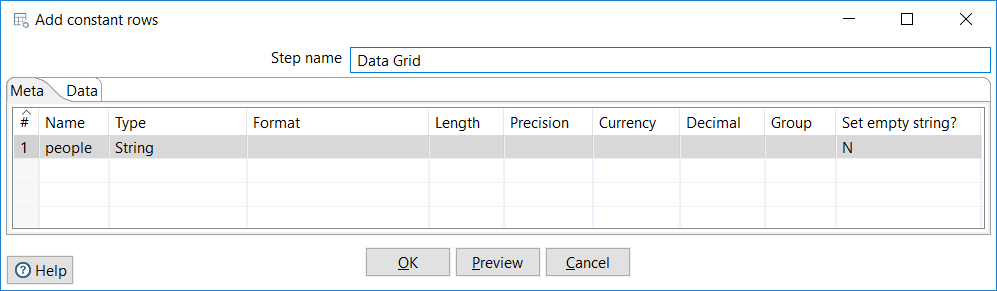
Configuring a metadata tab
- Now select the
Datatab and fill the grid with some names, as in the following screenshot. Then click onOKto close the window:
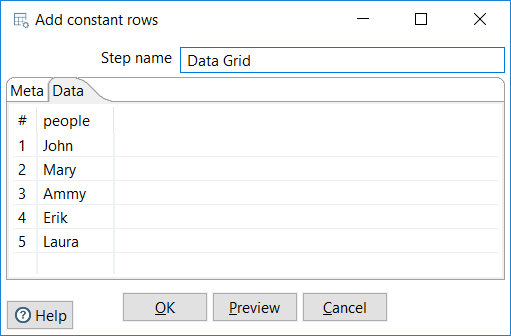
Filling a Data tab
- From the Steps tree, double-click on the
Scriptingbranch, click on theUser Defined Java Expressionicon, and drag and drop it to the main canvas. - Put the mouse cursor over the
Data Gridstep and wait until a tiny toolbar shows up succeeding theData Gridicon, as shown next:
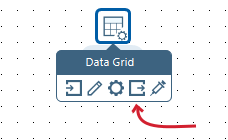
Mouseover assistance toolbar
- Click on the output connector (the icon highlighted in the preceding image) and drag it towards the
User Defined Java Expression(UDJE) step. A greyed hop is displayed.
- When the mouse cursor is over the
UDJEstep, release the button. A link—a hop from now on is created from theData Gridstep to theUDJEstep. The screen should look like this:
Connecting steps with a hop
- Double-click the
UDJEicon and fill the grid as shown. Then close the window:
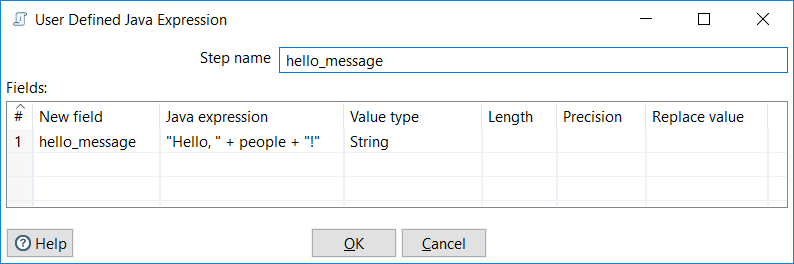
Configuring a UDJE step
Done! We have a draft for our first Transformation. A Data Grid with the names of a list of people, and a script step that builds the hello_message.
Before continuing, let's just add some color note to our work. This is totally optional, but as your work gets more complicated, it's highly recommended that you comment your transformations:
- Right-click anywhere on the canvas to bring a contextual menu.
- In the menu, select the
New noteoption. A note editor appears. - Type some description, such as
Hello, World!. Select theFont styletab and choose some nice font and colors for your note, and then click onOK. This should be the final result:
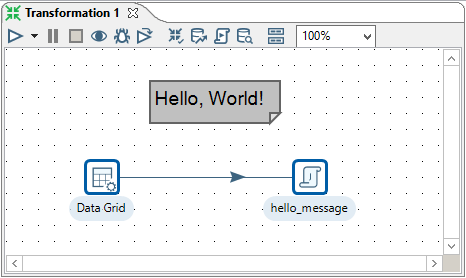
Hello World Transformation
The final step is to save the work:
- From the main menu, navigate to
Edit|Settings.... A window appears to specify Transformation properties. Fill theTransformation nametextbox with a simple name, such ashello world. Fill theDescriptiontextbox with a short description, such asMy first transformation. Finally, provide a more clear explanation in theExtended descriptiontextbox, and then click onOK.
- From the main menu, navigate to
File|Saveand save the Transformation in a folder of your choice with the namehello_world.
Next step is to preview the data produced and run the Transformation.
Now we will preview and run the Transformation created earlier. Note the difference between both:
- The Preview functionality allows you to see a sample of the data produced for selected steps
- The Run option effectively runs the whole Transformation
In our Transformation, we will preview the output of the User Defined Java Expression step:
- Select the
User Defined Java Expressionstep by left-clicking on it. - Click on the
Previewicon in the bar menu preceding in the main canvas:

Preview icon in the Transformation toolbar
- The
Transformation debug dialogwindow will appear. Click on theQuick Launchbutton.
- A window will appear to preview the data generated by the Transformation, as shown in the following screenshot:
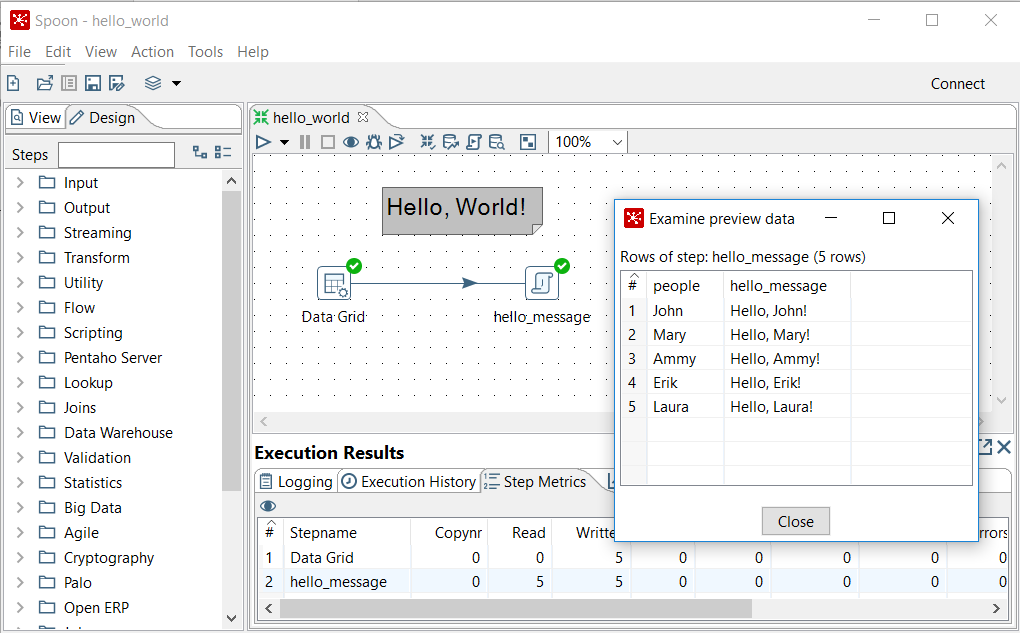
Previewing the Hello World Transformation
- Close the preview window.
Note
You can preview the output of any step in the Transformation at any time of your designing process. You can also preview the data even if you haven't yet saved the work.
Once we have the Transformation ready, we can run it:
- Click on the
Runicon:

Run icon in the Transformation toolbar
- A window named
Run Optionsappears. Click onRun.
Note
You need to save the Transformation before you run it. If you have modified the Transformation without saving it, you will be prompted to do so.
- At the bottom of the screen, you should see a log with the result of the execution:
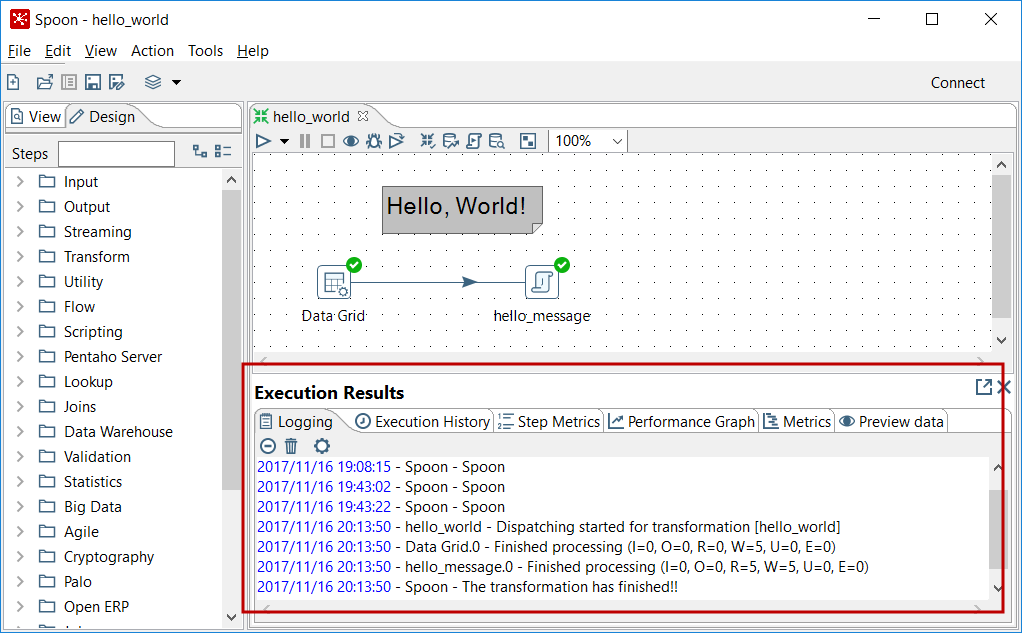
Sample execution results window
Whether you preview or run a Transformation, you'll get an Execution Results window showing what happened. You will learn more about this in Chapter 2, Getting Started with Transformations.