
Creating a blank list
When it comes to creating a new, blank list, there are different starting points. You can create a new list from the home page of a modern SharePoint site, from the Lists app in Teams, or from the Lists app in the Microsoft 365 app launcher. In the following subsections, each of these options will be explained. However, as there are many similarities between the three different options, including common functionalities, steps, and options, they will only be explained once; any differences will be highlighted.
Creating a new list from the Microsoft Lists app
As the Lists app in the Microsoft 365 app launcher provides the most flexibility, we will look at what benefits we get from creating a list there. Once you've navigated to the Lists app, you will see a New list button at the top of the page. Clicking on it provides you with the Create a list dialog, which provides various options you can choose from:

Figure 2.1 – Creating a new list
There are three options for creating a new list, and the list templates we explained in the previous chapter are at the bottom of the dialog. To create a new list not based on one of the templates, you can start from the following entry points. You can either start with a blank canvas or, depending on any already existing data structures you may have, use an existing spreadsheet containing data or another list as a base:
- Blank list: This option allows you to create a new, empty list without any specific structure or data in it. It is used as the standard starting point in most cases. While this option provides you with the simplest initial setup, it also gives you the greatest flexibility in terms of how to set up your list.
- From Excel: If you already have a structure set up in an Excel spreadsheet, likely containing some existing data, then this is the best option for creating a new list while using it. You would choose this option, for example, when you are already tracking information in a spreadsheet and want to convert it into a list to make use of additional functionality. This option will be covered in detail in the Creating a list from Excel section of this chapter.
- From existing list: Finally, if you already have an existing list that you want to duplicate, this option allows you to do so. For example, if there is an asset tracking list in use that another department is also interested in, you could use this option to create a new copy. We will explain this in the Creating a list from an existing list section.
Once you've selected Blank list, the dialog will present you with a range of options so that you can configure your list:
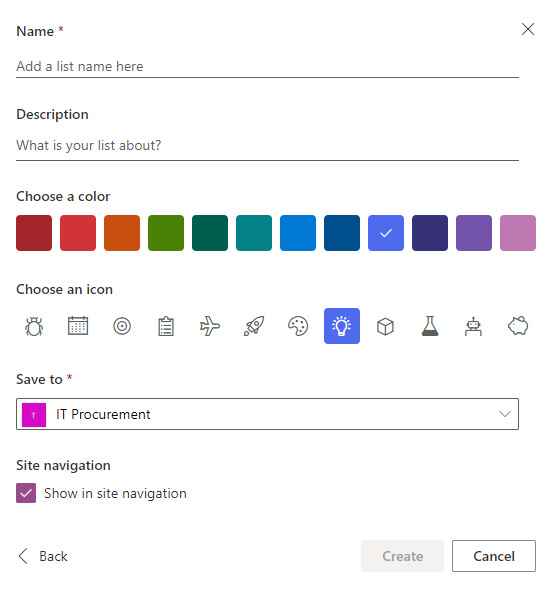
Figure 2.2 – Setting up a new blank list
Except for the last option, Save to, all the other options can be changed again after their initial setup:
- Name defines the display name of your list. It is recommended that you choose a unique and descriptive name right at the beginning, as the list name is the first thing that people usually see before they see a description or data. Thus, the more specific you are here, the easier it is for people to understand the purpose of the list.
- Description allows you to provide further information about the purpose of your list. As an example, if you have an "Asset Tracking List" to manage your physical IT assets, an appropriate description could be "This list is used to manage the life cycle and allocation of all physical IT assets, including notebooks, speakers, and others."
- Choose a color is one of two options that helps you define a logo for your list. You can choose from 12 different colors to use as the background color for the logo.
- Choose an icon is the second option for defining your logo. As with the colors, there are 12 different choices available to you, including a calendar icon, an airplane icon, and a tracking chart icon. The icon you select here will also use your selection from Choose a color as the background color to provide you with a preview of the final logo.
- Save to is an option where you will need to make a very conscious choice:
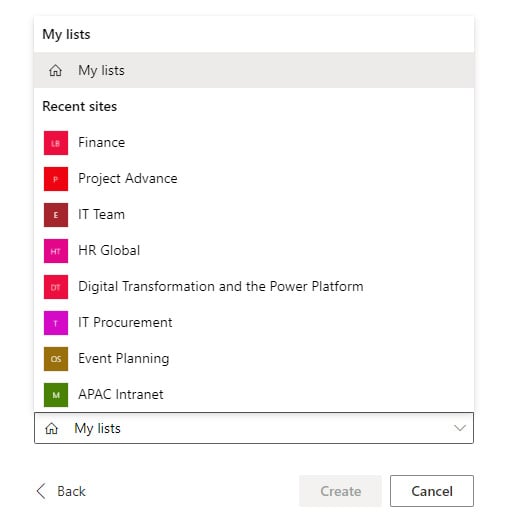
Figure 2.3 – Save to options
Here, you decide where your list will be created, a choice that cannot be changed as easily without additional migration or copy and paste effort compared to the other options. You can choose to save to My lists, which will create a personal list in your OneDrive account that you can share later with others. Alternatively, you can select from a range of Recent sites, which includes regular SharePoint sites as well as sites connected to Microsoft Teams. Selecting one of those will create the list in this site, and any existing access rights to the site will also apply to your new list.
- Site navigation is an option that only appears if you have selected a SharePoint or Teams site under Recent sites in the Save to field. It allows you to define whether your list should be displayed in the left-hand navigation of the site where you want to create the list, and thus be easily accessible to site visitors.
Note
In this chapter, we will use the following scenario for our list:
Your company does not use any software system that allows you to track and manage your annual leave. You want to use Microsoft Lists to keep note of any leave requests that you made, their status, and when the leave is scheduled for. You are planning to call this list Leave Tracker, and you will not share it with anyone else initially, so you will create it within My Lists.
Once you click Create, the list will be created in your selected location, and your browser will navigate to it:
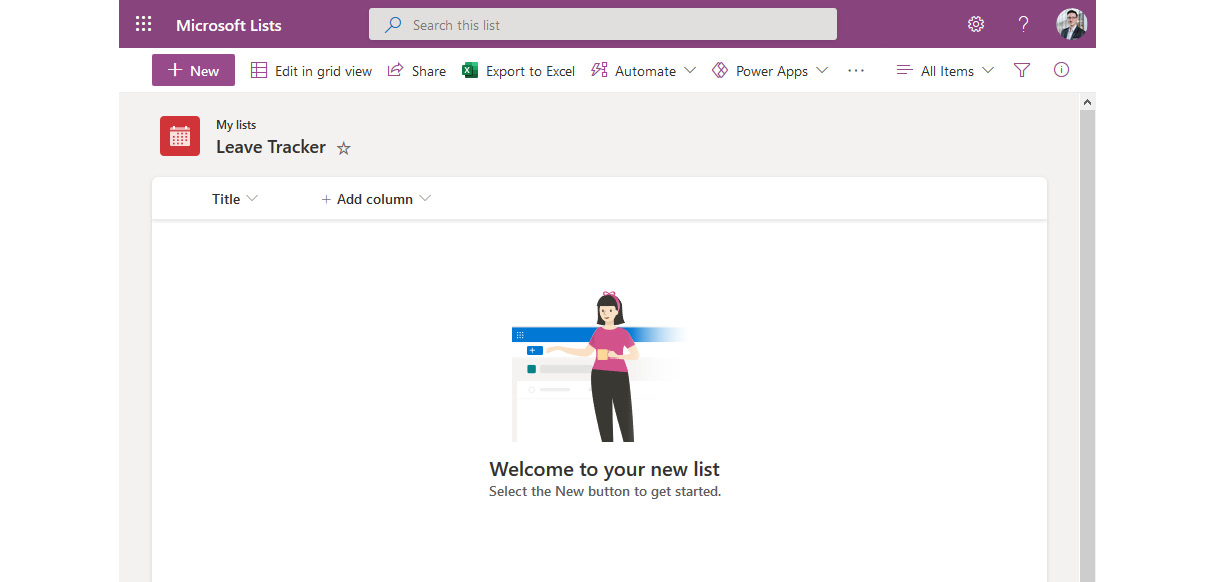
Figure 2.4 – A newly created list
As you can see, it only contains the default column called Title, which is available in every list, and no data has been added yet. Adding additional columns to your list will be covered in the Adding columns to a list subsection.
As we mentioned previously, you can change some of your list settings again once you've created the list. When you are viewing the contents of a list, clicking on the name of the list in the top-left corner will make a small dialog appear with familiar options:
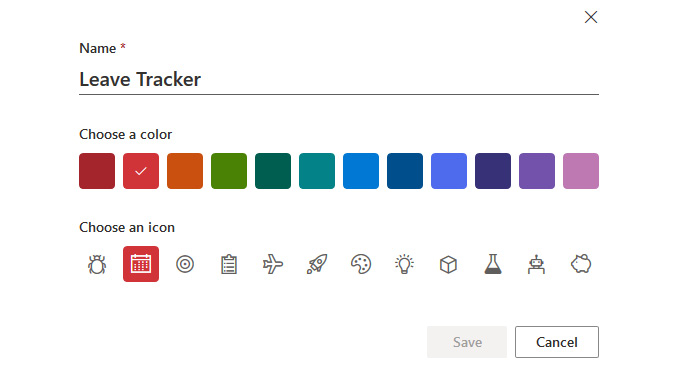
Figure 2.5 – Changing your list's name and icon
This allows you to change the name and the logo of your list later if needed.
Creating a new list in a SharePoint site
If you want to create a new list in a SharePoint site directly, you can do so by navigating to your site's home page or Site contents page and selecting List from the New dropdown. The dialog that appears will show the same Create a list options and templates as in the Microsoft 365 app launcher. However, selecting Blank list will show you a slightly different next step:
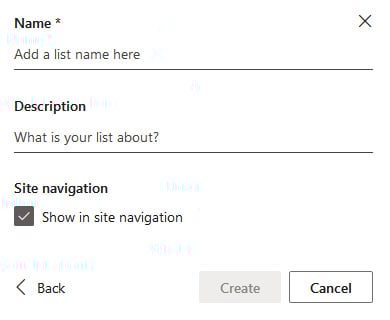
Figure 2.6 – Setting up a new blank list in a site
As you can see, you can still configure the Name and Description areas and whether the list should be displayed in Site navigation. However, you can't update the logo of your list.
Once you have entered all the required information and clicked Create, the list will be created within the site and you will be redirected to it.
Creating a new list in Microsoft Teams
The third option for creating a new list is available in Microsoft Teams. Usually, there are already people collaborating within Microsoft Teams and leveraging the flexibility of creating and using dedicated teams and channels to focus on specific work. The Lists app can be added to a team and is then available in all the channels within this team. You can create a new list for and within a selected channel, and anyone who has access to the channel can then work on data within that list.
Within a channel in a team, you can add a new tab at the top, and then select Lists from the options provided:
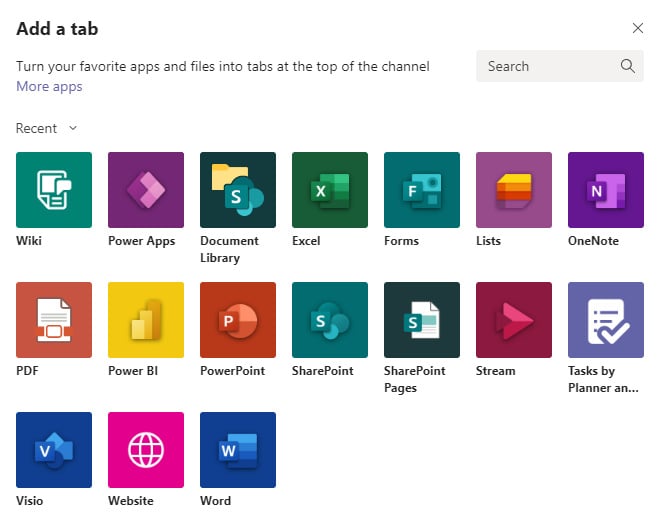
Figure 2.7 – Add a tab window in Microsoft Teams
Once the tab has been added, you have the option to either create a new list or add an existing list to be displayed within this tab. If you choose to add an existing list, it should be noted that the list does not have to reside in the current team and its dedicated SharePoint site; instead, it can be a list that has been created in another SharePoint site:
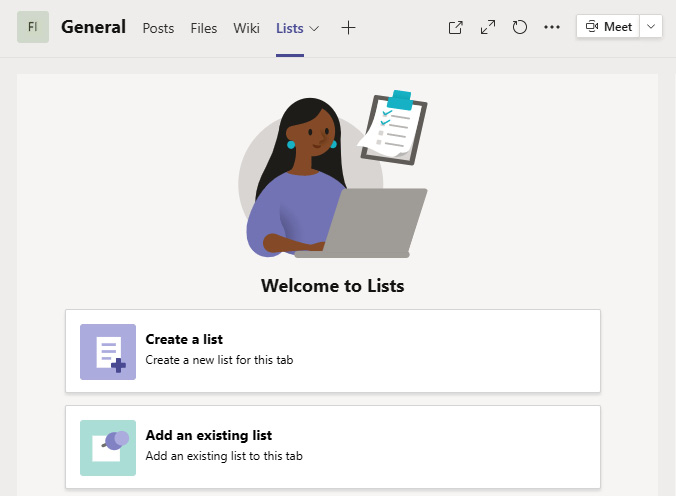
Figure 2.8 – Create a list and Add an existing list options
Once you click Create a list, a familiar view will be shown in the tab, providing you once again with the options to create a blank list, create one based on an Excel spreadsheet or a duplicate of an existing list, or select from predefined templates:
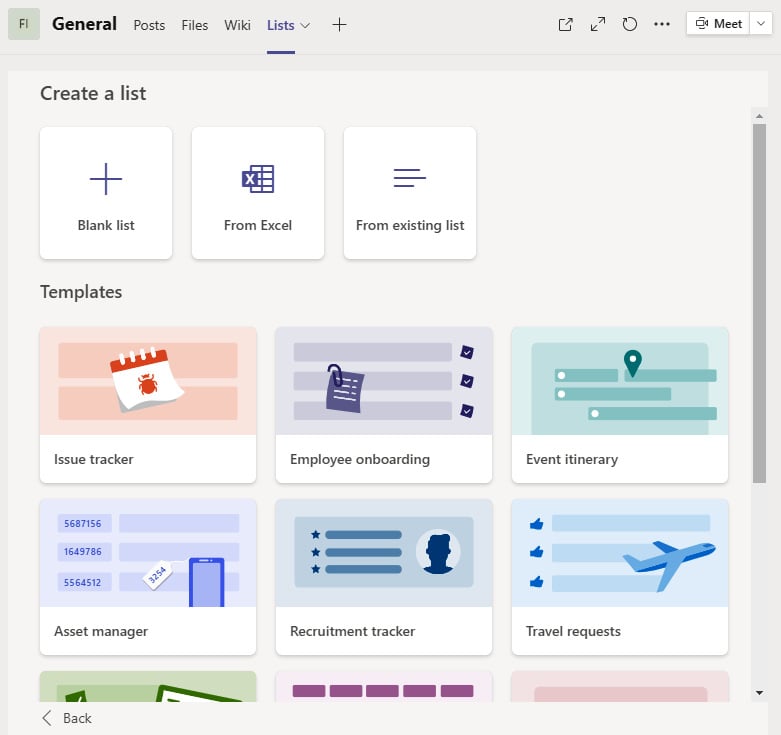
Figure 2.9 – Create a list option in Microsoft Teams
When you choose to create a blank list from here, you can define the name, description, and logo of your new list:
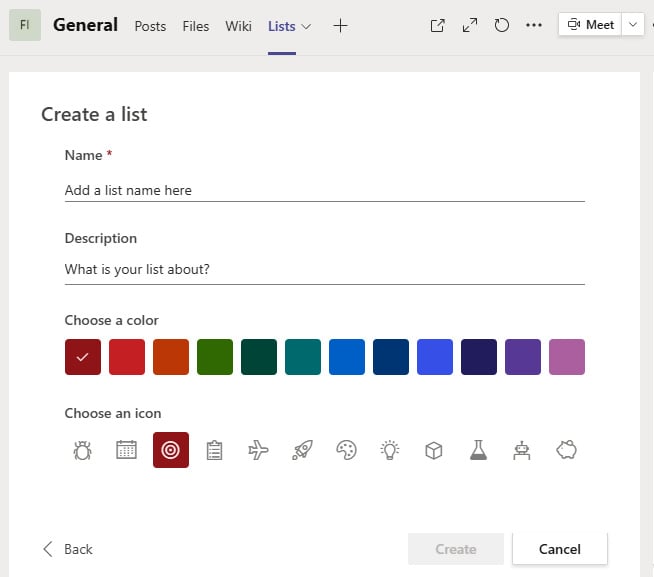
Figure 2.10 – Configuring your new list in Microsoft Teams
Once the list has been created, members of your team can work with it directly within Microsoft Teams by accessing it from the Channel's tab.
In this section, you learned how to create a new blank list from the Microsoft 365 app launcher, a SharePoint site, and from within Microsoft Teams. Next, you will learn how to configure your list according to your needs by adding an appropriate structure for your data.