Book Image

Installation, Storage, and Compute with Windows Server 2016: Microsoft 70-740 MCSA Exam Guide

By : Sasha Kranjac, Vladimir Stefanovic
Book Image

Installation, Storage, and Compute with Windows Server 2016: Microsoft 70-740 MCSA Exam Guide

By: Sasha Kranjac, Vladimir Stefanovic

Overview of this book

MCSA: Windows Server 2016 certification is one of the most sought-after certifications for IT professionals, which includes working with Windows Server and performing administrative tasks around it. This book is aimed at the 70-740 certification and is part of Packt's three-book series on MCSA Windows Server 2016 certification, which covers Exam 70-740, Exam 70-741, and Exam 70-742. This book will cover exam objectives for the 70-740 exam, and starting from installing and configuring Windows Server 2016, Windows Server imaging and deployment to configuring and managing disks and volumes, implementing and configuring server storage and implementing Hyper-V. At the end of each chapter you will be provided test questions to revise your learnings which will boost your confidence in preparing for the actual certifications. By the end of this book, you will learn everything needed to pass the, MCSA Exam 70-740: Installation, Storage, and Compute with Windows Server 2016, certification.
Table of Contents (10 chapters)

Installing and configuring Nano Server

Nano Server is a small footprint server designed for remote administration that targets data center and private cloud deployments. It was designed to have a significantly smaller installation than regular Windows Server operating systems, with a higher speed of deployment and a higher level of security and manageability.

Similar reasoning from a previous section, where we discussed Windows Server Core, can be applied to Nano Server. What if we could have an even smaller server that could be deployed faster and have even shorter servicing times? Nano Server was introduced in 2016, at the same time as Windows Server 2016. It seemed that it would be widely embraced, but the reality was quite different. Although Nano Server had a lot of potential, its small number of elements meant it was less popular than anticipated. The resemblance to Server Core was too close, and while developers needed a smaller server, administrators and IT professionals asked for better hardware and software support, which in turn defeated the purpose of Nano Server:

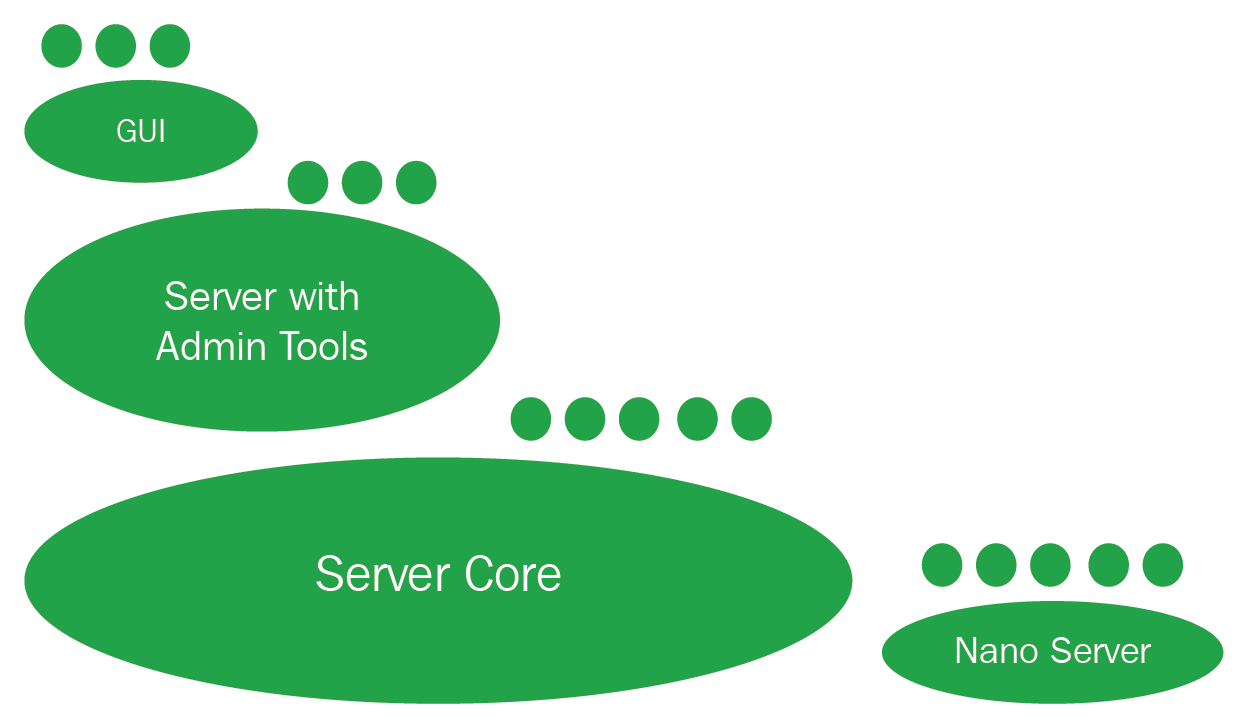
The graphic shows various Windows Server components and their relative sizes, such as the GUI, Server Core, and Nano Server, with its significantly smaller size compared to the Windows Server edition with a GUI.

Two years after Nano Server was introduced, the Windows Server engineering team revealed that support for some of the workloads would be removed from Nano Server and that it would now serve primarily as a container image, while Server Core would be the recommended server version for infrastructure deployment. Microsoft has since shifted their focus more to containers, and Nano Server is not going away anytime soon. The Nano Server is still on the list of topics that are tested in Windows Server 2016 exams, so we will cover the basics in this chapter.

You're most likely to use Nano Server as DNS server, a web or Internet Information Services (IIS) server, or as a host for a custom-built application. Nano Server supports only 64-bit workloads and does not support several services, which is no surprise due to its small size. There is no support for the following:

  • Active Directory domain controller role
  • Group Policy
  • NIC teaming, except Switch-Embedded Teaming (SET)
  • System Center Data Protection Manager or System Center Configuration Manager
  • Local log on capability
  • NIC Teaming
  • Internet Proxy

This list is not definitive and we encourage you to check the Nano Server documentation for the most recent information.

Follow the link for the official Microsoft documentation on Nano Server in Windows Server 2016: https://docs.microsoft.com/en-us/windows-server/get-started/getting-started-with-nano-server.

Recently, Microsoft announced that from Windows Server version 1709, Nano Server will be available only as a container base OS image. This means that you will only be able to run Nano Server as a container in a container host. You will not be able to install it on a physical server, as many roles will be removed, such as Hyper-V support and driver support.

Deploying Nano Server

After downloading and extracting Windows Server 2016 ISO image, navigate to the folder containing the installation files. You will notice that the NanoServer folder contains several files, including the NanoServer.wim image; the NanoServerImageGenerator folder, which contains scripts that are used to build Nano Server images; and the Packages folder, which contains files that enhance the Nano Server installation with roles and features such as DNS, IIS, and failover clustering.

On the Nano Server Image Builder Download page, https://www.microsoft.com/en-us/download/details.aspx?id=54065, download Nano Server Image Builder, which will assist you in building the Nano Server image file. Nano Server Image Builder is a graphical interface tool for creating Nano Server images, bootable USB drives, and ISO files. Nano Server Image Builder can also automate your installation of Nano Server and create reusable PowerShell scripts. It is supported on Windows 10, Windows 8.1, Windows Server 2012 R2, and Windows Server 2016.

Nano Server Image Builder requires the Windows Assessment and Deployment Kit (ADK), which can be installed and downloaded from the following page: https://docs.microsoft.com/en-us/windows-hardware/get-started/adk-install.

Before starting Nano Server Image Builder, you must install two components from the Windows ADK: Deployment Tools and Windows Preinstallation Environment (Windows PE).

To create a new Nano Server image, we will outline the procedure, along with additional explanation of the steps:

  1. After starting Nano Server Image Builder, two scenario options are available to select, Create a new Nano Server image and Create bootable USB media. You will need to know the name of the server or servers to which you will be deploying an image. You will also need to have source installation files that will be used to create the Nano Server image and any required drivers ready. The Select scenario screen looks as follows:

  1. In the first steps of the wizard, select a location for the Windows Server media source, either in a local folder or on a shared network. Accept the license agreement and choose the deployment type, either to a virtual machine image or a physical machine image:
  1. In the Nano Server image output file name option, ensure that you choose either VHD or VHDX, as this will determine the generation of a virtual machine that is created by the wizard, either Generation one or Generation two.
  2. Next, you can choose whether the Nano Server edition is Datacenter or Standard. You can also add components that will be included in the image:

You can also add any drivers that you need to support planned workloads, join Nano Server to a domain, and set up network configurations such as PowerShell remoting, Window Remote Management, VLAN IDs, network address, subnet, gateway addresses, and more.

  1. At the end, an advanced dialog prompts you either to create a Nano Server image or to choose advanced settings including debugging methods, remote options, servicing packages, or embedding additional files or scripts in the image.

Nano Server Image Builder is a graphical tool and wizard that creates a Nano Server image file. It is, however, limited with regard to automating tasks, speeding up deployments, and creating multiple images. This is why Microsoft included Nano Server Image Generator, a PowerShell module located in the NanoServer folder, in Windows Server 2016 ISO file.

Three PowerShell cmdlets are available:

  • New-NanoServerImage: Creates a Nano Server installation image
  • Edit-NanoServerImage: Modifies a Nano Server installation image
  • Get-NanoServerImage: Gets available packages for a Nano Server installation image