
Validating PRs/MRs into the develop branch from the feature branch via CodeBuild and AWS Lambda
In this section, we will basically implement a solution that gives the status of the build of the PR raised in CodeCommit. This helps the maintainer see that the PR raised is at least passing all the builds and tests. Let's have a look at the solution and understand the flow, as follows:
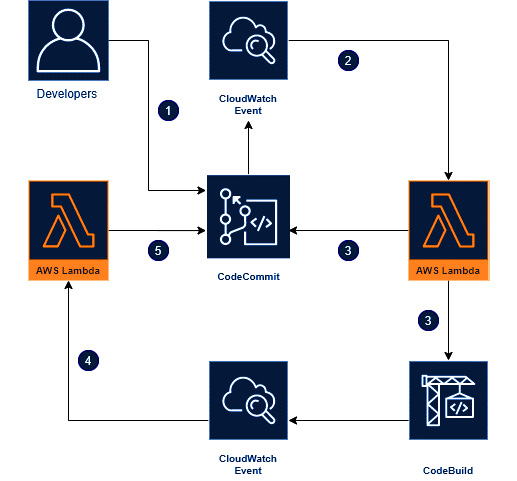
Figure 1.47 – Flow diagram of the solution
The following steps explains the flow of diagram:
- When a developer finishes their work in the feature branch, they will then raise a PR/MR to the develop branch.
- A CloudWatch event that is watching our repository will get triggered, and that will invoke the
TriggerCodeBuildStartlambda function by passing some information. - This
TriggerCodeBuildStartlambda function will use the CloudWatch information and trigger an AWS CodeBuild Project to our latest commit. After that, it will create a custom message that we want on our PR activity. - Once this CodeBuild event finishes, another CloudWatch event will send those build results and comments to another lambda function (
TriggerCodeBuildResult). - This
TriggerCodeBuildResultlambda function will comment the build result on the PR in the CodeCommit activity.
To set up the solution, perform the following steps:
- Go to the CodeBuild section of the project and click on Create Build Project.
- Enter the following information:
- Project name:
northstar-pr - Description:
PR-Build - Repository:
northstar; Branch:feature/image - Environment Image:
Managed Image; OS:Amazon Linux 2; Runtime:Standard; Image:aws/codebuild/amazonlinux2-x86_64-standard:3.0; Environment type:Linux - Service Role:
New service role - Buildspec: Inset build commands; Build Commands:
npm install && nohup npm start & - Leave the rest at their default settings and click on Create build project.
- Project name:
The CodeBuild console of the northstar-pr project is shown in the following screenshot:
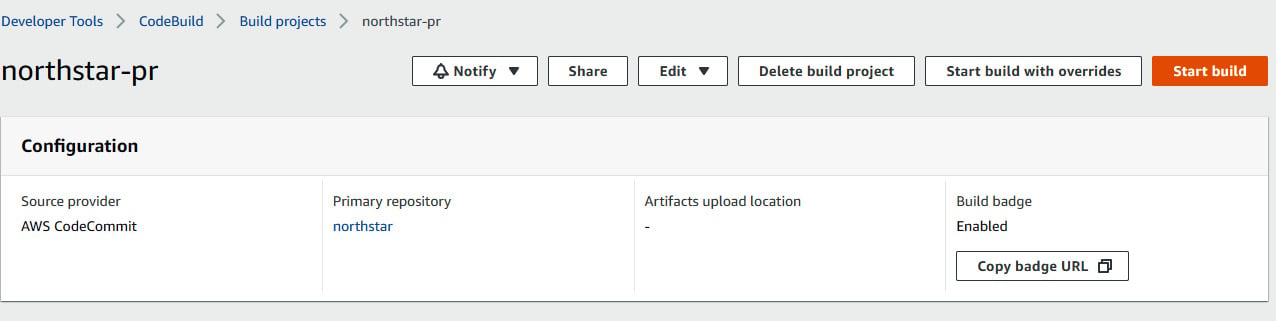
Figure 1.48 – CodeBuild console of northstar-pr project
- Go to the AWS Lambda console and under Create a function, select Author from scratch and give the name
TriggerCodebuildStartandNode.js 12.xunder Runtime. In the Permissions section, you need to select a role that has permission to access AWS CloudWatch Logs, CodeBuild, and CodeCommit. You can create a policy using thelambdapermission.jsonfile and attach it to the role.
An overview of the process is shown in the following screenshot:
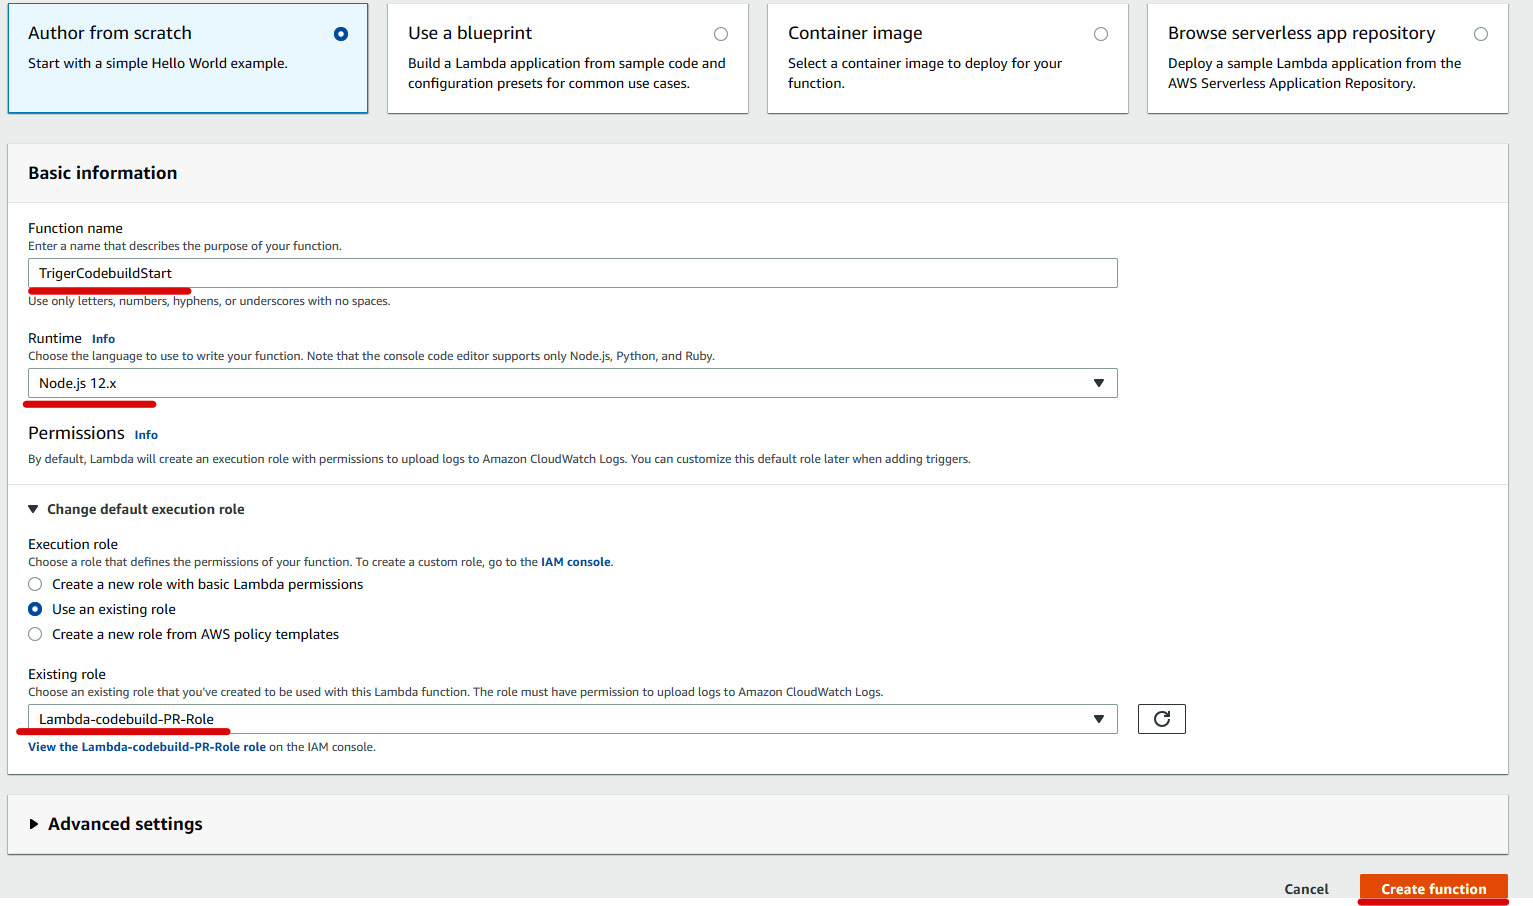
Figure 1.49 – Creating a lambda function
- Go to the Code Source section and modify the
index.jsfile. We will be using the source code present in theAccelerating-DevSecOps-on-AWS/chapter-01folder that we downloaded for our sample application. There is a folder calledTriggerCodeBuildStartthat includesindex.jsandpackage.jsonfiles. Copy and paste both the files into this Lambda function and click on Deploy, as illustrated in the following screenshot:
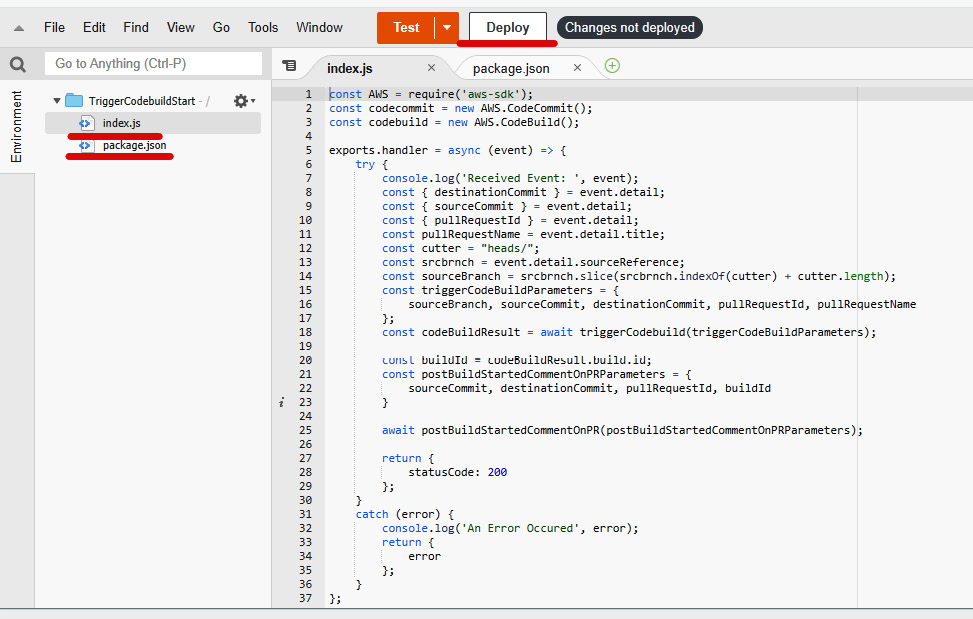
Figure 1.50 – Lambda function code editor
- After that, go to the Configuration section and click on Environment variable to add the environment variables. The lambda function code uses three environment variables shown in the following screenshot. Click on Save once you have entered the three environment variables:
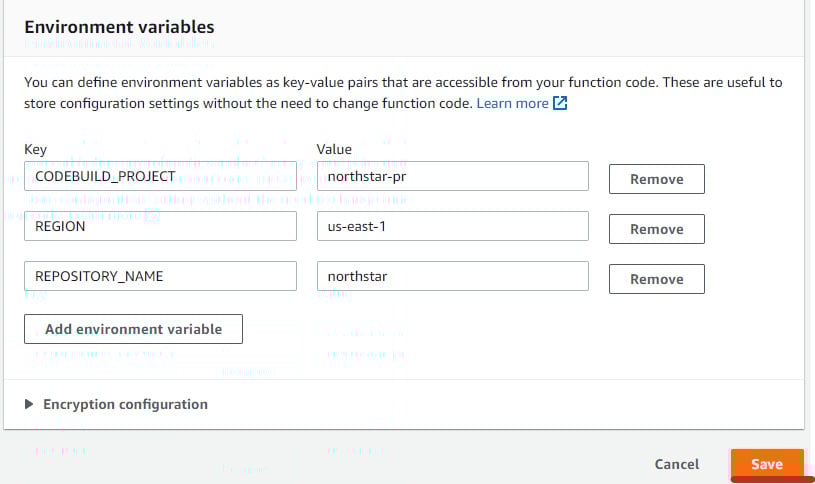
Figure 1.51 – Environment variables for TriggerCodebuildStart lambda function
- Similarly, create another lambda function,
TriggerCodebuildResult, with the code available in theTriggerCodeBuildResultfolder. Deploy the Lambda function and go to the Configuration section to enter the environment variable, as illustrated in the following screenshot:
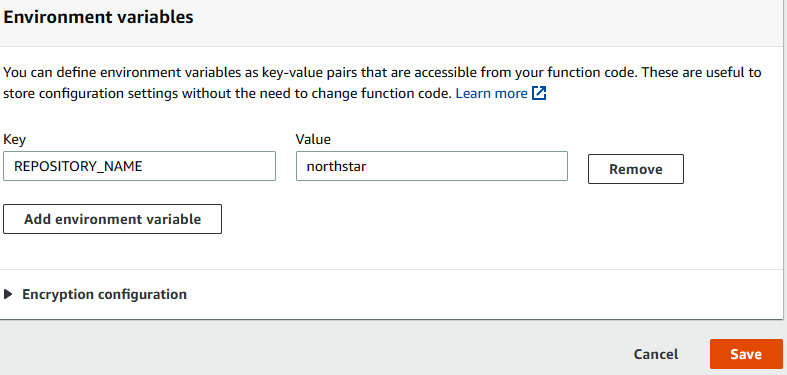
Figure 1.52 – Environment variable for TriggerCodebuildResult lambda function
- Once we have created our Lambda function, we need to create CloudWatch event rules. Go to the CloudWatch console, click on Events on the left-hand side, and then click on Rule. After that, click on Create rule.
- Once you click on Create rule, you will be redirected to the Event Source section. Click on Edit in Event Pattern Preview, as illustrated in the following screenshot:
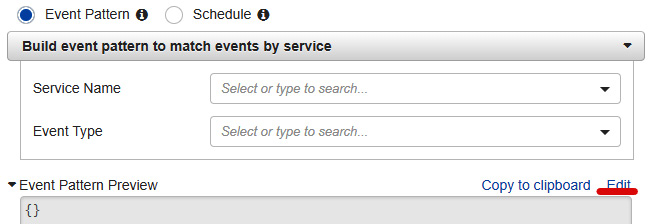
Figure 1.53 – CloudWatch rule creation with event pattern
- You will get a box where you need to paste the following event pattern and then click Save:
{ "source": [ "aws.codecommit" ], "detail-type": [ "CodeCommit Pull Request State Change" ], "resources": [ "arn:aws:codecommit:us-east-1:<Your accountID>:northstar" ], "detail": { "event": [ "pullRequestCreated", "pullRequestSourceBranchUpdated" ] } } - In the Targets section, select Lambda function in the dropdown, and then select the
TriggerCodebuildStartfunction, as illustrated in the following screenshot:

Figure 1.54 – CloudWatch target
- Click on Configure details to proceed to Step 2, where you need to give the rule a name and a description. Name the rule
TriggerValidatePRCodeBuildStartand then save it. - Similarly, create another CloudWatch rule, naming it
TriggerValidatePRCodeBuildResultand giving it the following event pattern, with the target being theTriggerCodebuildResultLambda function:{ "source": [ "aws.codebuild" ], "detail-type": [ "CodeBuild Build State Change" ], "detail": { "project-name": [ "northstar-pr" ], "build-status": [ "FAILED", "SUCCEEDED" ] } } - We now have two CloudWatch rules,
TriggerValidatePRCodeBuildStartandTriggerValidatePRCodeBuildResult, as we can see in the following screenshot:

Figure 1.55 – CloudWatch rules
- We are all set up with the solution. Now, to test this solution, we need to modify the
feature/imagebranch and create a PR to the develop branch. We will modify thenorthstar/source/templates/default.jadefile, save it, and push it, as illustrated in the following screenshot:
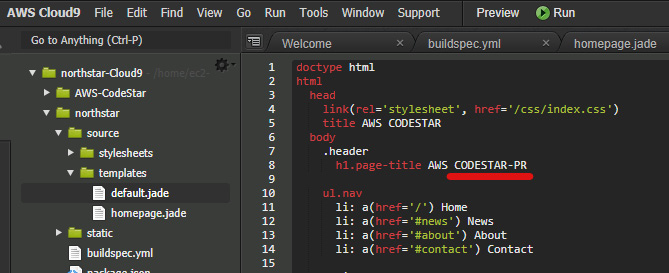
Figure 1.56 – Editing feature branch code for PR to develop branch
- Now, let's create a PR from the CodeCommit console. Choose feature/image under Source and develop under Destination. Enter
Raising PR for Codestar-PRfor Title and Description and click on Create pull request, as illustrated in the following screenshot:
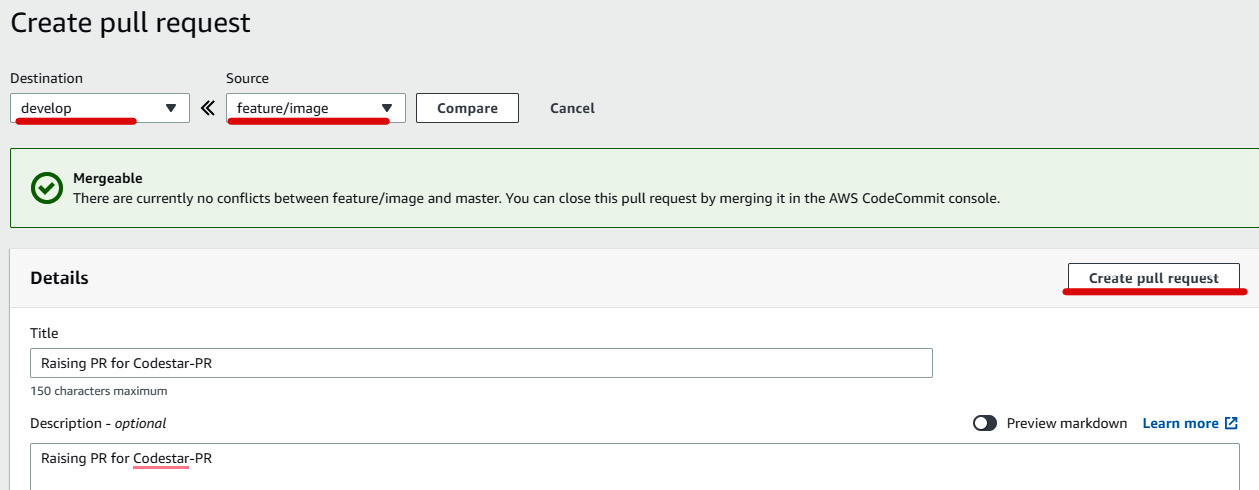
Figure 1.57 – Raising PR via CodeCommit
- If you go to the Activity section of Pull requests, you can see a comment in Activity history, as illustrated in the following screenshot:
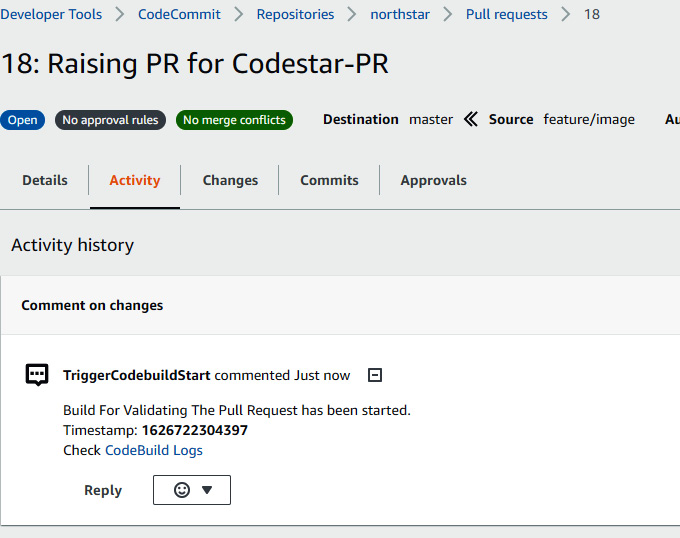
Figure 1.58 – PR status
- Meanwhile, you can see the CodeBuild logs or the CodeBuild project by going to the following screen:
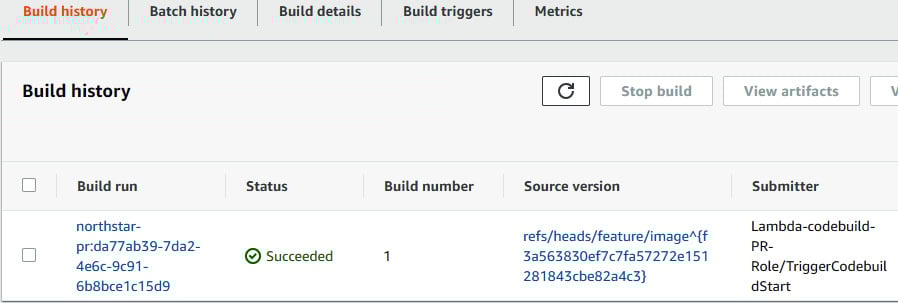
Figure 1.59 – Build status
- Once the build is successful, you can see the build status on the Activity page, as illustrated in the following screenshot:
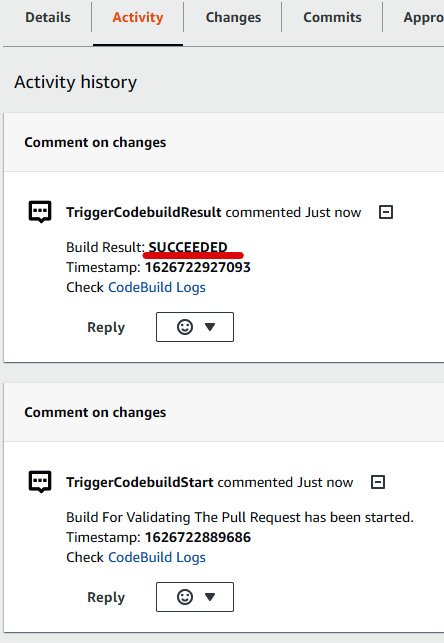
Figure 1.60 – PR build status
- Once you see that the build related to the PR commit is successful, you can then merge the code to develop from feature/image by clicking on Merge (Fast forward merge), which will eventually trigger a development pipeline and deploy the new changes into the development environment, as illustrated in the following screenshot:
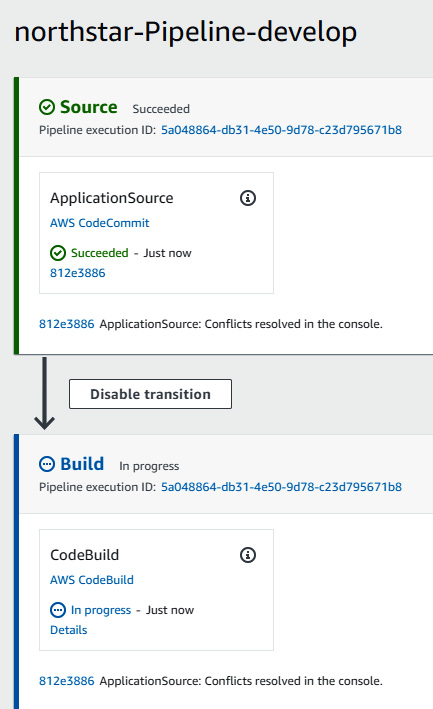
Figure 1.61 – northstar develop code pipeline
- After that, you can go to Elastic Beanstalk and open the
northstarappdevendpoint, and you can then see the change on the home page, as illustrated in the following screenshot:
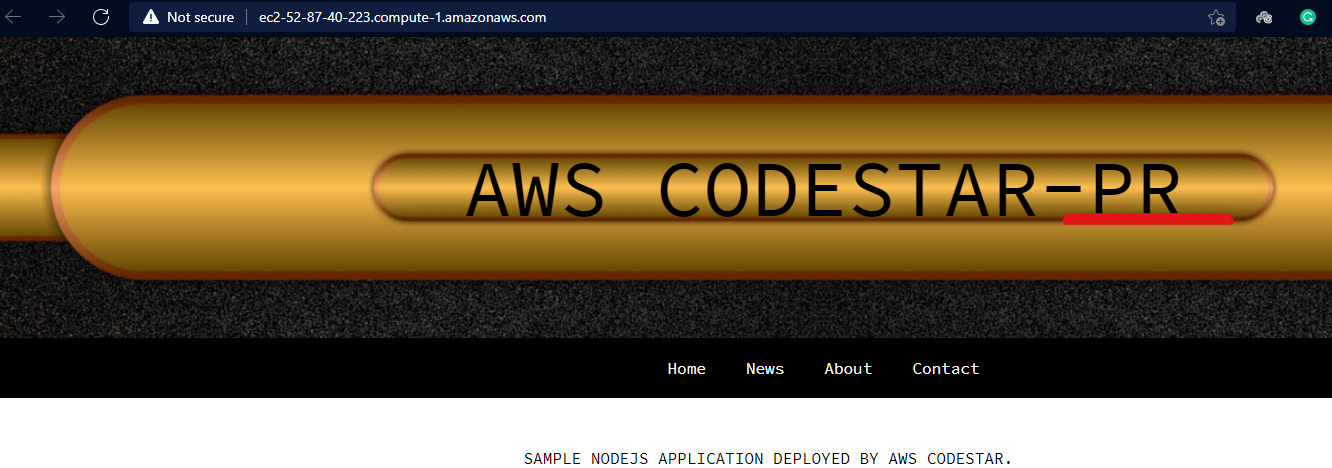
Figure 1.62 – Modified web application running in the development environment
So far, we have a feature branch and an associated CodeBuild project when a PR is raised and a develop branch with its own development pipeline and environment. In the next section, we will modify the existing pipeline that came by default during the start of the project. We will rename the environment as staging and create a new production stage and environment.