-
Book Overview & Buying
-
Table Of Contents

Azure Active Directory for Secure Application Development
By :
Azure Active Directory for Secure Application Development
By:
Overview of this book
Azure Active Directory for Secure Application Development is your one-stop shop for learning how to develop secure applications using modern authentication techniques with Microsoft Azure AD. Whether you’re working with single-tenant, multi-tenant, or line-of-business applications, this book contains everything you need to secure them.
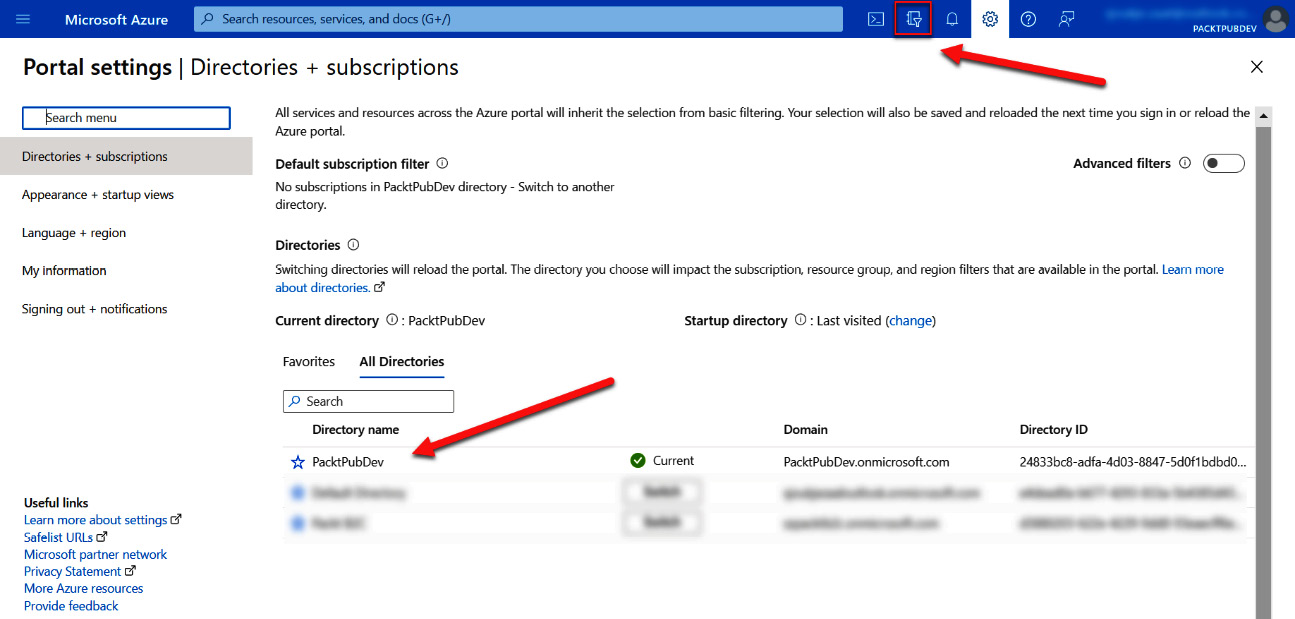
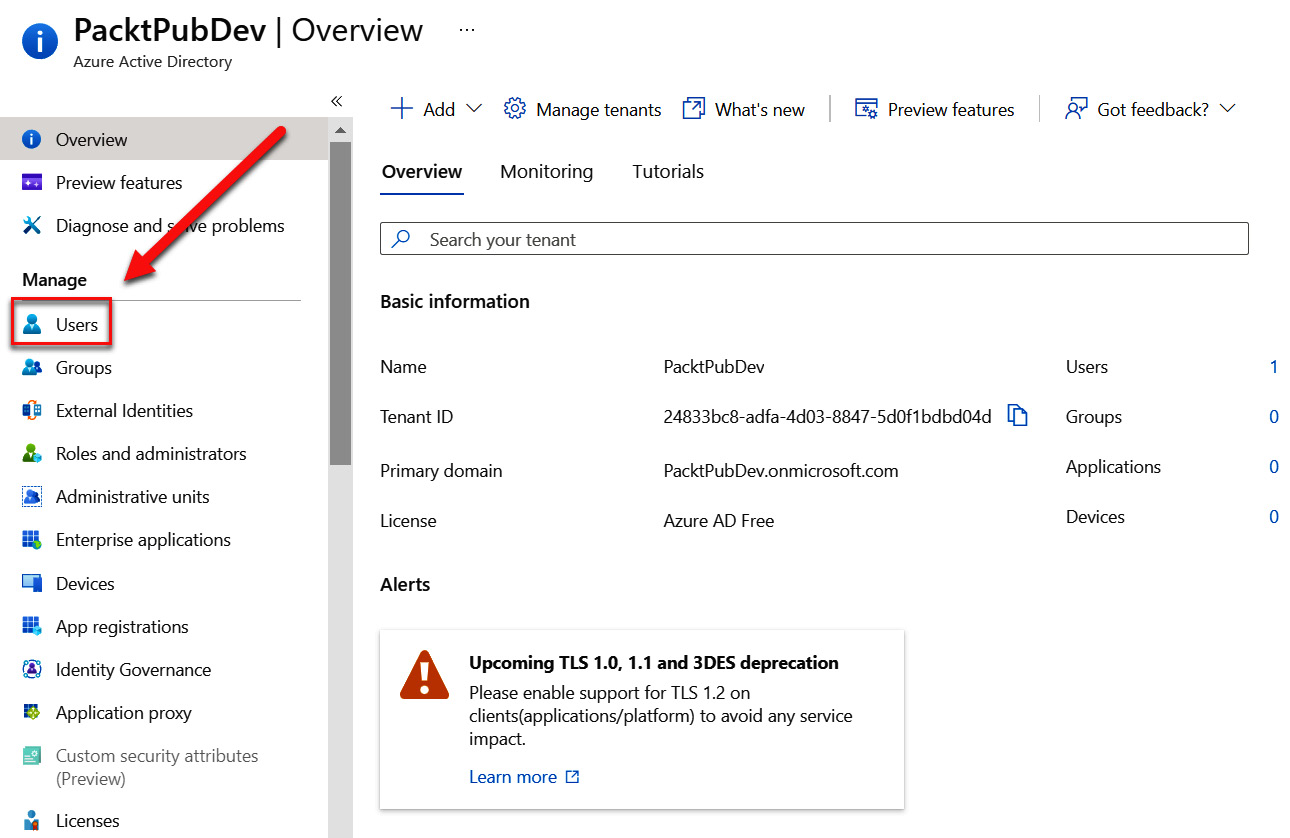
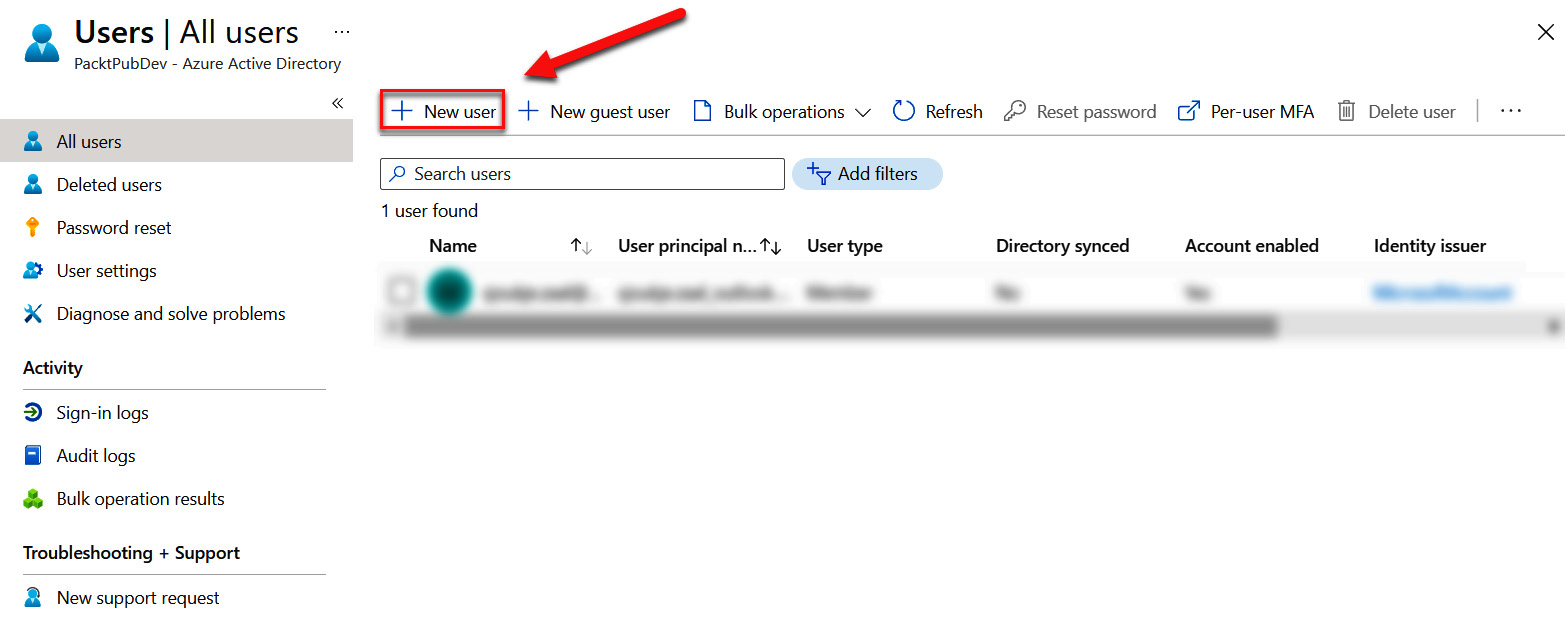
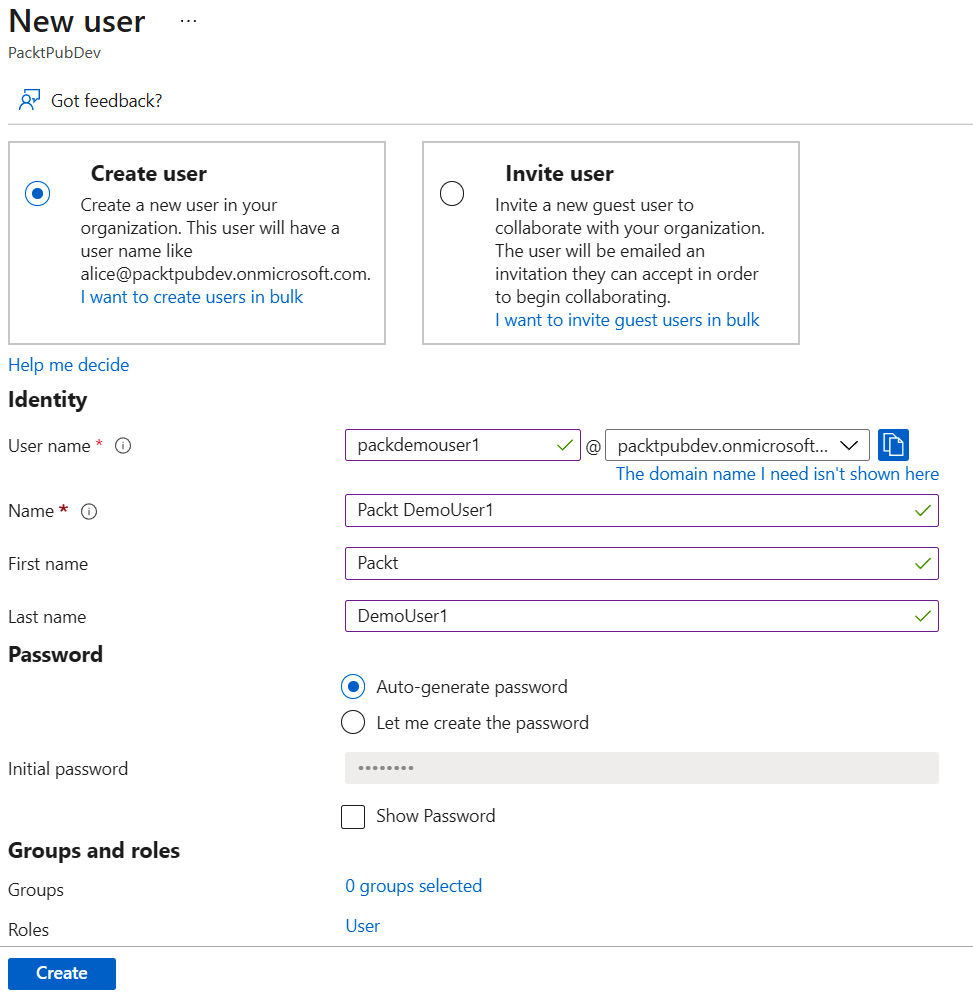
The book wastes no time in diving into the practicalities of Azure AD. Right from the start, you’ll be setting up tenants, adding users, and registering your first application in Azure AD. The balance between grasping and applying theory is maintained as you move from the intermediate to the advanced: from the basics of OAuth to getting your hands dirty with building applications and registering them in Azure AD. Want to pin down the Microsoft Graph, Azure AD B2C, or authentication protocol best practices? We’ve got you covered. The full range of Azure AD functionality from a developer perspective is here for you to explore with confidence.
By the end of this secure app development book, you’ll have developed the skill set that so many organizations are clamoring for. Security is mission-critical, and after reading this book, you will be too.
Table of Contents (14 chapters)
Preface

Part 1: Getting Started with the Microsoft Identity Platform
 Free Chapter
Chapter 1: Microsoft Identity Platform Overview
Chapter 2: Azure AD Application Model
Chapter 3: Application Types and User Consent
Part 2: Authentication and Protocols
Chapter 4: The Basics and Evolution of Authentication
Chapter 5: Securing Applications with OAuth 2.0, OpenID Connect, and MSAL
Chapter 6:Building Secure Services Using the Microsoft Graph API
Part 3: Azure AD B2C
Chapter 7: Introducing Azure Active Directory B2C
Chapter 8: Advanced Features of Azure AD B2C
Chapter 9: Azure AD B2C Custom Policies
Other Books You May Enjoy