
Connecting non-Azure virtual machines using Azure Arc
Before Microsoft Defender for Cloud can monitor your security posture and display security recommendations of your non-Azure computers, you must connect them to Azure. This recipe will show you how to connect a non-Azure server to Azure using Azure Arc.
Getting ready
Before you start connecting servers to Azure using Azure Arc, you must have administrative permissions on a target server to install and configure it.
Open a web browser and navigate to https://portal.azure.com.
How to do it…
To enable Microsoft Defender for Cloud Plans on multiple subscriptions at once, complete the following steps:
- In the Azure portal, open Azure Arc. You can open Azure Arc in multiple ways: by typing Azure Arc in the search bar, by going to All Services, or by clicking on the respective link in Favorites.
- On the left menu, select Servers:
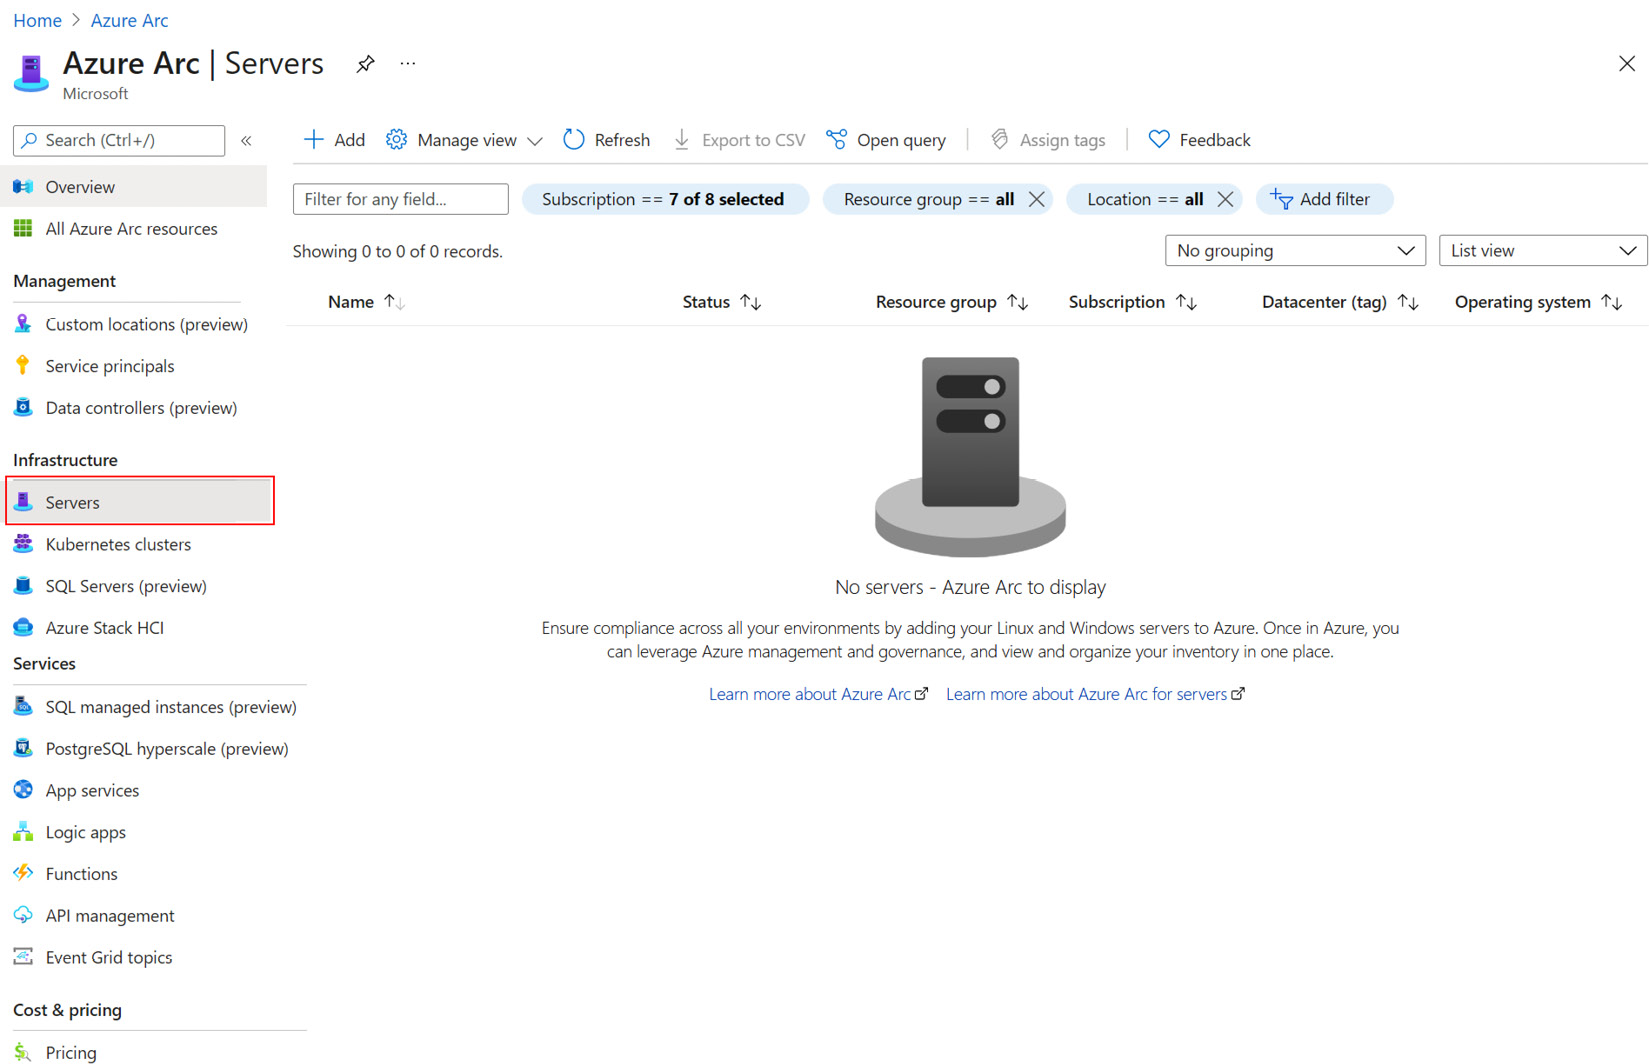
Figure 2.1 – Selecting Azure Arc | Servers
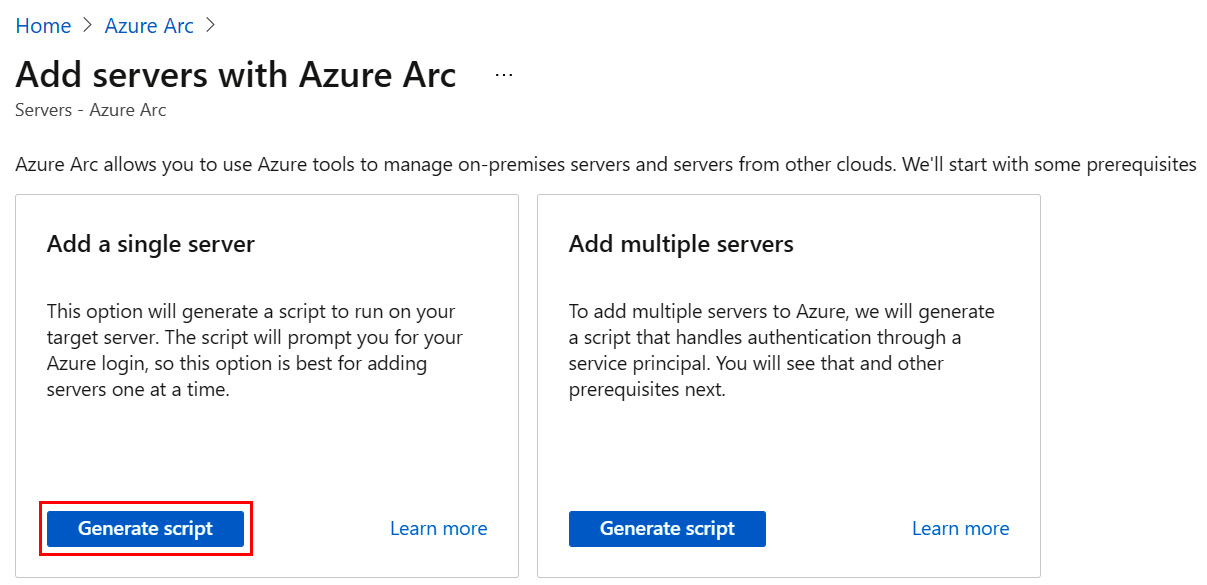
Figure 2.2 – Add servers with Azure Arc
- In Add single server box, select Generate script.
- On the ❶ Prerequisites blade, read the information provided and click Next: Resource details at the bottom of the blade.
- On the ❷ Resource details blade, select the subscription and resource group that will contain the server you are adding and that will be managed in Azure. In addition, select the Azure region where the metadata for resources will be created, and the operating system that the server is running. If the server you are adding is unable to communicate directly to the internet and Azure data centers, specify the URL of the proxy server that the non-Azure server can use. At the bottom of the page, click Next: Tags to proceed to the next step:
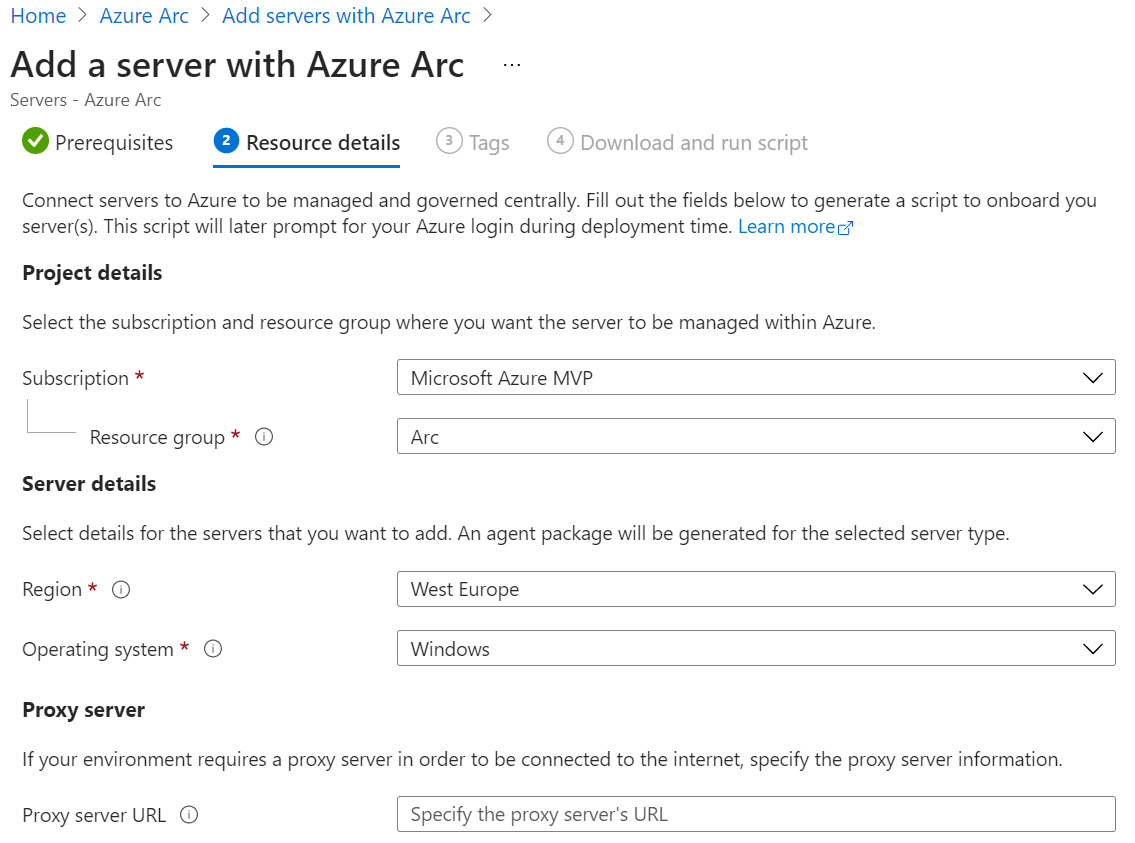
Figure 2.3 – Add a server with Azure Arc – Resource details
- On the ❸ Tags blade, enter physical location tags that will identify the server you are adding, as well as any additional tags that will help you organize the resources better. At the bottom of the blade, click Next: Download and run script:
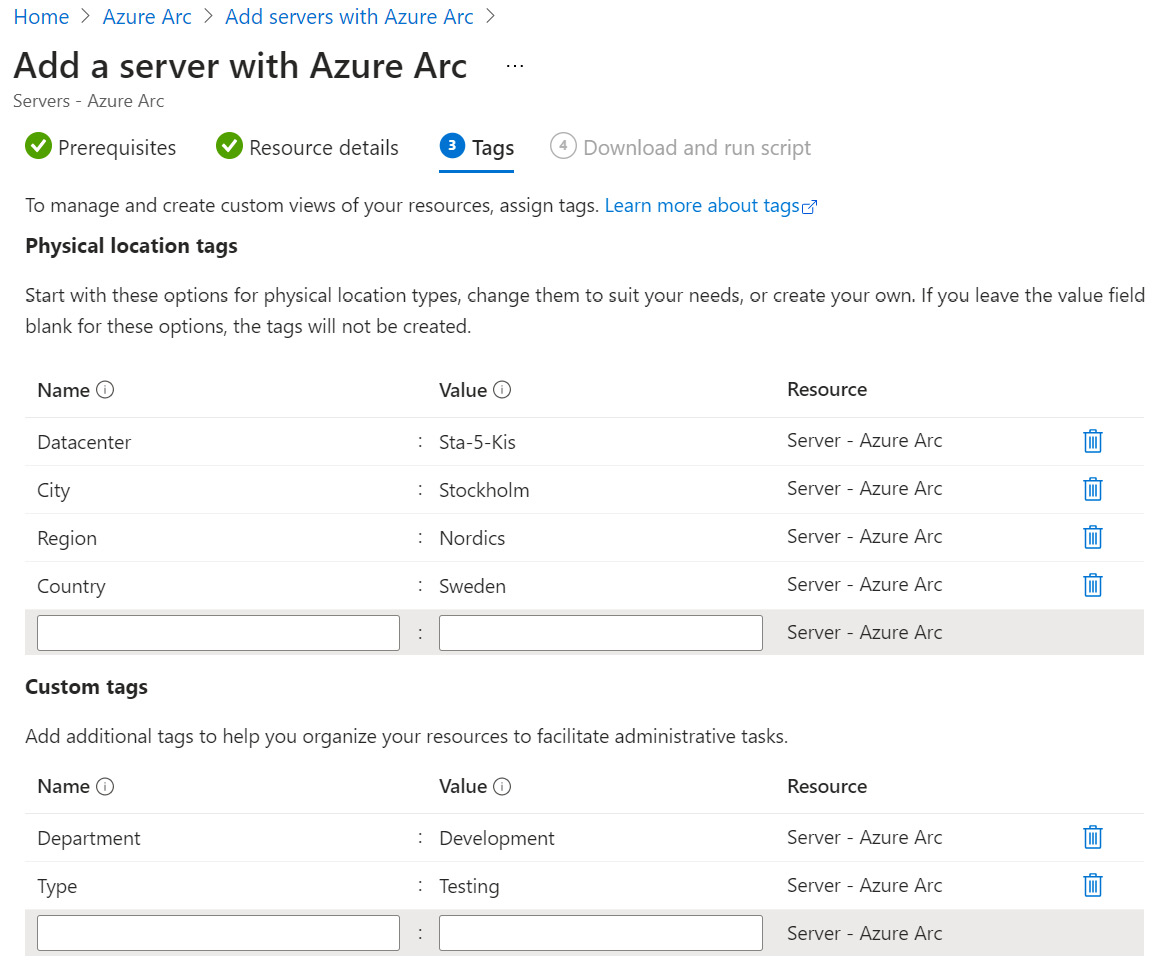
Figure 2.4 – Add a server with Azure Arc – Physical location tags
- In the ❹ Download and run script section, click on the Download button to download and save the
OnboardingScript.ps1script. Copy the script onto the server you are onboarding to Azure Arc. Select Close to finish and close the Add a server with Azure blade. On the top-right side of the Add servers with Azure Arc blade, click X to close the blade and return to the Azure Arc | Servers blade:
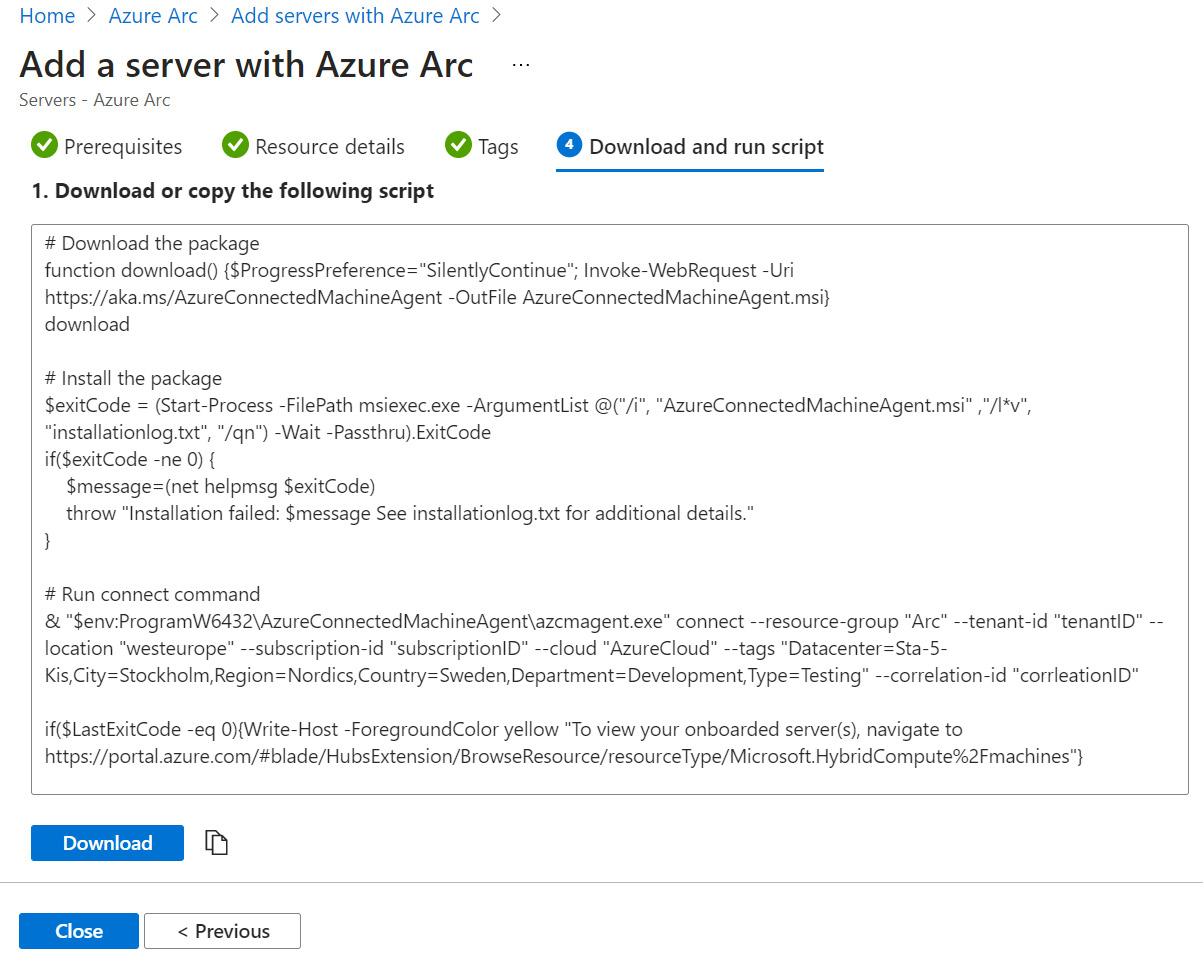
Figure 2.5 – Add a server with Arc – Download and run script
- On the server you are onboarding to Azure Arc, run
OnboardingScript.ps1. The script will download and install Azure Connected Machine Agent, initiate authentication to Azure, create an Azure Arc-enabled server resource, and associate it with the agent:
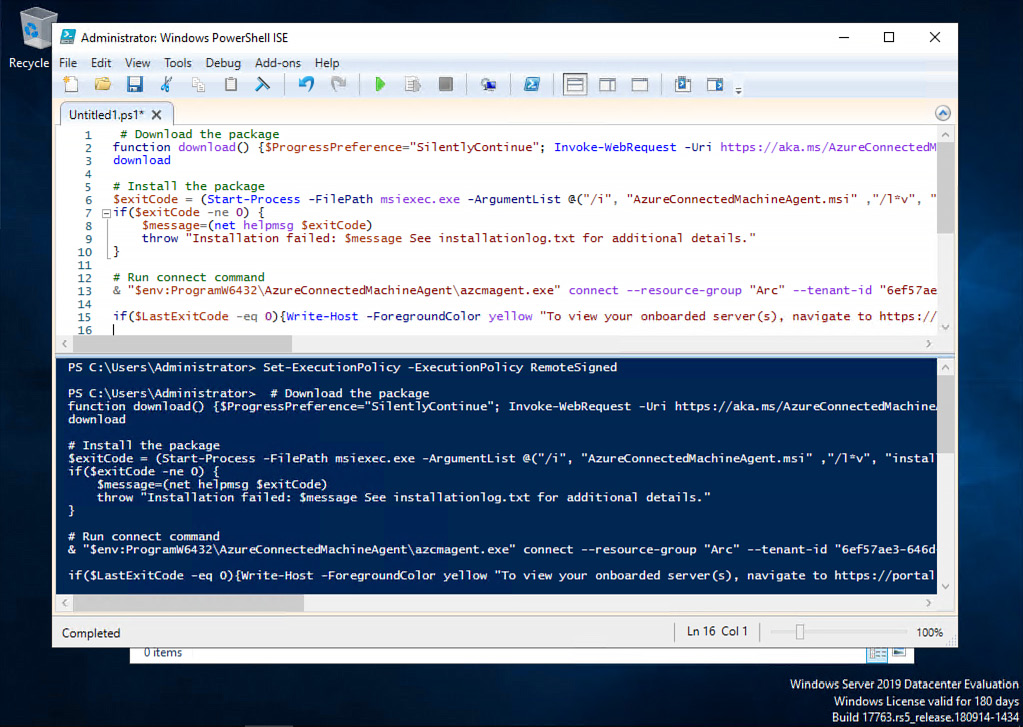
Figure 2.6 – Executing the installation script on a target machine
- After successfully installing Azure Connected Machine Agent, authenticating, and creating an Azure Arc enabled resource in Azure, you should receive a message about having signed into the Azure Connected Machine Agent application:
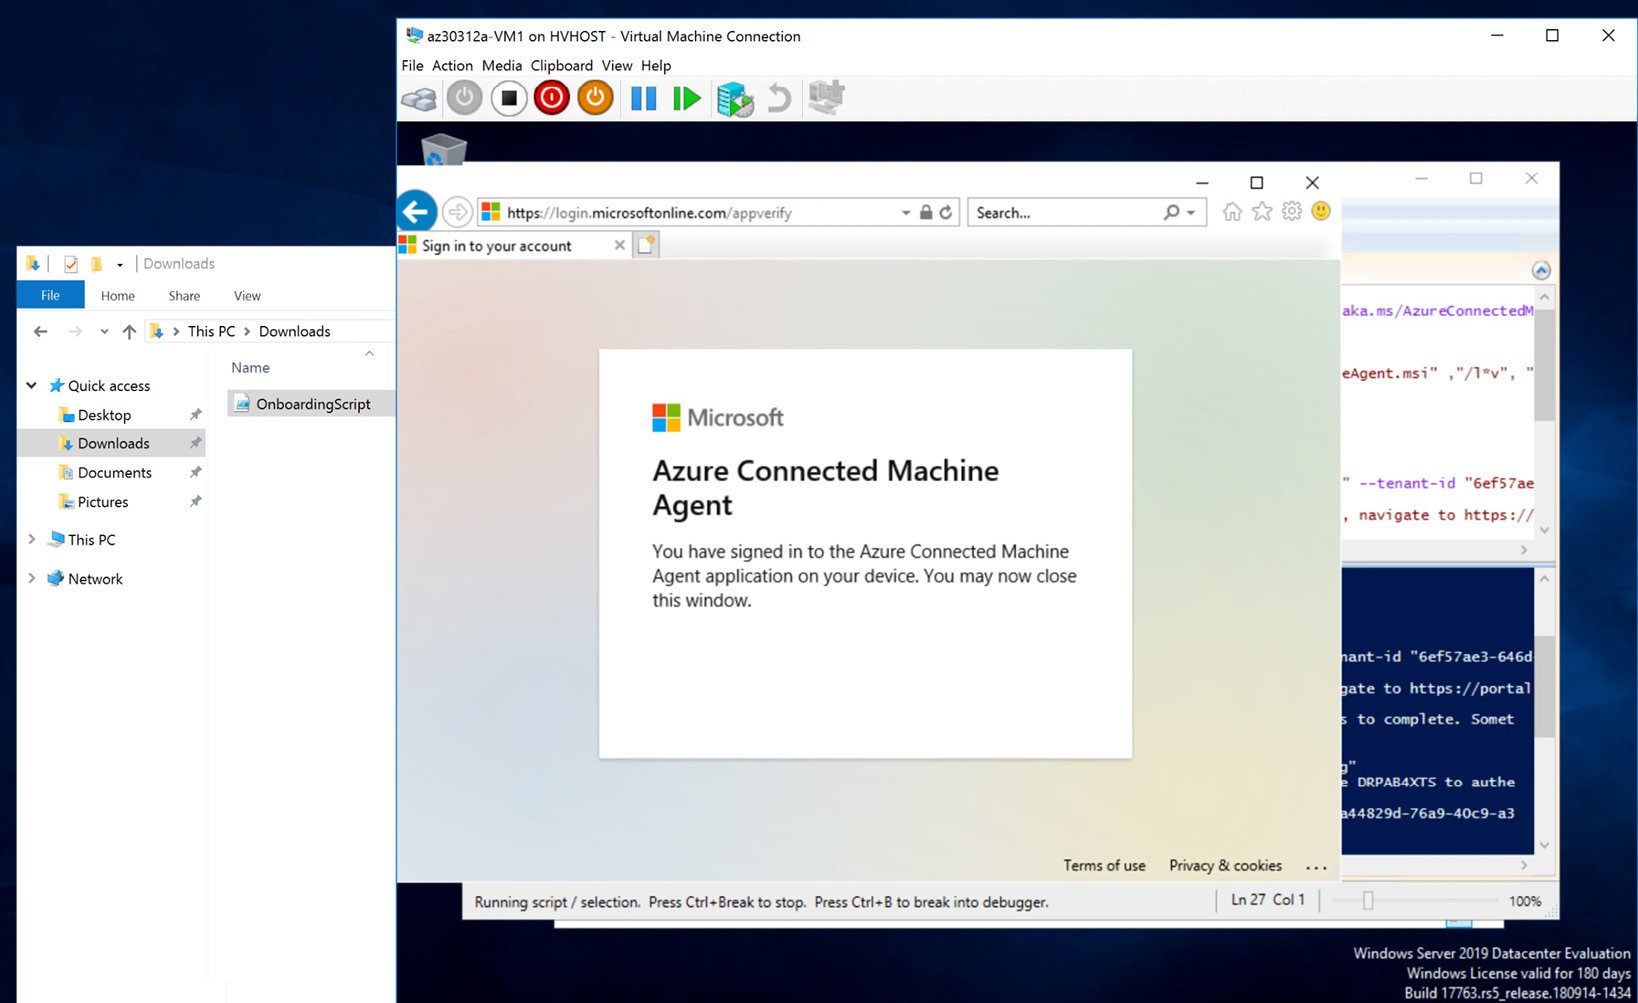
Figure 2.7 – Successful Azure Connected Machine Agent sign-in message
- In the Azure portal, on the Azure Arc | Servers blade, click Refresh to display the newly onboarded server in Azure Arc:
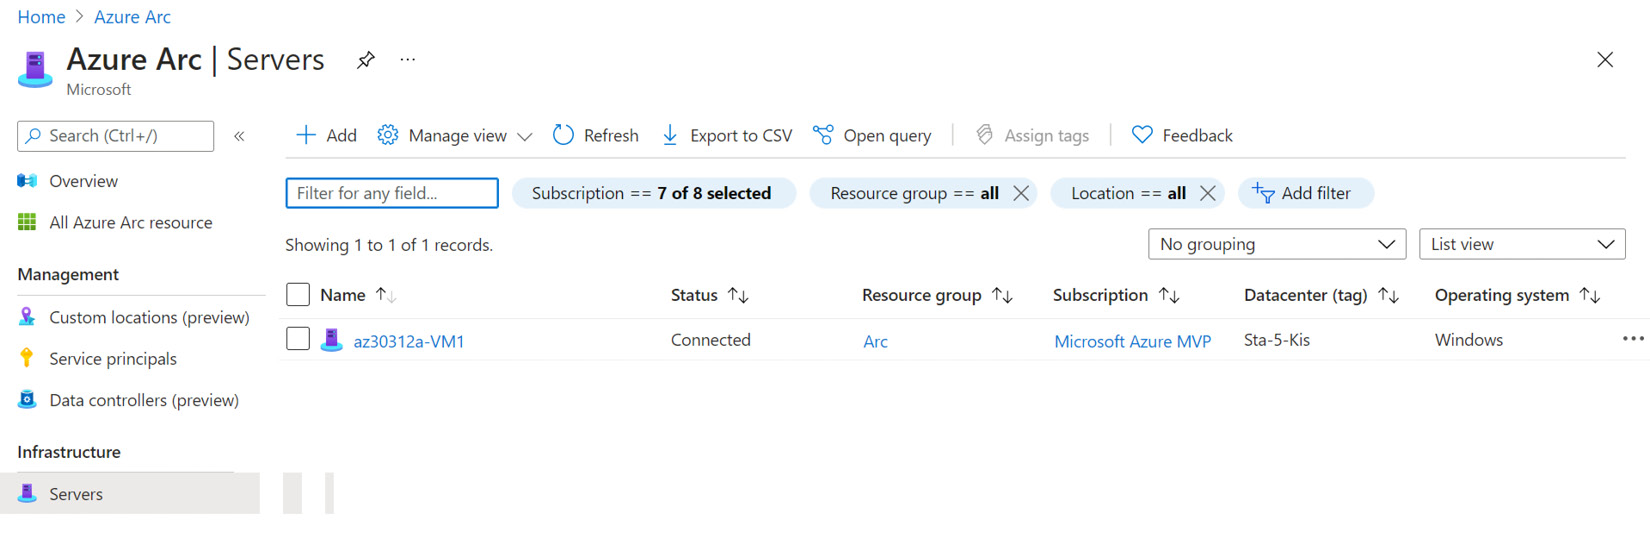
Figure 2.8 – Newly onboarded server visible in the Azure Arc | Servers blade
- After a while, the newly added Azure Arc server will be visible in Microsoft Defender for Cloud, including its Inventory and Recommendations:
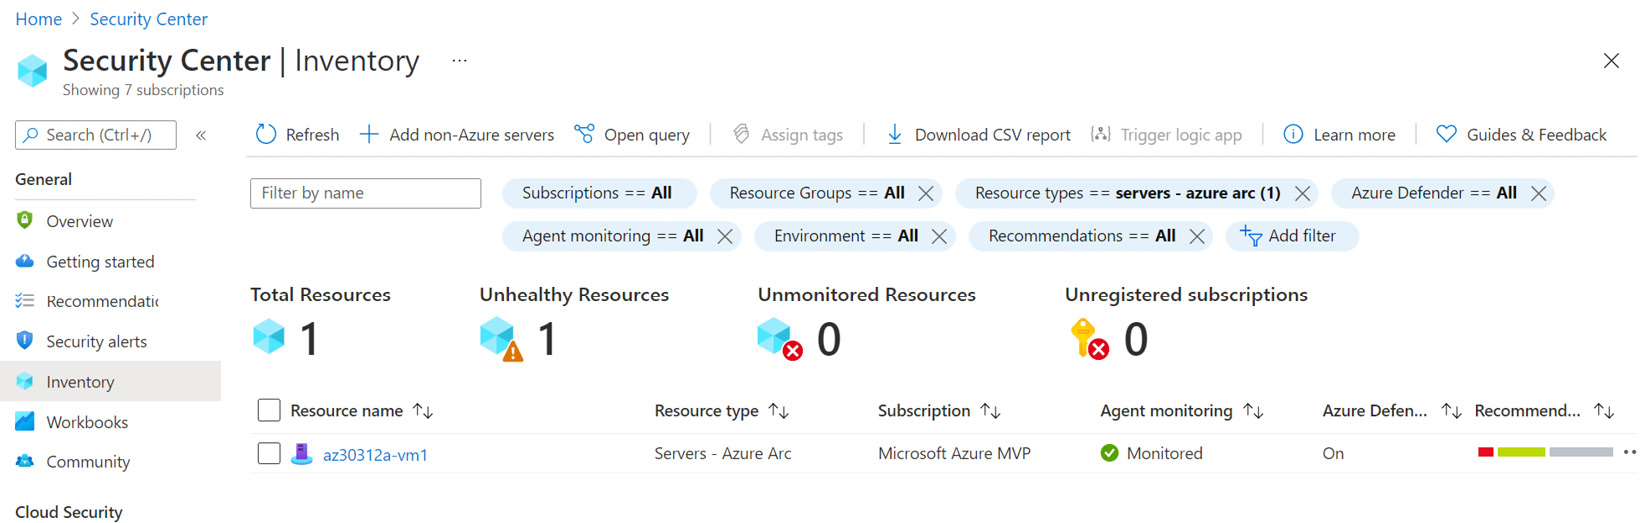
Figure 2.9 – Newly onboarded server visible in Microsoft Defender for Cloud | Inventory
How it works…
Azure Arc-enabled servers is a cloud service that allows you to manage servers hosted outside of Azure, such as on-premises or on other cloud providers, and it is the preferred way of adding non-Azure machines to Microsoft Defender for Cloud. Azure Arc-enabled machines support additional monitoring and configuration management tasks, such as configuration changes reporting, guest configuration policies, VM Insights, simplified deployment, update management, security monitoring, threat detection, and others. Once you connect a non-Azure machine to Azure Arc, it will be visible and protected by Microsoft Defender for Cloud.