
Creating a GCP service account and connecting GCP to Microsoft Defender for Cloud
You will need a GCP service account to access the data that's ingested in GCP's Security Command Center.
Getting ready
Open a web browser and navigate to https://portal.azure.com. Open a new browser tab and navigate to https://console.cloud.google.com.
How to do it…
To create a GCP service account, complete the following steps:
- In GCP Console, from the left menu, under IAM & Admin, select Service Accounts.
- From the top menu, select + CREATE SERVICE ACCOUNT.
- In the Service account name field, enter the account's name. Optionally, in the Service account description field, describe what this service account will be used for. Click CREATE AND CONTINUE.
- When you get to the ❷ Grant this service account access to project step, click on a Select role drop-down menu and select the Security Center Admin Viewer role. Select CONTINUE.
- The Grant users access to this service account step is optional. Click DONE.
- Copy the email of the service account and save it; we will use this later.
- From the Navigation menu, under IAM & Admin, click IAM. Ensure you are viewing IAM permissions for an organization, rather than for a project. From the top menu, switch to the organization level.
- To add a new user, click ADD.
- In the New members field, enter the email value of the service account you copied in Step 6.
- From the Select role menu, select the Security Center Admin Viewer role and click SAVE.
- Select a project to switch to a project level since the Service Accounts page can't be viewed by organizations.
- In the Navigation menu, under IAM & Admin, click Service accounts.
- Next to the service account you created previously, click on the vertical ellipsis (three vertical dots) and select Manage keys:
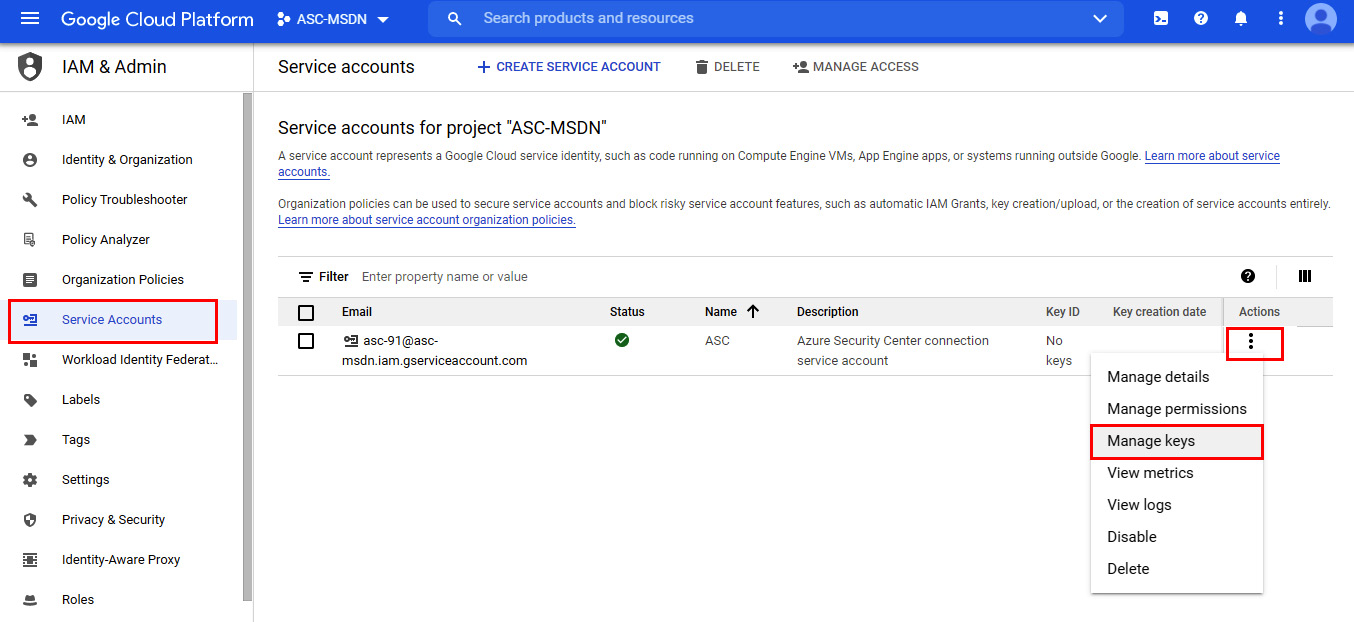
Figure 2.33 – Service accounts for project
- On the Keys page, click ADD KEY and then select Create new key.
- In the Create private key window, choose JSON for Key type and click CREATE.
- Save the JSON file.
- In the Navigation menu, under IAM & Admin, click Settings. Copy the Organization ID value and save it for later use.
- In the Azure portal, open Microsoft Defender for Cloud. Under the Management section, select Cloud connectors.
- Select Connect GCP account:
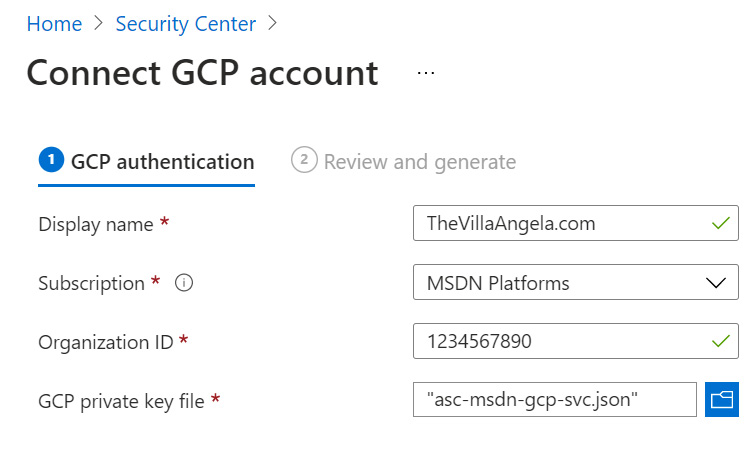
Figure 2.34 – Connect GCP account
- In the Display name field, enter a name for the GCP connector.
- Choose an Azure subscription.
- In the Organization ID field, paste the value you copied in Step 17.
- For GCP private key file, click on a folder icon and select the JSON file you saved in Step 16.
- Select Next: Review and generate.
- On the ❷ Review and generate page, review the details and click Create.
How it works…
To connect the GCP account to Microsoft Defender for Cloud, you created a service account in GCP with the appropriate permissions to read security information from GCP Security Center. This GCP service account is used to read the data in GCP Security Command Center. Then, you created a private key for the service account, which will be used for authentication in the Microsoft Defender for Cloud GCP connector. With all the necessary information at hand, you created a GCP connector in Microsoft Defender for Cloud.