In order to download the job and data files, visit the support page of the Packt website at http://www.packtpub.com/support, select the name of the book from the drop-down list, and enter your e-mail address. The code download link will be e-mailed to you and the necessary files can be downloaded by clicking on the link.
Once you have downloaded the job package, unzip it and open it. Inside, you will find three directories—SampleDataFiles, DBBackup, and ExampleJobs. Inside each of these subdirectories are the files you need to install.
Within the
SampleDataFiles directory is a further set of directories containing sample input files. They have been organized chapterwise for easy reference.
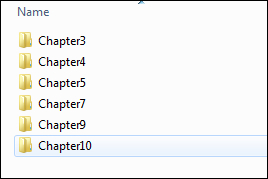
Once you have created your workspace directory and a new project, create a DataIn directory within the project and copy the chapter directories (shown previously) into the DataIn directory.
As an example, if your workspace was created in C:\Talend\Workspace and you created a project named DEMOPROJECT, your
DataIn directory would exist alongside the files and directories created by the Studio when a project is created, as shown in the following screenshot:
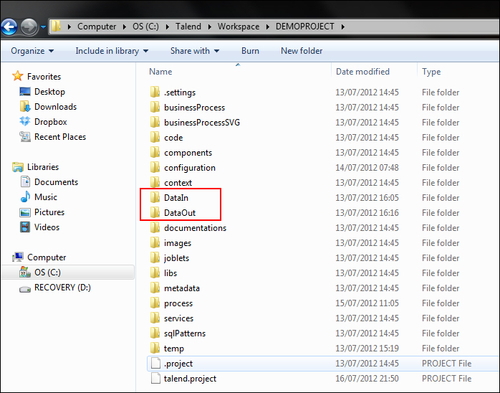
Note that we have also created a DataOut directory for files that will be produced by our jobs.
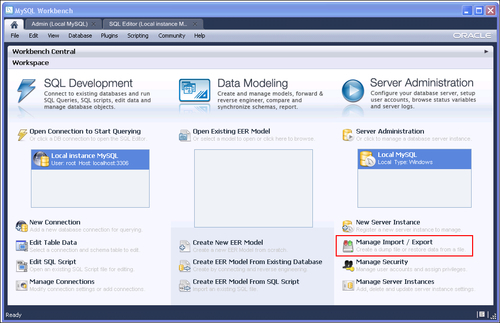
The job package contains a MySQL database backup file. Restoring this will create a database with a number of populated tables that will be used by some of the jobs we create. To restore the backup, open MySQL Workbench and click on Manage Import/Export, as shown in the following screenshot:
On the Admin screen, click on Data Import/Restore in the left-hand pane and then browse to the DBBackup directory on your computer.
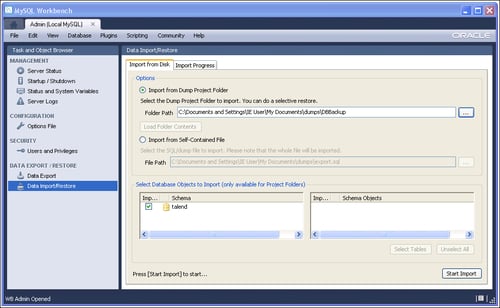
The schema in the DBBackup directory will be shown in the bottom-left pane of the main window.
Now click on Start Import. The database will be created in your local MySQL instance.
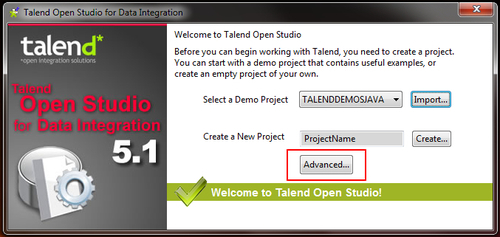
To import the sample jobs, start up the Studio and on the start-up screen, click on Advanced... as shown in the following screenshot:
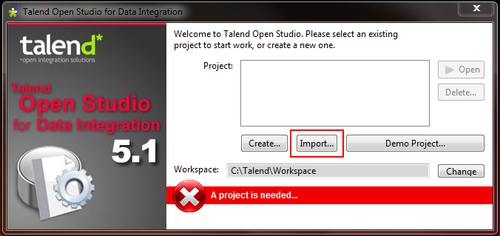
Once on the Advanced screen, click on the Import... button as shown in the following screenshot:
On the Import window, enter a project name, such as GETTINGSTARTEDTOS, and using the Select root directory field, browse to the ExampleJobs directory. Select the project folder within the ExampleJobs directory, namely GETTINGSTARTEDTOS.
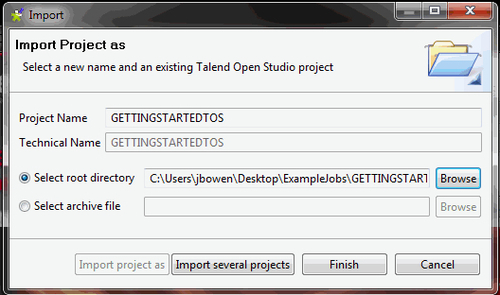
Finally, click on Finish to import the projects into your workspace. Once the import is complete, you will see the new project in the projects list on the start-up screen. Select the project and click on Open to open the imported project.


