

The first thing we need to do is prepare our PC to develop for Android using Java. Fortunately, this is made quite simple for us.
Tip
If you are learning on Mac or Linux, everything in this book will still work. The next two tutorials have Windows-specific instructions and screenshots. However, it shouldn't be too difficult to vary the steps slightly to suit Mac or Linux.
All we need to do is:
Install a software package called the Java Development Kit (JDK), which allows us to develop in Java.
Install Android Studio, a program designed to make Android development fast and easy. Android Studio uses the JDK and some other Android-specific tools that automatically get installed when we install Android Studio.
The first thing we need to do is get the latest version of the JDK. To complete this guide, perform the following steps:
You need to be on the Java website, so visit http://www.oracle.com/technetwork/java/javase/downloads/index.html.
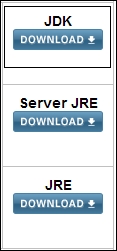
Find the three buttons shown in the following screenshot and click on the one that says JDK (highlighted). They are on the right-hand side of the web page. Click on the DOWNLOAD button under the JDK option:
You will be taken to a page that has multiple options to download the JDK. In the Product/File description column, you need to click on the option that matches your operating system. Windows, Mac, Linux and some other less common options are all listed.
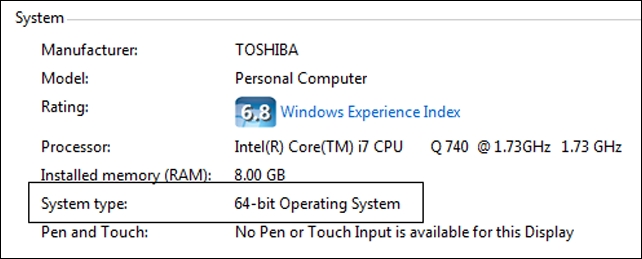
A common question here is, "do I have 32- or 64-bit windows?". To find out, right-click on your My Computer (This PC on Windows 8) icon, click on the Properties option, and look under the System heading in the System type entry, as shown in the following screenshot:
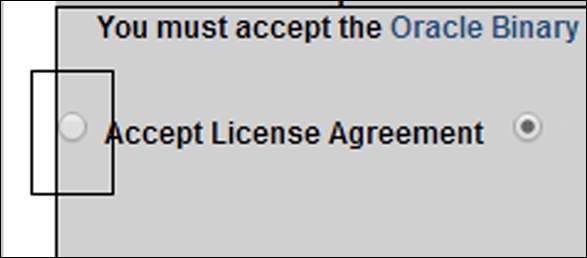
Click on the somewhat hidden Accept License Agreement checkbox:
Now click on the download option for your OS and system type as previously determined. Wait for the download to finish.
In your
Downloadsfolder, double-click on the file you just downloaded. The latest version at time of writing this for a 64-bit Windows PC wasjdk-8u5-windows-x64. If you are using Mac/Linux or have a 32-bit OS, your filename will vary accordingly.In the first of several install dialogs, click on the Next button and you will see the next dialog box:
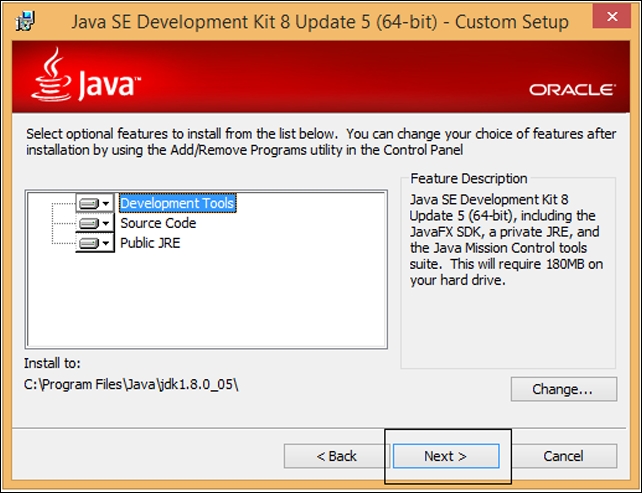
Accept the defaults shown in the previous screenshot by clicking on Next. In the next dialog box, you can accept the default install location by clicking on Next.
Next is the last dialog of the Java installer. Click on Close.
The JDK is now installed. Next we will make sure that Android Studio is able to use the JDK.
Right-click on your My Computer (This PC on Windows 8) icon and navigate to Properties | Advanced system settings | Environment variables | New (under System variables, not under User variables). Now you can see the New System Variable dialog, as shown in the following screenshot:
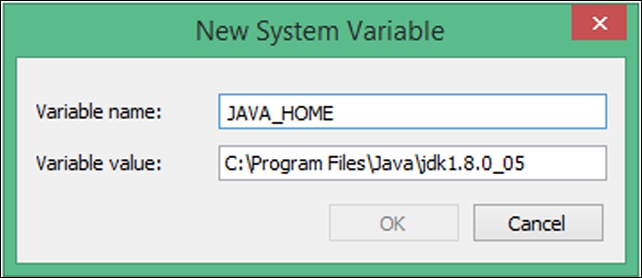
Type
JAVA_HOMEfor Variable name and enterC:\Program Files\Java\jdk1.8.0_05for the Variable value field. If you installed the JDK somewhere else, then the file path you enter in the Variable value: field will need to point to wherever you put it. Your exact file path will likely have a different ending to match the latest version of Java at the time you downloaded it.Click on OK to save your new settings. Now click on OK again to clear the Advanced system settings dialog.
Now we have the JDK installed on our PC. We are about half way towards starting to learn Java programming, but we need a friendly way to interact with the JDK and to help us make Android games in Java.
We learned that Android Studio is a tool that simplifies Android development and uses the JDK to allow us to write and build Java programs. There are other tools you can use instead of Android Studio. There are pros and cons in them all. For example, another extremely popular option is Eclipse. And as with so many things in programming, a strong argument can be made as to why you should use Eclipse instead of Android Studio. I use both, but what I hope you will love about Android Studio are the following elements:
It is a very neat and, despite still being under development, a very refined and clean interface.
It is much easier to get started compared to Eclipse because several Android tools that would otherwise need to be installed separately are already included in the package.
Android Studio is being developed by Google, based on another product called IntelliJ IDEA. There is a chance it will be the standard way to develop Android in the not-too-distant future.
Tip
If you want to use Eclipse, that's fine; all of the code in this book will work. However, some the keyboard shortcuts and user interface buttons will obviously be different. If you do not have Eclipse installed already and have no prior experience with Eclipse, then I even more strongly recommend you to go ahead with Android Studio.
So without any delay, let's get Android Studio installed and then we can begin our first game project. To do this, let's visit https://developer.android.com/sdk/installing/studio.html.
Click on the button labeled Download Android Studio to start the Android studio download. This will take you to another web page with a very similar-looking button to the one you just clicked on.
Accept the license by checking in the checkbox, commence the download by clicking on the button labeled Download Android Studio for Windows, and wait for the download to complete. The exact text on the button will probably vary depending on the current latest version.
In the folder in which you just downloaded Android Studio, right-click on the
android-studio-bundle-135.12465-windows.exefile and click on Run as administrator. The end of your filename will vary depending upon the version of Android Studio and your operating system.When asked if you want to Allow the following program from an unknown publisher to make changes to your computer, click on Yes. On the next screen, click on Next.
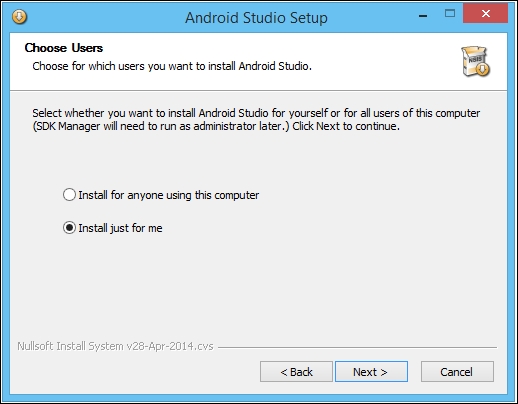
On the screen shown in the following screenshot, you can choose which users of your PC can use Android Studio. Choose whatever is right for you as all options will work, and then click on Next:
In the next dialog, leave the default settings and then click on Next.
Then on the Choose start menu folder dialog box, leave the defaults and click on Install.
On the Installation complete dialog, click on Finish to run Android Studio for the first time.
The next dialog is for users who have already used Android Studio, so assuming you are a first time user, select the I do not have a previous version of Android Studio or I do not want to import my settings checkbox, and then click on OK:

That was the last piece of software we needed. The simple nine-step process we just went through has actually set up a whole range of Android tools that we will begin to use in the next chapter.