

If you think of Cinema 4D as the CEO of your design project, it employs several managers to focus on and control specific parts of your project. The three most important managers in Cinema 4D are the Object Manager, the Attribute Manager, and the Material Manager. This recipe will give you an overview of what kind of functionality these managers provide.
Keep using the Obstacle_Course.c4d project for this recipe. If you want to start your project fresh like it was before the previous recipes, click on Revert to Saved under the File menu.
The Object Manager is the hub that lists all of the components of your project that comprise your scene. Whenever you add pieces like primitives, deformers, lights, cameras, and so on to your scene, they appear inside the Object Manager. By default, it appears as the bigger panel on the right-hand side of Cinema 4D. As your scene grows in complexity, it's important to be able to keep your Object Manager tidy and labeled so that objects remain organized, so you can clearly find the particular piece of the puzzle you need.
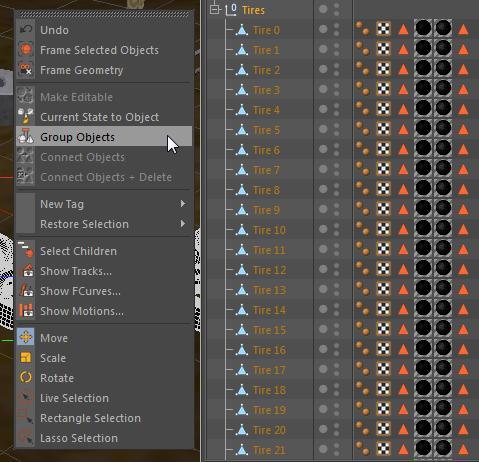
Look in the Object Manager and find the Tire objects. They are all the same kind of objects but occur as separate instances, each with their own individual properties. However, it's smart keep them grouped together for organizational purposes. Hold down the Ctrl key and select the items individually or select the first and last ones while holding the Shift key to select all of the objects, and then hit the Alt or Option + G keys, and you'll see that the objects have now become a group. You could also right-click or context-click on the selected items and hit Group Objects. We can click on the + at the top of the group name to unfold the group and view its contents, and click on the – symbol to close that group. The tires still retain their individual properties and can be modified, but they have now become part of a group with its own properties, so all of the tires can be moved, scaled, or rotated at once. Click on the name of Group 1 and change it to Tires so that we know what it is, and fold it up by clicking on the - symbol.
Note
Objects in the Object Manager do not follow any sort of vertical stacking rules like in programs such as Photoshop and After Effects. If you have "Object A" listed first in the Object Manager ahead of Object B, it won't appear on top of or in front of the object like it would in other programs where the stacking order determines the visibility of the objects. Cinema 4D presents objects in terms of their position within 3D space, so you have to physically place objects in front, behind, on top, and so on, in order to get them to appear in the manner you choose. It makes no difference where they appear in the Object Manager.
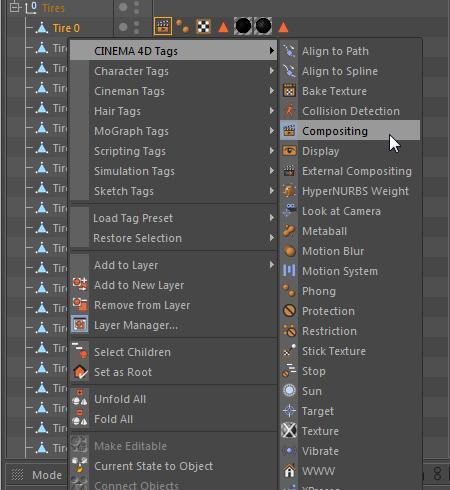
Within our group of tires, you'll notice that each tire has small square icons to the left-hand side of their object names. Each tire contains different Tags, which are specialized modifiers used to add different properties and functions to the objects we apply them to. The tags can be added from the Tags menu at the top of the Object Manager, which actually contains several different groups of tags that are organized for you to browse. They are also accessed via right-clicking or context-clicking on an object that is selected in the Object Manager. Select the Tire 0 object in the group and go into the Tags menu, and then under Cinema 4D Tags, select the Compositing tag and notice how the image of a small slate has appeared at the end of our row of tags. Now, we can fiddle with extra parameters added by this tag to just the Tire 0 object (the Compositing tag is one of the most useful; it has its own recipe within Chapter 7, Rendering Strategy).
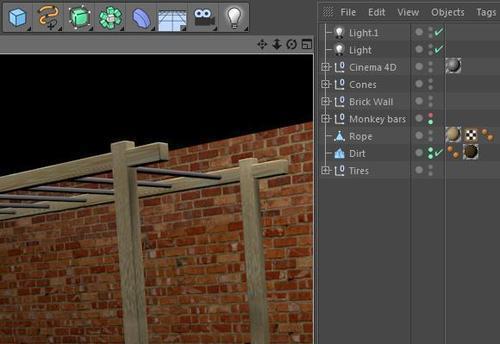
The next crucial feature of the Object Manager is what is often referred to as the Traffic Light in Cinema 4D. It has two small dots very close to the right-hand side of the object's name. The dots default to a gray state, but these can be changed from red and to green by clicking directly on them. Find the Monkey Bars object , click on the top dot to change it to green, then click it again to change it to red. The Monkey bars disappears from the scene as red, but reappears once you cycle back to gray or green. This traffic light toggles the visibility of objects in the editor, represented by the top dot, and the renderer, which is represented by the bottom dot.
Note
Objects can be visible with both the default gray dot and the green dot. The difference is that when the green dot is active, it means that the visibility of the object is forced. For example, if you have several objects that are in a group and you force the group to have red dots, meaning that they are invisible in the editor and renderer, you could still have select objects within that group appear visible if you set their traffic lights to green. The objects that are left to the default gray dots will remain invisible.

Now, make sure the top dot is turned red, and the bottom dot is gray or green, and do a render preview by hitting the Ctrl or Command + R. The scene renders the Monkey Bars object, even though you don't actually see it in the Viewer. By having control of both dots, you can show and hide different objects in a cluttered scene and still have them rendered as part of your previews and final output, which can be useful if you are working with scenes filled with high-polygon objects.
The green checkmark next to the traffic light controls if an object is active or not. It essentially eliminates an object from your scene without deleting it, and it's an easy way to turn an object completely off in both the editor and renderer with just one click. Click on any green checkmark you see in the Object Manager and watch it turn into a red X. The object no longer affects your scene and it will only become activated again if you change the setting back to the green checkmark.
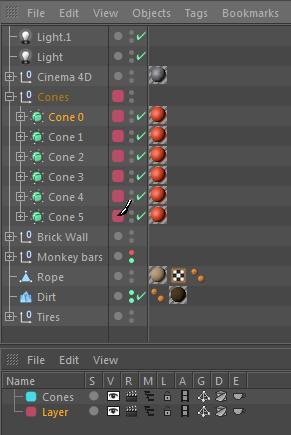
The last main feature of the Object Manager is the ability to place your objects in layers to keep your project organized. It takes ideas from the traffic light and the idea of grouping in Cinema 4D, but it can control as many objects as you wish at once, as long as they are all applied to the same layer. We already hit upon this a little bit by selecting all or certain objects in the Object Manager and using the + and – symbols in groups to fold and unfold the contents. There are a few other options for these actions that help sort and organize our project. Highlight the Cones object in the scene and unfold the group by going under the View menu in the Object Manager, followed by the Folding submenu, and then select Unfold Selected. With the Cones group selected, go under the Edit menu and click on Select Children to highlight all of the objects below. With everything highlighted, go under the Edit menu in the Object Manager and select Add to New Layer. A small colored swatch pops up right next to the names of the objects. Click on any one of the color swatches and select the Layer Browser... option to open the panel that will list all the different layers we apply throughout our scene. It replaces the area where the Attribute Manager is found.

We can double-click on the name Layer and change it to something more descriptive, such as Cones. Click on the eyeball under the V column in the browser and you'll notice that in the Viewer our objects have disappeared. This row of options is a set of controls for all of the objects within our layer; toggling them affects all the objects equally. The dot in the S column acts as a solo switch, which isolates all the objects in that layer inside the Viewer.

In the File menu of the Layer Browser, select New Layer, and a new color swatch pops up in the browser. Take the color swatch for the new layer and drag it from the Layer Browser on top of the Cones group in the Object Manager. Then, click on the new swatch and drag your mouse down the column of swatches, where your cursor should change to a brush icon, and paint your swatches with the new color. An alternative is to select the Cone objects and right-click or context-click on them and then select Add to New Layer, where you'll find both of your created layers, and select the layer that you want to add to them. Because our new layer has the eyeball option open, our cones become visible again. As a result, you can add multiple layers and freely switch the objects between them as you develop your project. Getting familiar with all the icons and buttons in the Object Manager is crucial for helping you navigate through your projects smoothly.
When an object is selected in Object Manager, the window directly below it (in the default layout) loads all the particular controls for that object into the Attribute Manager. This is where we can tweak the settings and parameters to make changes to our objects and set key frames to adjust parameters over time. The manager places these parameters inside different tabs to help organize all the information you have control of. The bottom window may still be set to the Layer tab on the right-hand side, so flip it over by clicking on the tab that says Attribute.
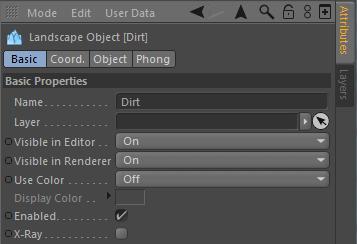
Almost every object has three main tabs to start: Basic, Coordinates (Abbreviated as Coord.), and Object. Select the Dirt object in the Object Manager and click on the Basic tab in the Attributes Manager. The Basic tab contains some fundamental properties about the object selected. The Name field and Layer field are self-explanatory; they contain what the object is called and what layer grouping the object pertains to. The other most useful properties in the Basic tab are the Visible in Editor, Visible in Renderer, and Enabled options.
Switch the Visible in Editor field from the Default setting to Off; you'll notice the Attributes object will disappear and the top dot in the traffic light is now red. These two fields are linked directly to the traffic light in the Object Manager, so any changes made in one will affect the other. Same goes for the enabled checkbox; by un-checking the box, the green checkmark by the Attributes object name switches to a red X.
Note
There are times you may want to switch on or off the visibility of an object, and that value can be controlled and key framed from inside the Attribute Manager, not the Object Manager. Simply set one key frame in the On state then one in the Off state, and you'll get an action that is like someone hit a switch to make your object disappear. We will discuss key framing in the next recipe.
The next tab over is the Coordinates tab. This contains the properties that determine where and how your object occupies space in your 3D Scene. The three properties are broken down into Position, Scale, and Rotation, each with their own sub-properties that control the parameter in the X, Y, and Z dimensions.
Take the Dirt object and change its X position from -250 to 0, its Y position to 100, and its Z position to 150. Note how the object jumps to a new position every time you enter a new value and how our dirt is now in the entirely wrong position. These position coordinates are based on the World Coordinates position, where the center (0,0,0) is the origin and the position properties indicate how far away your object is from the origin. Change the dirt back to -250 for X and 0 for both Y and Z dimensions.

The Scale parameters control the size of the object in the X, Y, and Z dimensions. Enter a value of 2 for all three scale values. Notice how the scale options are independent of each other and you can adjust the values to distort the object in any dimension; the values do not have to be uniform. Change the value back to 1 for each dimension, which represents the actual scale of the object.
Note
Don't use scale to size up objects unless you absolutely have to. If you have a sphere object, change its radius to make it bigger instead of using the scale. Projects can get messy if you have different objects with varying scale values, and there are some instances where scale values will be ignored and overridden like when using cloners in MoGraph. Only change scale values when you want to perhaps keep a group of objects proportional in size because adjusting them individually will throw off their relation to one another. Or, you can use scale to change just one dimension to modify a shape, such as taking a sphere and increasing its scale in the X value to make it into more of an egg shape.
The last column is for the Rotation properties of your object. They are labeled as R.H, R.P, R.B, which correspond to the rotation in the Heading, Pitch, and Bend respectively. They will rotate the object around the origin of the Object Axis, which we can adjust to a different spot. Adjust the R.H value of the Dirt object to 45, and you'll notice our object has turned 45 degrees. Reset the rotation value back to 0.
Our Dirt rotates around the exact center of itself, but there are times where we want to adjust to where the rotation point is and where our axis occurs.
This will be covered more in Chapter 2, Super Modeling, but we need to convert our Dirt from its primitive state into a polygonal object. With the Dirt object highlighted in the Object Manager, press the C key on your keyboard and the object won't change the way it looks; it will just lose some of the editable properties that were in the Attribute Manager. We move from mathematically defined geometry to objects the user can define. All the magic lies in this transition. Now, we can freely reposition the axis within our Dirt object.
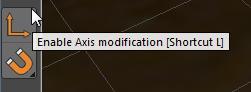
Look on the left-hand side of the Command Palette and click on the two orange arrows that form a right angle, which is the command to Enable Axis Modification. This tells Cinema 4D we want to reposition the actual axis by moving the gizmo around, rather than using the gizmo to move the entire object while the axis remains in place. Take the red, green, and blue colored axis in the center of the object and grab the red handle, and slide it to the left 500 units (directed towards the back of the scene). Click-and-hold the Shift Key down to get exact measurements in multiples of 10 in order to keep your values nice and even. With the axis now shifted, enter the R.H value of 45 again, and you'll notice the Dirt object has now rotated around the newer pivot point, and we have a different-looking rotation.
The Object tab is unique to every object; it contains the parameter specific to modifying that particular object. Unfold the groups and click on the different objects in our project file, and notice how their Object tab loads different controls each time you change objects. The Attribute Manager also contains tabs for any specific tags that are applied to your object. Click on your tags next to your tire objects and you'll see them instantly load into the Attribute Manager.
The final manager of the recipe is our Material Manager. This window loads at the bottom of the screen in the default layout, and it's reserved for viewing and sorting our materials, which are applied to objects in order to give them specific visual qualities such as color, texture, transparency, and reflection. Notice how there are materials already loaded in the manager, because they were applied to objects and saved into the project.
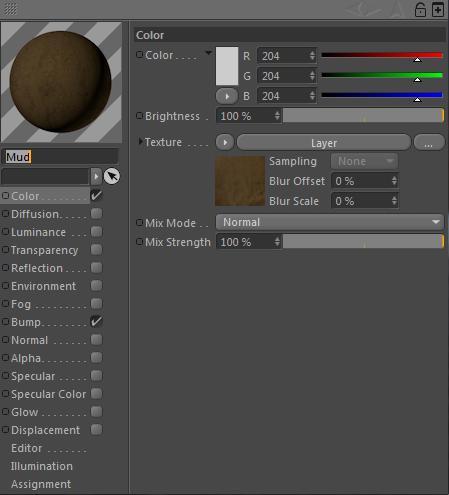
Double-click on the "Mud" thumbnail in the Material Manager and Cinema 4D will open up the Material Editor, which contains all of the channels we need to create the visual look we are going for. Each thumbnail in the Material Manager loads a different material, which can all have a unique combination of parameters for creating different materials like metal, wood, and glass.
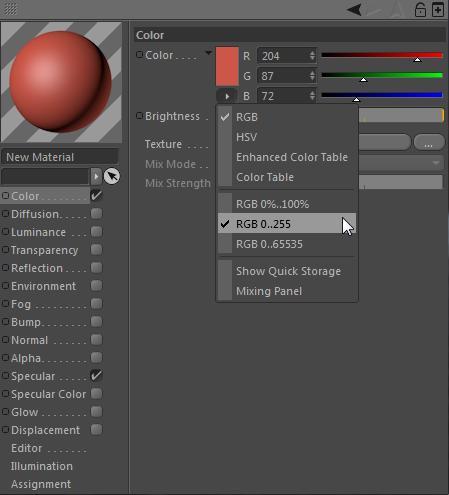
Double-click on an empty space in the Material Manager to create a new material, and then double-click on the new thumbnail to open it in the Material Editor. Change the name of the material by entering the word New Material in the box under the thumbnail image of the gray sphere directly.
The column on the left lists the channels that are active and combine as properties of the material. The Color and Specular channels are on by default. Highlight the Color channel and note the color slider that appears inside the Material Editor. By default, it should be set to an RGB slider with values from 0-255; if it's not, you can change it to that mode by selecting those options inside the small-rounded rectangular button right below the color swatch. Adjust the sliders so that you have values of 204 for red, 87 for green, and 72 for blue, to create a reddish-pink color.
Now you can take this material and apply it to an object in your scene. Simply take the thumbnail from the Material Manager and drag it on top of any object in your scene or on the name of the object directly in the Object Manager. Apply it to the Cinema 4D group and note that a new Texture tag appears in the Object Manager, represented by a small icon of the material. This can be loaded into the Attribute Manager to make adjustments to the way the material is applied to your object. This is how you get all three managers working together.

Note
You can drag a material from the Material Editor onto the Texture tag in the Object Manager in order to replace the texture. Simply adding the material to an object that already has a material on it will just add another texture on it, and you may want to replace it and not end up being confused by extra Texture tags on an object.
The Object Manager, Attribute Manager, and Material Manager serve special purposes to help manage your projects in Cinema 4D. The Object Manager displays all our objects that are contained within your project, and we can use the Alt or Option G command to group them together, as well as assign layers to them, so our project stays organized. The Attribute Manager displays our editable parameters for whatever object we have selected, including any tags we add to provide extra functionality. The Material Manager is the key towards sorting and applying materials to our objects, and it can launch the Material Editor that we can use to design our materials to look a certain way.
Cinema 4D has a comprehensive list of all of the keyboard commands that come into Cinema 4D by default, and it's where you can assign custom shortcuts. It's located inside the Window menu and under the Customization submenu, under Customize Commands. There are tons, and I mean tons, of shortcuts by default, and I will try to bring up many useful ones throughout the book, but if you are a keyboard shortcut fiend, you may need to sift through this manager and absorb all of them and maybe set your own once you get better with the program.
Basically, you will be using these different managers in every recipe in this book, so it's important to get familiar with the different options and functionality they provide. As far as the Material Manager and Material Editor go, there's a whole chapter on materials that uses these features extensively.