In this section, we will cover how to set up the Raspberry Pi. Although simple, it is crucial to perform each step as this will help us set up our own local MQTT broker on the Raspberry Pi. This will also help you understand how to get started with your new Raspberry Pi by installing an operating system onto it.
First, we will flash the popular Debian-based Raspberry Pi OS on our Raspberry Pi. After that, we will install all the necessary libraries and packages to make our device a local MQTT broker.
The topics we will be covering will be as follows:
- Setting up an SD card for your Raspberry Pi
- Flashing the OS image onto the SD card
- Setting up your Raspberry Pi for the first time
- Setting up VNC for the Raspberry Pi
- Setting up and testing the MQTT broker
- Testing the MQTT broker locally
First, we will discuss what will be required in terms of hardware to follow this setup process.
Technical requirements
To follow the instructions provided in this section, you will need the following hardware:
- Raspberry Pi (model 3B or higher, preferably Raspberry Pi 4)
- HDMI display (for first boot only)
- Keyboard and mouse (for first boot only)
- Power supply for the Pi (the official Pi power supply is recommended)
- MicroSD card (minimum 8 GB storage option is recommended)
So, let us proceed to the next step, which is installing the official Raspberry Pi OS image and setting up the SD card.
Setting up an SD card for your Raspberry Pi
In this step, the main aim is to get the microSD Card ready for the Raspberry Pi.
Important Note
If you have purchased a Raspberry Pi bundle with a pre-burnt SD card and some optional accessories, you can skip this step, as the SD card you have is already loaded with the required OS. But, if you would like to install a different OS, you can follow this step to do so.
Before installing the OS onto the SD card, we need to format the SD card to make sure nothing corrupts the OS. There are two methods to do so. The first is the easy way, using software to do this task, and this can be done in Windows and macOS systems. The second method is a little more complicated, and it will cover how to do the same for Linux-based systems.
The SD Card Formatter software (managed by the SD Association) helps you wipe the SD card totally so it can be used for the desired purpose, which, in our case, is to burn an OS image onto it.
We need to perform this step when the SD card we are using has been previously used or has some data stored on it already. This can corrupt the OS, and so all the existing data needs to be wiped. Moreover, this is perfect practice and should be done every time we install a new OS.
Let’s look at the following steps:
- To install this software, go to the relevant link depending on the OS you are using:
- For Windows: https://www.sdcard.org/downloads/formatter/sd-memory-card-formatter-for-windows-download/
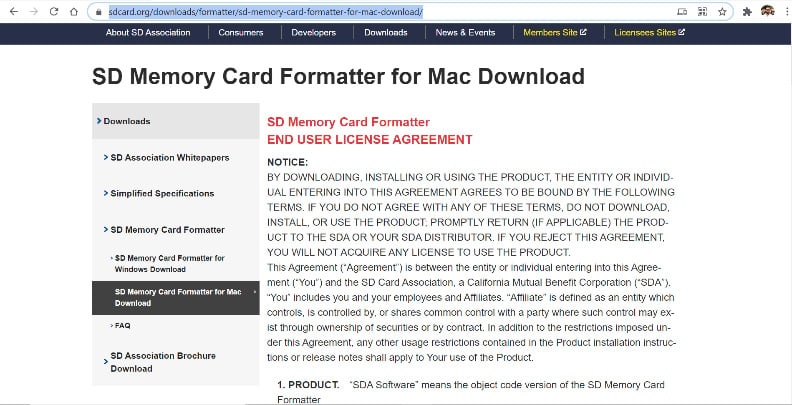
- For macOS: https://www.sdcard.org/downloads/formatter/sd-memory-card-formatter-for-mac-download/
- When you open the link on your browser, you will see an agreement on your screen, as shown in Figure 1.4. Scroll down to the end and press the Accept button:
Figure 1.4 – Download page for SD Card Formatter
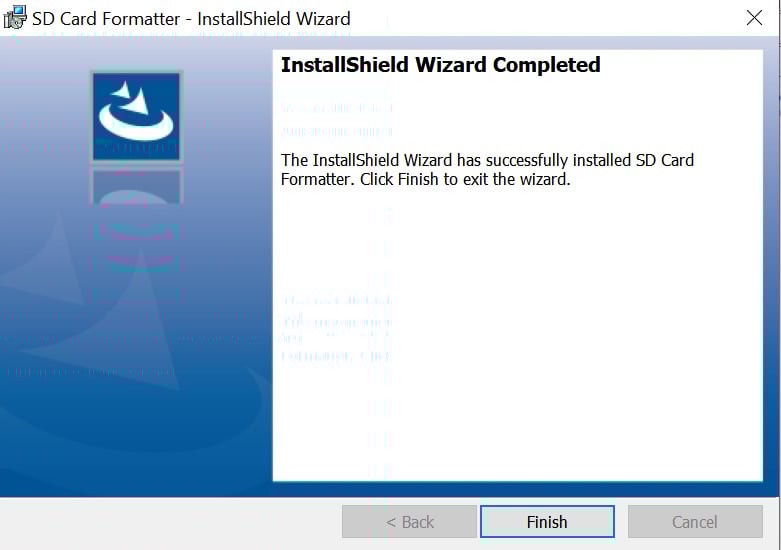
- Once you’ve clicked the Accept button, the software setup ZIP file will automatically start downloading on your system. Once complete, extract the ZIP file and just run the setup file. This will open an installer window; follow the steps to install the software onto your system. After the software is successfully installed, you will see the dialog box shown in the following screenshot:
Figure 1.5 – The dialog box that appears after successful installation of the software
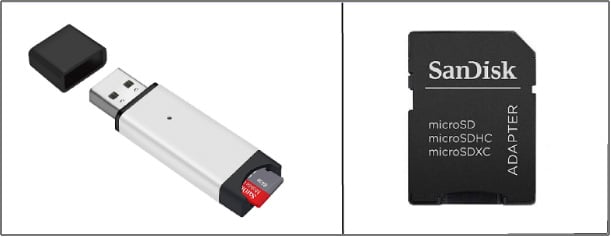
- After the software has been installed, the next step is to format our SD card. For this, an SD card reader is required. There are two options available on the market. One is a USB SD card reader stick, and the other is an SD card adapter, as shown in the following figure:
Figure 1.6 – Common SD card adapters
- Once getting an adapter, the next step is to insert the SD card into the adapter and then insert it into the PC. Please note that not all PCs and laptops have SD card readers, so getting a USB adapter is better to avoid any problems.
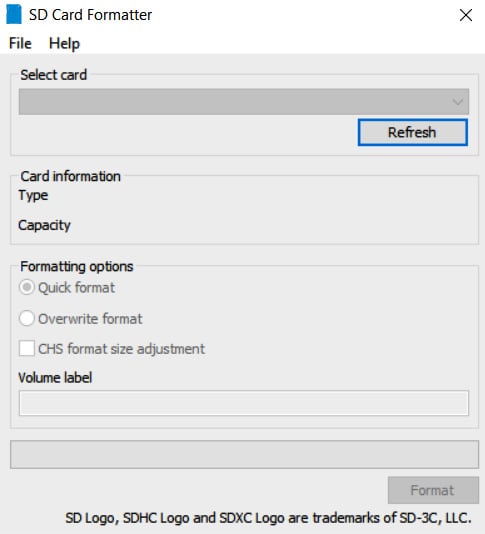
- Once the stick has been inserted and detected by your machine, launch the SD Card Formatter software. A dialog box will open, which looks something like the following:
Figure 1.7 – SD Card Formatter application page
- Next, you have to select your card, which will be visible in the Select card dropdown menu. There will be two partitions available (in your file explorer) for formatting if you have an OS image already burned on it. In that case, select the one that has the name boot.
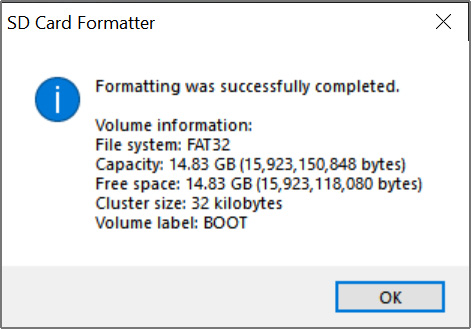
- Once the card is selected, keep all the other settings as default and press the Format button. This will start the process of wiping the SD card. Once the process is complete, you will see a dialog box saying Formatting was successfully completed, as seen in the following screenshot:
Figure 1.8 – Formatting completion dialog box
We have successfully formatted our SD card! Now, we are all set to burn our Raspberry Pi OS image onto our card.
Important Note
Please keep in mind that if you are using an SD card adapter, make sure it is in unlock mode or you could face formatting issues. Unlocking the adapter means giving the computer access to the SD card. This is done by simply flipping a small switch on the side of the adapter.
SD card formatting in Linux systems
We will use GParted to format our SD card on a Linux system. It is an open source disk management software. Just follow these steps:
- First, we will need to install this software, as this does not come preinstalled. We will use the Ubuntu OS for this tutorial, the most common and widely used Linux OS. Use this command to install the software via the Linux Terminal:
sudo apt install gparted
Once the app has been installed, it will be available in the Applications menu. Just find and launch the application, as shown in the following figure:
Figure 1.9 – Launching GParted from the Applications menu
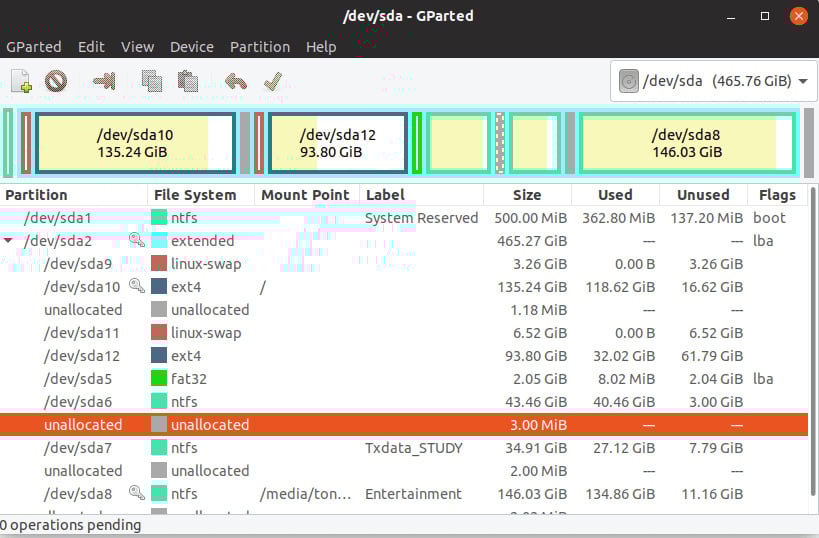
- This application requires root privileges to run, so enter your password when prompted. After that, the application window will pop open, and you will be able to see all the disks presently connected to your system:
Figure 1.10 – GParted application home screen
The user interface is relatively easy to navigate and much more intuitive than the one we get with the preinstalled disk utility software. There are additional features that this software provides, such as creating bootable USB drives and downloading an ISO file, for example.
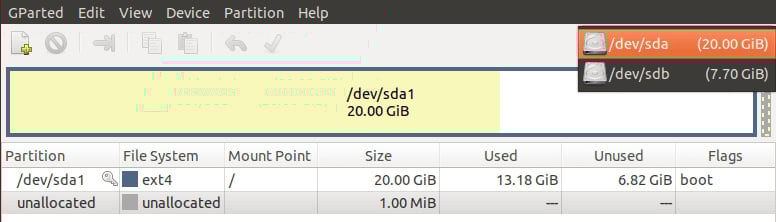
- Now, select the SD card drive from the top-right corner dropdown, as shown here:
Figure 1.11 – Selecting the USB drive to format
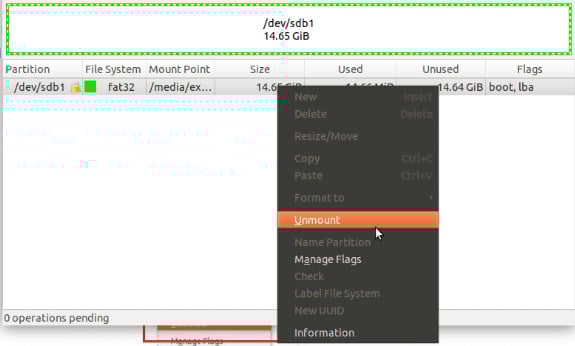
- We will now format this drive, but to do so, we first need to unmount it. Just right-click on the visible partition, and you will see an option to unmount it , as shown in the following screenshot:
Figure 1.12 – Unmounting the USB adapter before formatting
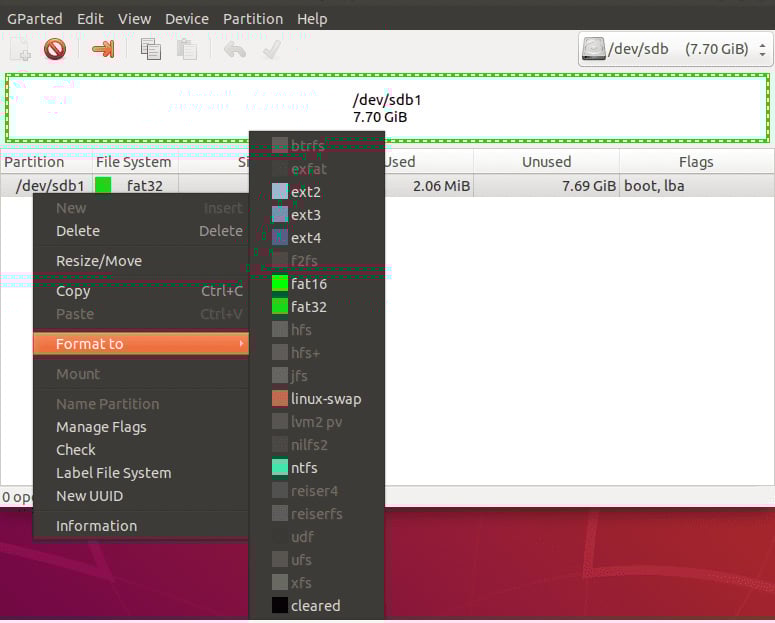
- You can start the formatting process once the drive has been unmounted. To do that, right-click on the USB drive and select the Format to option. Select the file system of your SD card (fat32, in most commonly available SD cards):
Figure 1.13 – Selecting the desired file format (fat32 in most cases)
This won’t start the formatting process. It will just add a new operation to the list of pending operations, as seen here:
Figure 1.14 – List of pending operations
- Now, click the Apply All Operations button, which is the green tick icon at the top, as shown in Figure 1.15:
Figure 1.15 – Clicking on Apply All Operations
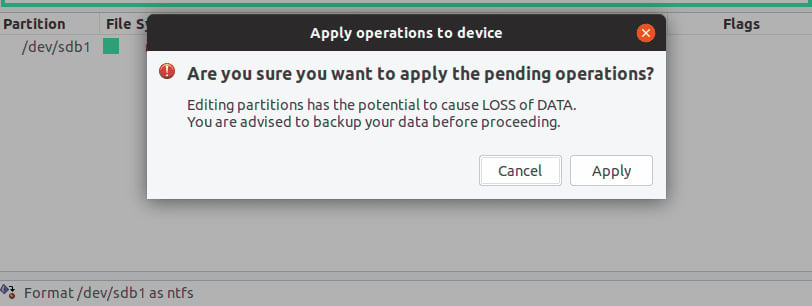
- A window will pop up, warning you that the operation will lead to complete loss of data on the USB drive. Just click on Apply to start the formatting process:
Figure 1.16 – Clicking Apply to continue formatting
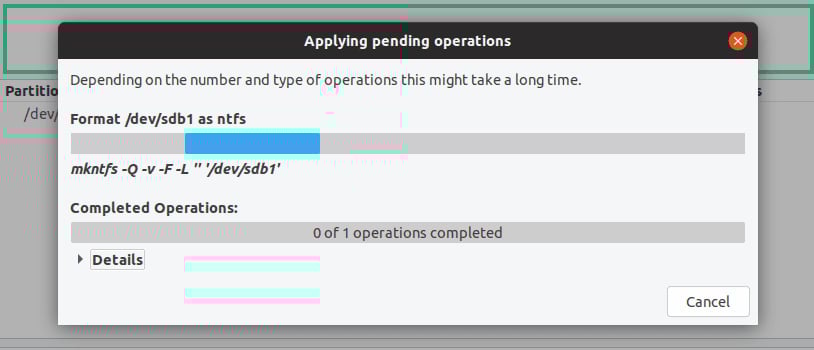
The formatting process will start. You can track the progress using the window that pops up:
Figure 1.17 – Formatting progress dialog box – GParted
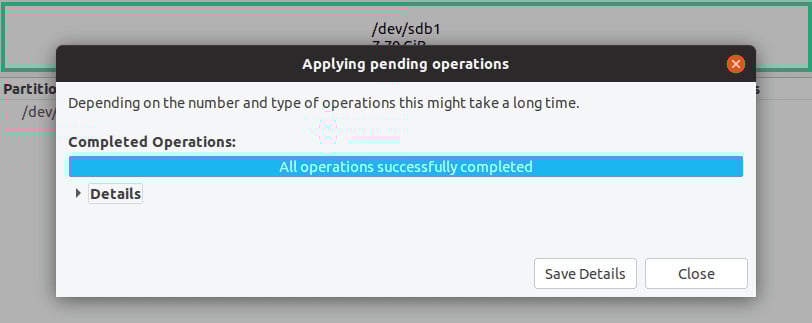
You will see the window shown in the following screenshot once the formatting process has been completed:
Figure 1.18 – Formatting process completed dialog box
Your SD card is formatted! Close the application, and your USB adapter will be listed in the file manager. We can now move to the next step.
Flashing the OS image onto the SD card
Now that our SD card is ready for the Raspberry Pi OS, the next step is to install the Raspberry Pi Imager software, which is the easiest way to install the OS onto our SD card.
Important Note
For more advanced users who are looking to install a particular OS, follow this link: https://www.raspberrypi.org/documentation/installation/installing-images/README.md.
In the next section, we’re going to follow the step-by-step process to install the Raspberry Pi OS on your SD card.
Downloading and installing the Raspberry Pi Imager software
The first step is to install the software:
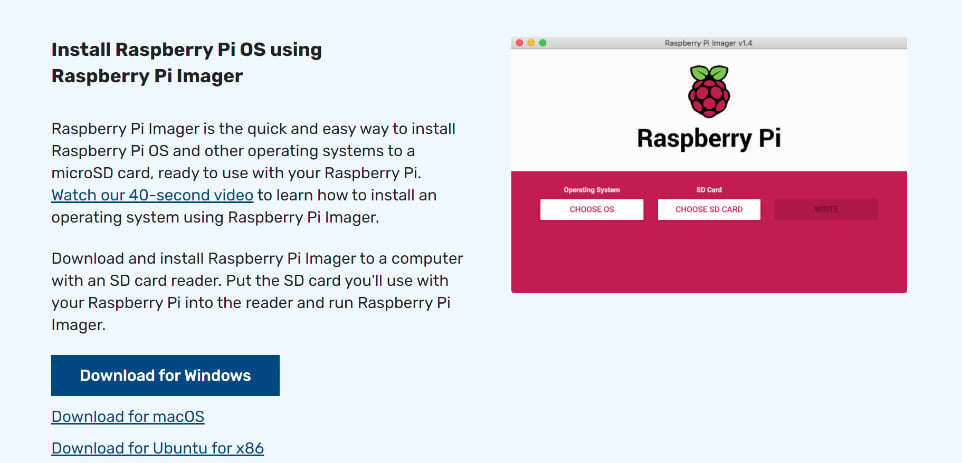
- To do that, visit the following link: https://www.raspberrypi.org/software/.
- Once the page is loaded, you will see a section for Raspberry Pi Imager. Just download the latest version of the software for your OS:
Figure 1.19 – Downloading Raspberry Pi Imager
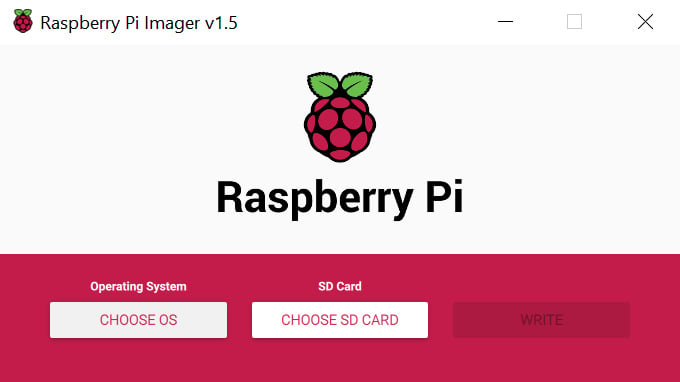
- Once you press any one of the download links, the latest version of the installer will download onto your system. (At the time of writing this book, the latest version is v1.5.)
- To run the installer, follow the process by pressing the Next button until the software is installed. Once the installation is complete, open the Raspberry Pi Imager software. A dialog box will pop up asking for permission as it requires root/administrator access. Just allow it, and the application will open:
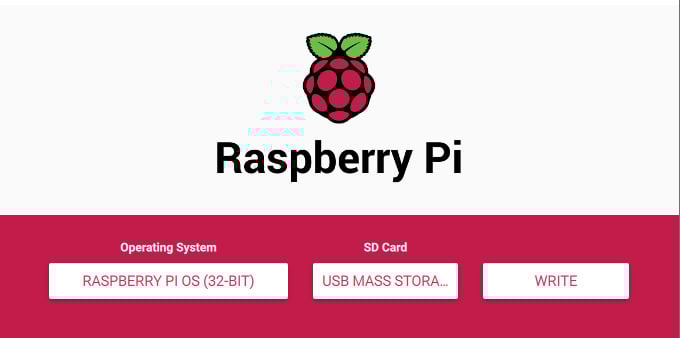
Figure 1.20 – Raspberry Pi Imager application
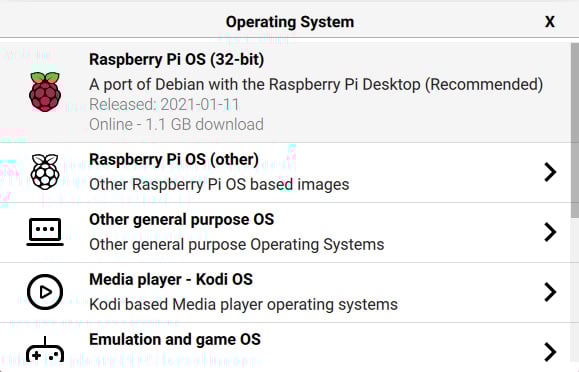
- We have to choose the OS we want to install, which is the Raspberry Pi OS. To do that, press the CHOOSE OS button, and you will see all the available options as follows:
Figure 1.21 – All the available OS options
- We will select the first option, Raspberry Pi OS (32-bit). As seen in Figure 1.21, the size of the latest OS version is 1.1 GB. That means that before burning the OS, the system will download the 1.1 GB image file.
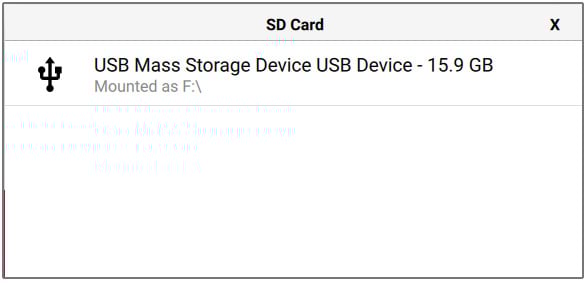
- Next, choose the SD card directory you want to burn the OS onto. At this point, insert your SD adapter if you haven’t already, and you will be able to see it listed when you press the CHOOSE STORAGE button:
Figure 1.22 – Choosing the SD card you want to burn to OS to
- After both the OS and SD card have been selected, press the WRITE button, which will now be white-colored:
Figure 1.23 – Pressing the Write button
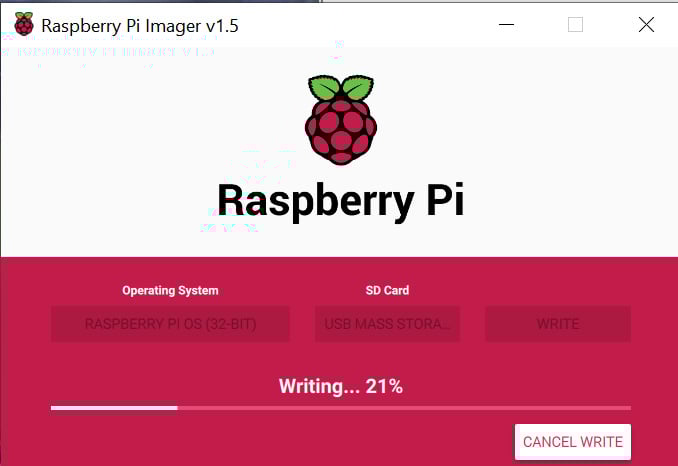
This will start the writing process. The application will first download the image file you chose and then write it onto the SD card. Please note that you will not see the download progress, just a Writing progress bar. So, it is an excellent time to grab a cup of coffee or go for a short walk, as this may take some time:
Figure 1.24 – You can see the writing progress in the application
- Once the writing process is over, you will see a dialog box saying Raspberry Pi OS has been successfully written…. You can now press the Continue button and remove the adapter.
This completes the SD card preparation for our Raspberry Pi. In the next step, we will boot into our new OS for the first time and update and upgrade some software to the latest version, enabling VNC to wirelessly SSH into our Pi (don’t worry, we will discuss this in detail in a later section).
Setting up Raspberry Pi for the first time
After the OS has been written to the SD card, we will insert this card into our Raspberry Pi, as seen in the following figure:
Figure 1.25 – Inserting the SD card into the Pi (image from the official Raspberry Pi website)
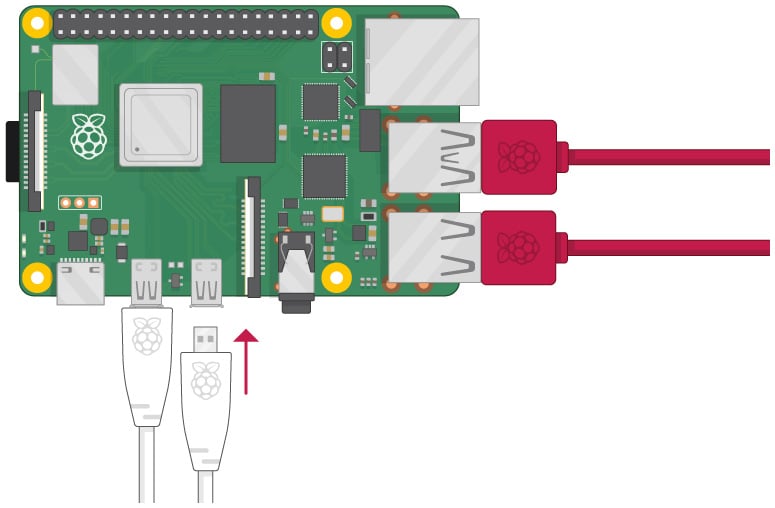
We will also connect a display using either a display port (if you have a Raspberry Pi 4) or a simple HDMI display, and a USB keyboard and mouse. Finally, after all the peripherals are connected, we will connect our power supply (any USB C or micro-USB charger, depending on the model you are using) to the Pi. Please see the following figure for how to make the connections:
Figure 1.26 – Powering the Raspberry Pi after connecting the peripherals
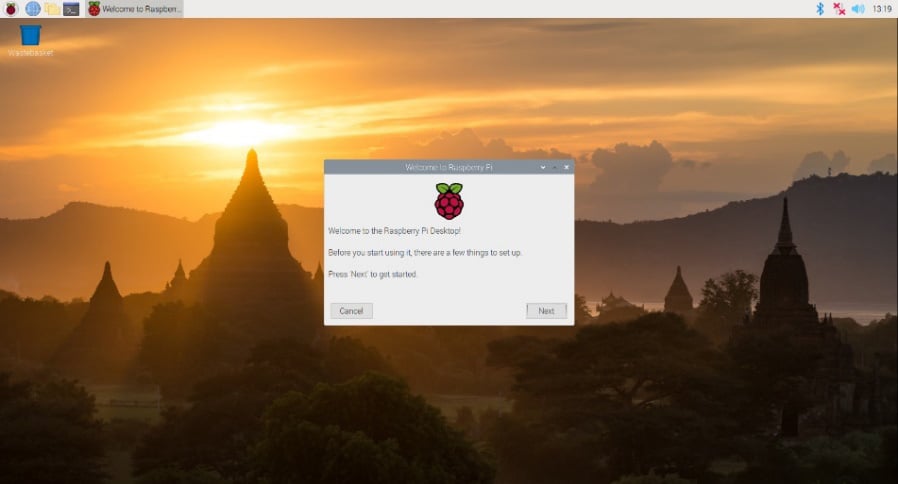
Once all the setup is complete, connect the power supply to the Pi, and you should see the Pi booting up on the connected HDMI screen. It will take 20-30 seconds for the first boot. Once it is done, a welcome screen will appear saying Welcome to Raspberry Pi Desktop, as seen in Figure 1.27:
Figure 1.27 – Raspberry Pi welcome screen
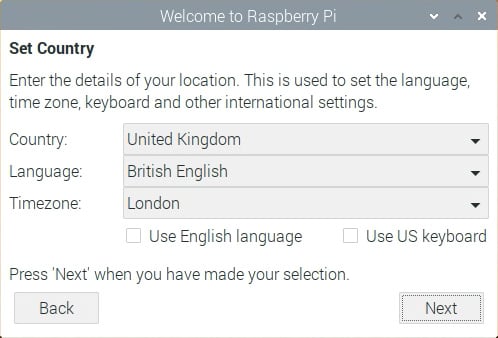
Just complete the first-time setup by clicking on the Next button. It will first ask you to set the location settings and choose the language and keyboard accordingly:
Figure 1.28 – Setting up the location, language, and timezone
After the required information has been entered, press the Next button. It will take a few seconds for the system to set up the location.
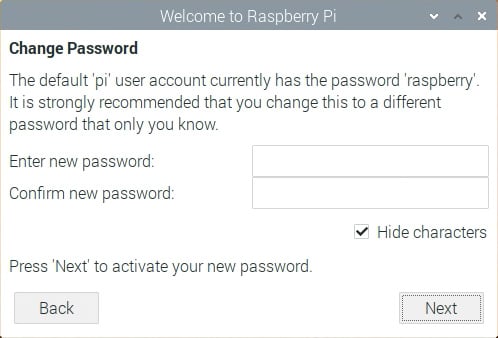
Next, the OS will prompt you to change the default password of your system, which is raspberry. Select a strong password, and after entering all the required information, press the Next button:
Figure 1.29 – Setting up a new password
After this, the system will help you choose the best resolution according to your display type. You can skip this step, as we will only use this monitor or display once. In the next section, we will learn how to set up VNC and SSH on our Pi to access it wirelessly when we are connected to the same network.
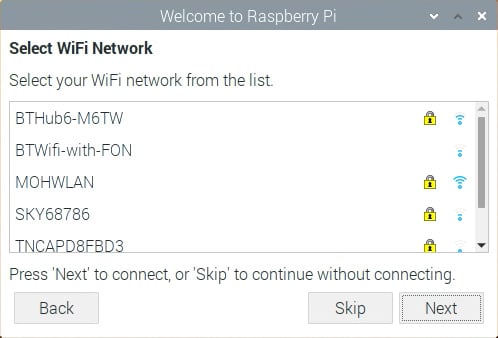
Next, we need to connect to a Wi-Fi network, as shown in Figure 1.30. Select your network from the list of available networks, then authenticate by entering your password to connect to your network. If you have connected via Ethernet or would like to do it later, you can skip this step by pressing the Skip button.
Please note that you will require a shared Wi-Fi network to use VNC, and you will need a local network at the very least. If you skip the step, for now, you can always connect to a network through the Wi-Fi symbol on the top-right side of the desktop in the following figure:
Figure 1.30 – Connecting to a Wi-Fi network
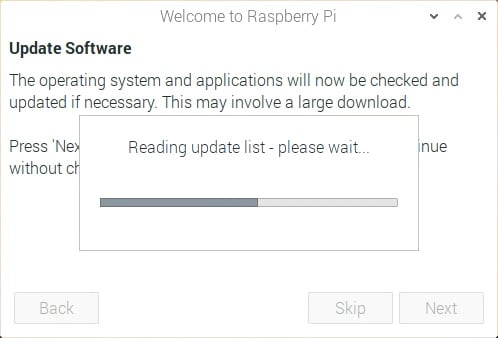
Finally, the last step of the setup is to update the software to the latest version. As we have used the newest version of Raspberry Pi OS, no significant updates will be pending. It is still preferable to use this opportunity to update all the preinstalled software to the latest version (Figure 1.31).
Just click Next as given in the instructions, and the process will automatically start:
Figure 1.31 – Updating to the latest software
Important Note
If you fail to update your system through this setup, it is possible to do this later. For this, open the terminal (the black icon on the top-left side of the home screen) and type the following commands:
sudo apt update – This will fetch the list of all available updates.
sudo apt dist-upgrade – This will download and install the updates.
It will take some time to fetch all the updates and install them, so this would be an excellent time to go for a short walk.
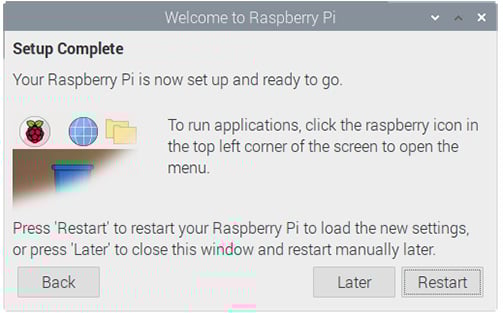
After the updates have been successfully downloaded and installed, the system will prompt you to restart the system for all the changes to take effect. You can do so by simply pressing the Restart button, as shown in the following figure:
Figure 1.32 – Restarting the system after the first setup
This completes the first-time setup of our Raspberry Pi! In the next section, we will learn how to set up VNC on our Raspberry Pi to access it wirelessly through our PC. What’s more, we can also use our PC or laptop keyboard and mouse with the Pi.
Setting up VNC for Raspberry Pi
In this step, we will learn how to set up SSH (Secure Shell) and VNC (Virtual Network Computing) on the Raspberry Pi. Note that the completion of the previous steps of the OS installation and setup on the Raspberry Pi is required to set these up.
Before getting into the practical part, let’s learn a bit more about VNC and SSH:
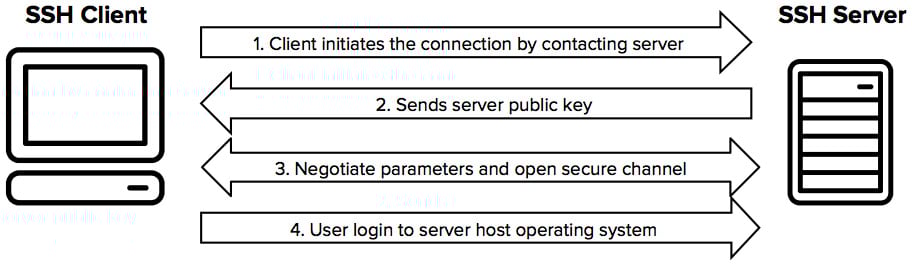
- SSH: SSH is a security protocol that gives you remote access to your computer. It can be used for both remote login and file transfer. It provides several alternating options for strong authentication. The following figure shows how SSH technology actually works:
Figure 1.33 – How does SSH work?
- VNC: This is a cross-platform desktop sharing system that allows you to remotely access any computer system with a server through supported client software. It uses the Remote Frame Buffer (RFB) protocol to achieve this. It even enables the use of the keyboard and mouse of the client system as it relays all this information to and fro over a network.
We will be using the RealVNC Server software, which is preinstalled on our Pi. Raspberry Pi will act as a VNC server, and a client software would be needed to access it through the main computer.
Let’s get started on the steps to set up VNC:
- As mentioned earlier, the software comes preinstalled on the Raspberry Pi OS (the Desktop OS version), but it is disabled by default. These options must be enabled.
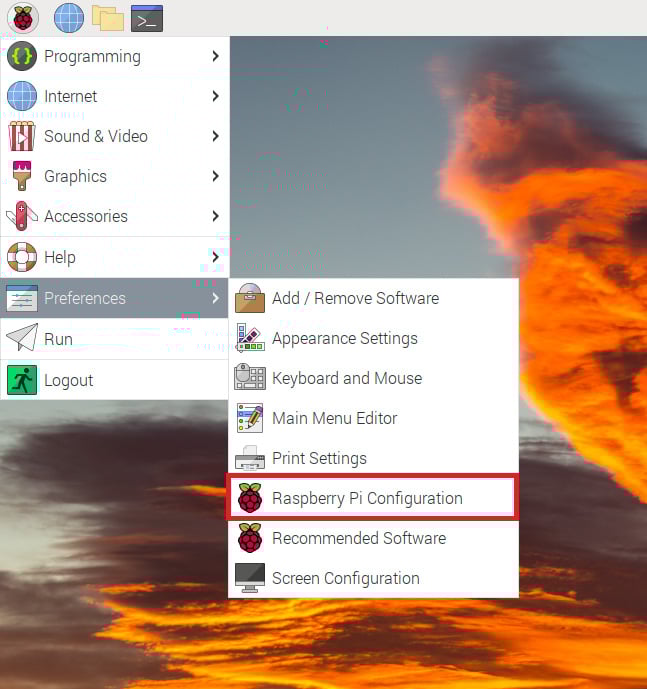
- First, open the Start menu. (It is the Raspberry Pi logo on the top left of the screen.) From there, make these selections:
Preferences | Raspberry Pi Configuration
Figure 1.34 – Selecting Raspberry Pi Configuration
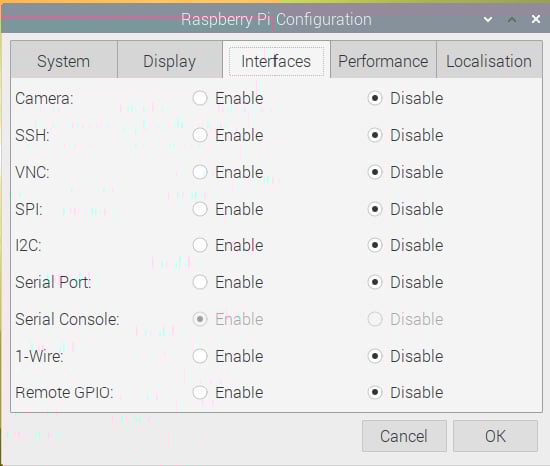
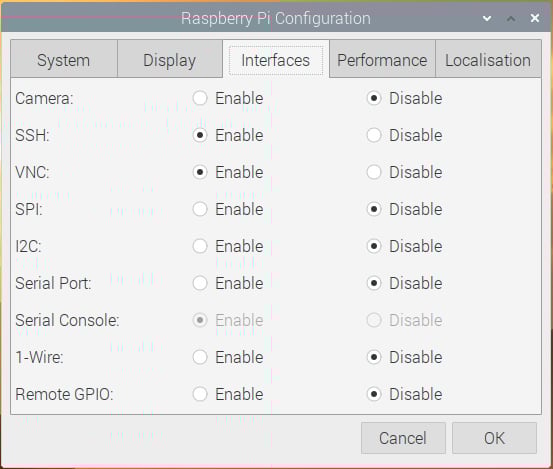
- Once the Raspberry Pi Configuration dialog box opens, there will be five sections available, from which we need to select the Interfaces section:
Figure 1.35 – Raspberry Pi Configuration Interfaces
- Enable the VNC and SSH options, then press OK.
Figure 1.36 – Enabling SSH and VNC
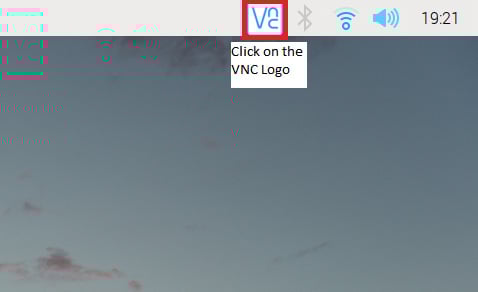
This will enable both the protocols on your Pi. Now, the Raspberry Pi is remotely accessible. Congratulations! To verify that it is working, check the top-left part of the screen. A white-colored VNC logo should be visible now:
Figure 1.37 – Checking for the VNC logo when enabled
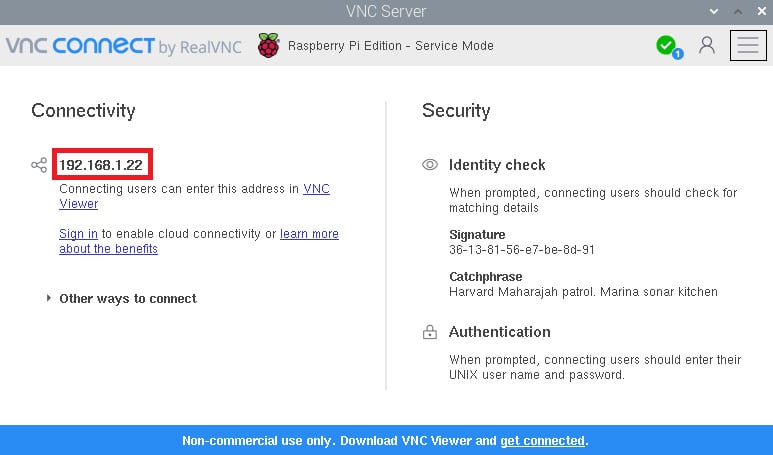
- Click on the VNC icon to get the IP address of our Pi. Make a note of this, as it will be required to access your Pi remotely from your main computer:
Figure 1.38 – Make a note of the IP address
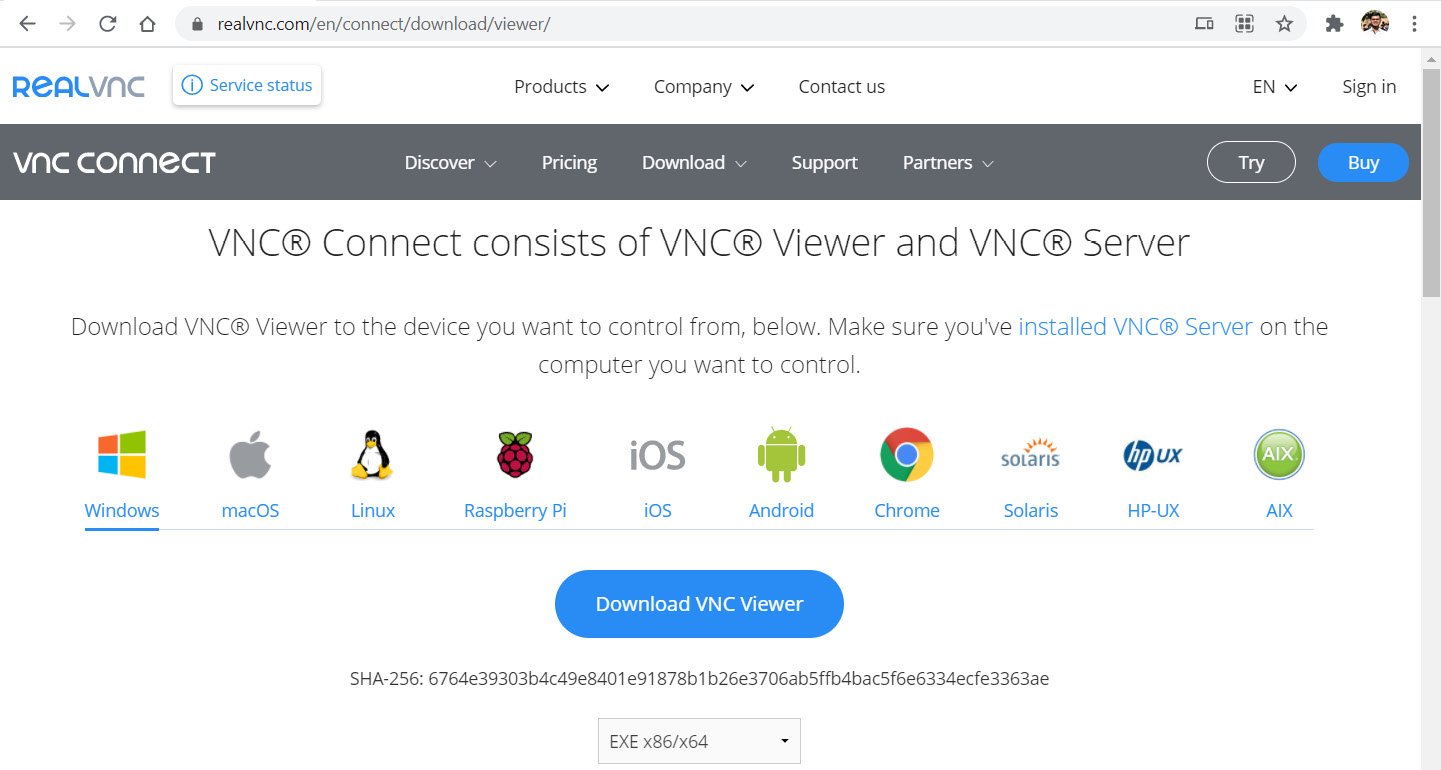
- Move on to the main computer you will be using to access the Pi. The first requirement is to download the VNC Viewer software. Visit the following link to download it: https://www.realvnc.com/en/connect/download/viewer/.
This is what the Download page looks like:
Figure 1.39 – The VNC Viewer download page
- After downloading the installer for your specific OS, install it onto your system and open the application. The application home page will look something like this:
Figure 1.40 – The VNC Viewer application
- Make sure that your Pi and computer are connected to the same network. Once that is done, enter the IP address of your Pi in the search bar of the application, and then click Enter. It will show a warning message; just press Continue, and you will then see an Authentication window:
Figure 1.41 – The Authentication window
- Enter the username and password and press OK. If the credentials are correct, your attempt to establish a connection will be successful, and now you can remotely log in to your Pi:
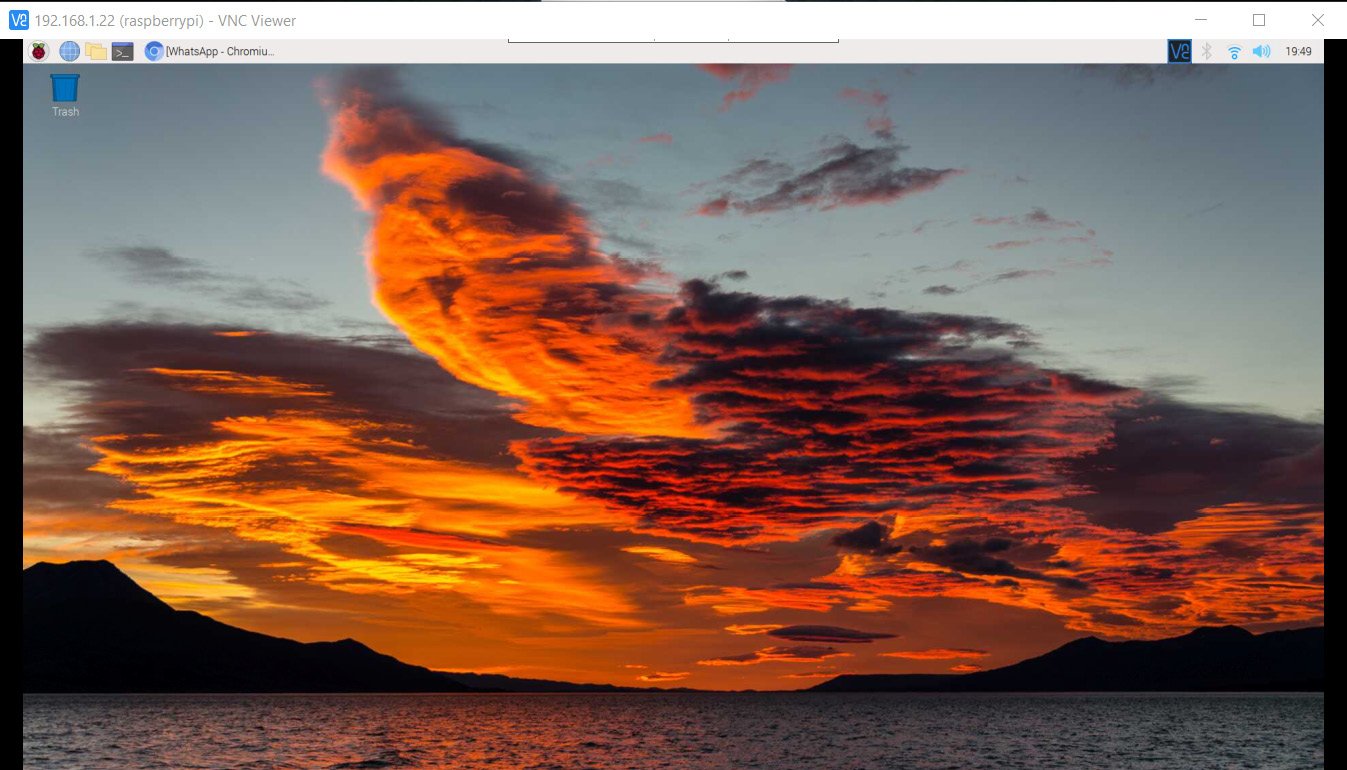
Figure 1.42 – Remote access to Raspberry Pi
You now have access to your Raspberry Pi wirelessly with the ability to use your computer mouse and keyboard with your Pi’s OS.
The next step is crucial, as we will install a software library that will allow us to use our Raspberry Pi as an MQTT broker. We will install the following two libraries developed by Mosquitto:
- Mosquitto – MQTT Broker Library.
- Mosquitto Clients (optional) – This library allows you to run client code on the Pi.
Setting up and testing the MQTT broker
After this setup step and the testing step that follows, you will be able to host a local MQTT broker on your Raspberry Pi device. Moreover, you will also test whether your broker is successfully running by simultaneously running a client code on the Pi itself. Cool, right?
So, let’s get started with the steps to get this done.
Installing the MQTT broker and Clients packages
Mosquitto is a popular MQTT broker well-supported on Debian-based Linux platforms such as Raspbian. To install this package, just open a new terminal, then type in the following command. It’s easy to install using the apt package installer:
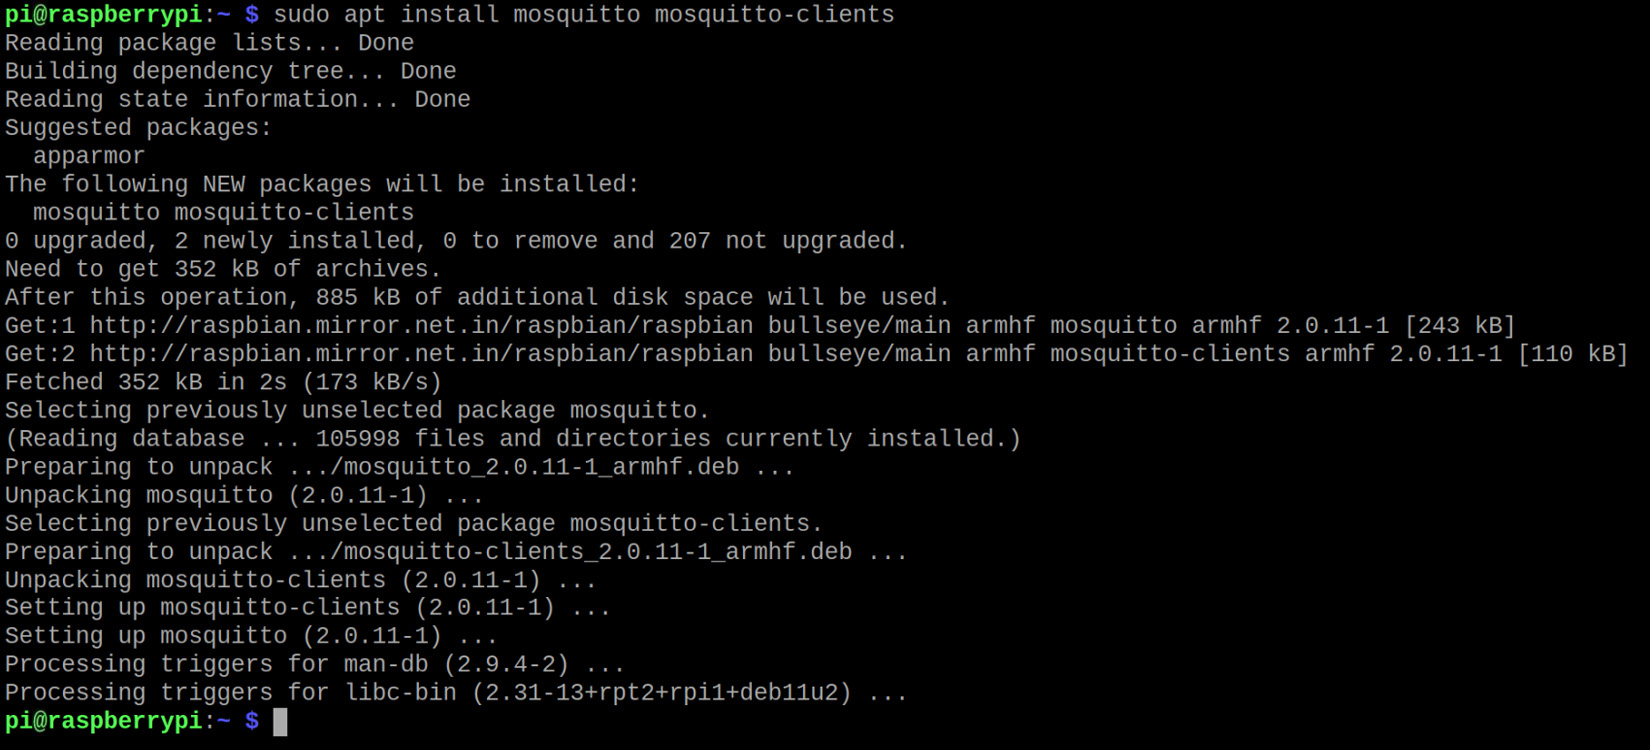
sudo apt install mosquitto mosquitto-clients
This command requires root privileges for which we have used sudo in our command. After that, the installation process will start, and once it is complete, you should see an output as shown in the following screenshot:
Figure 1.43 – Terminal view while installing the packages
The mosquitto-clients package is optional for running the Pi as an MQTT broker, but it will help us test whether the broker is running locally.
This package allows you to use your Raspberry Pi as an MQTT client as well. So, if you want to create a local dashboard to control all the MQTT clients from your Pi, you will be able to do so.
Enabling the Mosquitto broker
The broker is still not active. To enable it, type in the following command in your terminal window:
sudo systemctl enable mosquitto
systemd is a Linux package manager that will help you monitor and control the different applications installed. Once the command has been executed, the broker should be running on your Pi. To confirm that, just run the following command:
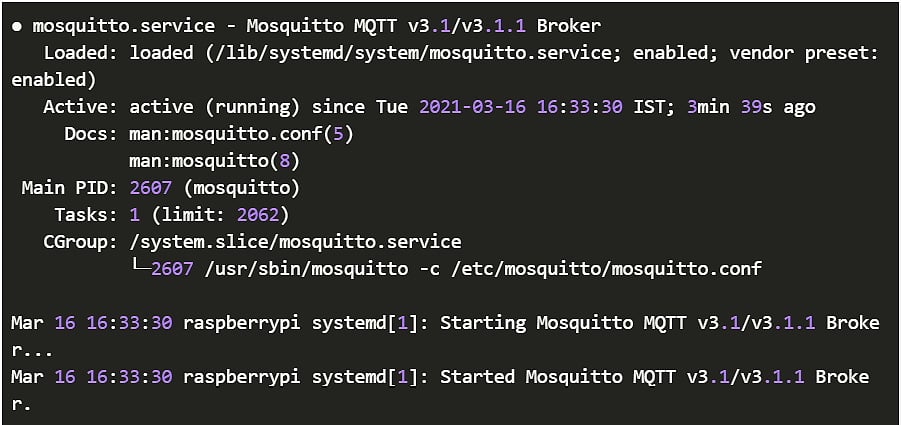
sudo systemctl status mosquitto
This should produce an output on the terminal window similar to what is shown in the following screenshot:
Figure 1.44 – The output of the status command for the broker
The most important thing is that the Active option should show the active (running) status, which will verify that our broker is up and running!
Important Note
If the status command shows an output that says that your process is dead and your MQTT broker stopped, restart the MQTT service by typing the following command:
sudo service mosquitto restart
Now, recheck the status, and it should show the status of your MQTT broker as running!
This marks the conclusion of this section. We successfully set up our Raspberry Pi as a local MQTT broker. Additionally, we installed a package that will let us use the Pi as an MQTT client as well. In the next section, we will test our MQTT broker’s functionality through a short demonstration.
Testing the MQTT broker locally
Now that the MQTT broker is running on the Raspberry Pi, we will test the connection using a straightforward project. First, open two terminal windows on your Raspberry Pi. Now, we will do the following:
- In one terminal window, we will subscribe to a particular MQTT topic, for instance:
test/message
To do this, you will require the mosquitto-clients package. Now, type the following command in the terminal:
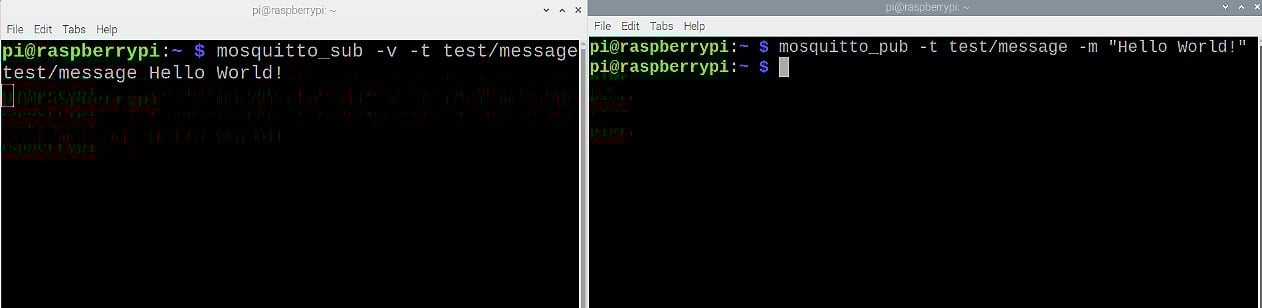
mosquitto_sub -v -t test/message
This will subscribe to the topic entered after -t.
- Next, in the alternate terminal window, we will publish a test message on the same topic to check whether it is sent and received by the other terminal window.
Just imagine the two terminals as different MQTT clients where one client is a subscriber to the topics which the other client publishes. To publish a test message of 'Hello World!', type the following command:
mosquitto_pub -t test/message -m 'Hello World!'
- After running the previous command on the second terminal, you should see the message
'Hello World!' on the terminal along with the topic name, as illustrated in the following screenshots:
Figure 1.45 – Raspberry Pi local MQTT test
Congratulations! You have successfully set up your Raspberry Pi. This marks the end of the first chapter of this book. Now, let us summarize what we covered in this chapter.


 Free Chapter